
Yeast... it is the key factor to fermentation. Without
yeast, there is no beer. Yeast is what turns the sugars in the wort into
CO2, alcohol, fruity esters and spicy phenols (where appropriate), and all the
wonderful flavors we look for in beer. Yeast also can add flavors that we
don't want, off flavors, higher alcohols, and other things that can cause a
beer to no longer be wonderful. The key to making a great beer is healthy
yeast. Yeast, like us, can only do so much work before fatigue sets in
and they have to stop. In order to keep the yeast from quitting before
their work is done they need sufficient nutrients, oxygen, and numbers.
Many hands make for light work. The more yeast you pitch, the
faster they can work, and the less stress exerted on them to finish their job.
There are multiple
ways to get an adequate amount of healthy yeast to pitch. One way is to
buy lots of yeast packs and pitch them all in. Another way is to get a
pitch of yeast from a brewery. The standard way that a homebrewer has
sufficient yeast of the strain they want for the best fermentation is to make a
yeast starter. Basically, you make a small amount of wort 1-2L of 1.040
wort with yeast nutrient, cool it, and pitch the yeast into it. This will
grow the amount of yeast and get them awake and active, ready for fermentation.
You can grow more yeast by adding oxygen as you pitch the yeast. You can grow even more by
shaking the starter whenever you pass it which sends oxygen into the wort while
expelling the CO2 lowering the pressure in the vessel and allowing for more
growth. The best way to make a starter to optimize growth is to place it
on a Stir Plate. A Stir Plate uses magnets to create a constant vortex in
the starter releasing CO2 and infusing with oxygen continually. Commercial
Stir Plates can easily cost $100, even on eBay. But we're homebrewers, we
don't pay absurd prices for beer we can make 5 gallons of for less than 3 6
packs (sometimes less than a bottle), so why would we pay that much for a piece
of equipment that you can make for around $25?
Do you have access
to a hard drive? What about a computer fan? What about a cigar box?
What about an extra 12V power supply (maybe to the old Sega)? Grab
a couple screws, nuts, washers, rubber washers, and some basic tools and you're
good to go. If you want more information on how to build a Stir Plate beyond how I did it, you can always read the article I used to build mine from Brew Your Own.
 What you’ll need:
Wooden cigar box
80mm 12-volt DC fan
12-volt AC/DC wall adapter
Rare earth magnet (from hard drive)
4 - #6-32 x 2” machine screws
4 - #6-32 machine screw nuts
#6 metal washers
4 - 1⁄4” flat neoprene wash
Plastic wire connectors
Tools:
Wire cutters
Drill
13/64 Drillbit
Countersink
Electrical Tape
Electrical Tape
Extra Needed Materials to Use:
2000ml Erlenmeyer flask
Magnetic Stir Bar
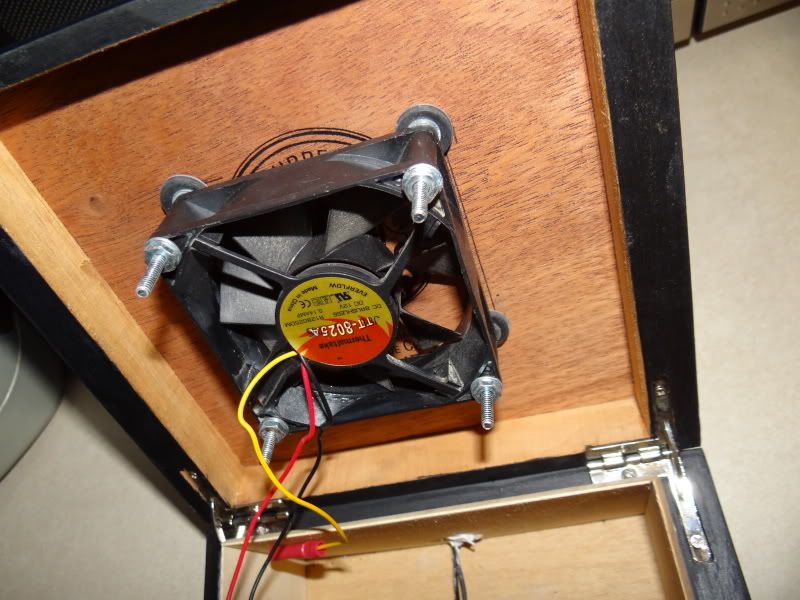
Start by opening up the hard drive and removing the rare earth
magnet. Once you have it, place it on
the main hub of the fan and give it a spin to make sure the weight is
distributed. Mark it off with a pen, the
superglue it in place. Next measure the
top of the cigar box to find the center and figure out where to drill your
holes to attach the fan on the inside lid.
Once you have the holes marked out (use an inked q-tip), drill the holes so that they can
sufficiently take the screw. I did a
countersink on mine that will allow not only for the head of the screw to fall
below the level of the lid, but to have room for covering the head of the screws
with wood putty (just sand it down and paint over for a clean look). Open the lid and slide the screws through the
top to the inside. Slide the neoprene washer onto the screw, rubber side towards the box, then a couple washers; next
slide the fan onto the screws, magnet towards the lid. Add a washer to the screw next, then place the machine nut onto the screw and tighten it
until the fan no longer moves (do this on all four screws). If there
is not enough clearance between the lid and fan for it to spin freely, add some
more washers between the neoprene washer and the fan. Once it is set you can
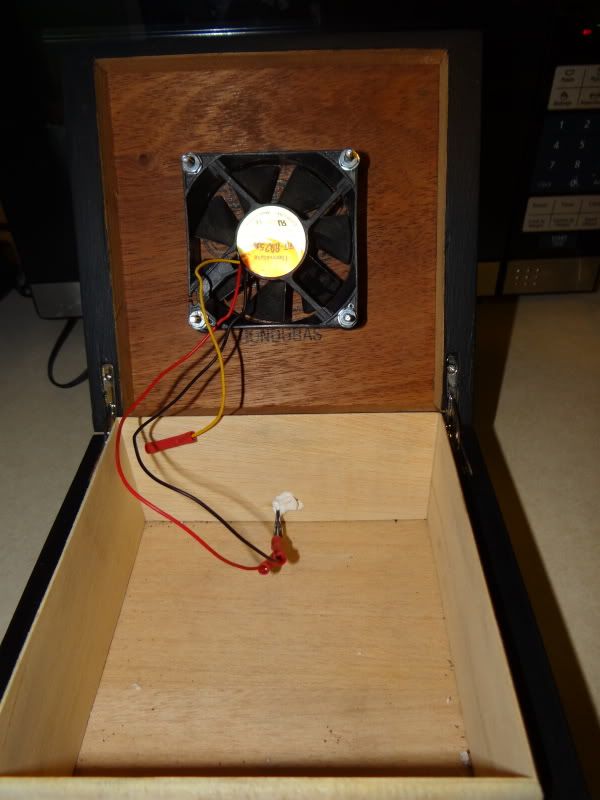
wire it up. Drill a hole through the
back to slide the wire from the 12V power supply through.
Cut the wire of the 12V as close as possible to the part that attached to the device
it was used for (typically the little circular plug). Splice the ends of the fan wires to the 12V
wires using plastic wire connectors and tape on tight. (I just put the ground wire into a plastic wire connector and taped it off). Check to see if you wired it up
correctly and to see if it is stable; it might shake some, place a partially
filled flask on top to see if it stops the rattling. I filled in the hole around the wiring, and
sanded it down as well to make a complete housing. After a paint job it was ready for use.
Once it is ready, make your starter: go here to figure out what size starter to make for your specific batch of beer. Once you know how big your starter needs to be, you take your flask, measure your water, and
dump some of it out into a bowl where you will mix in the DME (1000ml of water to 100g DME makes 1.040 starter wort). Add it back to the flask with some nutrient,
and boil in the flask. Add a couple drops of foam
control to keep it from boiling over and to keep any krausen from blowing off
during growth. Drop in the
magnetic stir bar during the boil to sanitize it. After boiling, cover with foil and chill to
pitching temps (below 80*F) in an ice bath (placing a cooling rack under the flask helps cool quicker). Sanitize
your yeast pack, open, pitch, and recover with the foil. Tilt the flask so that the stir bar is at the
outer edge, and place it on over the center of the plate. You will see the bar magnetize to the magnet
on the fan. Slide it until the flask is
centered. Plug it in, and you will see
the vortex form. Place out of direct
sunlight, and let her roar for a couple days.
You will see it get foggy and creamy.
After it is done, place it in the fridge. On brew day, remove the flask from the
fridge, let it warm up, and when you are ready to pitch - remove the foil, decant most of the wort, swirl up the
yeast, and pitch it in – be careful not to toss the stir bar in with it.
UPDATE: This is an awesome tool to use as you step up your starters, but some times you have a small amount of yeast, like from a bottle or slant/plate, and need to do a 10ml starter, what then. Build a Shaker Tray for the initial steps, then use your Stir Plate for the 100ml and 1000ml steps.
UPDATE: This is an awesome tool to use as you step up your starters, but some times you have a small amount of yeast, like from a bottle or slant/plate, and need to do a 10ml starter, what then. Build a Shaker Tray for the initial steps, then use your Stir Plate for the 100ml and 1000ml steps.
No comments:
Post a Comment