Showing posts with label hop care. Show all posts

Tuesday, July 23, 2013

UPDATE: Hops, Lagers, Experiments


It has been awhile since I last posted, and wanted to get something up here, including a few things that don't need there own individual posts.  After transplanting the hops after the move and installing irrigation for them, only 3 have any growth: Santiam, Chinook, and Blisk.  The growth is very little, maybe a foot or two max, and very thin.  The rest of the hops aren't producing anything at all.  My understanding is that the late move and time out of the ground shocked the plants and they are going to be fine next year.  Keeping them watered to ensure good roots for the next season.

I haven't posted a recipe in awhile now.  The reason for this is because I have brewed 3 batches that take longer to ferment.  I did an extract Berlinerwiesse fermented with only yogurt.  This beer was intended to be a quick sour.  It was quick, only 4 weeks and it was down to 1.003, but it never really soured.  The Lacto strains in the yogurt created CO2 and alcohol instead of acid, and lots of DMS.  I am still debating what to do with this batch.  I have a few strains of Brett right now that I am thinking of adding to it for a few months, then adding fruit to it as well for next summer.

I also brewed 2 American Pilsners, 1 classic with Saaz, Liberty, and Sterling, the other is New School with Simcoe, Mosaic, and Calypso.  They are just starting to lager now and should be kegged by the weekend.  I have found that brewing lagers isn't really my cup of tea.  I can enjoy them when I finally get to drink them, but they just take so long.  My fermentation fridge is locked up for 5 weeks, then I have to clear kegs for them, and then I have to wait another couple weeks for them to lager before I have 2 kegs to drink through before I can put anything else on.  I also find that by the time they are done fermenting and ready to drink I have had a shift in tastes and don't really want to drink 5 gallons of American Pils.

I am also trying to culture up some Lacto off of grains.  I will have a full write up of the process in a few weeks when it is done, but for now, I am using grains and apple juice in a heating blanket set on high to get a culture going and have had success so far.  I will be stepping it up tonight to get more and hopefully with multiple steps should be able to kill off any enterobacter as the pH drops and some alcohol is produced.

Wednesday, July 18, 2012

Update: Hops, Promotion and New Schedule, Vacations

It has been awhile since I last posted, there was a nice vacation to Portland with family which included a couple visits to Full Sail's Pilsner Room which was a short walk from the hotel, dinner at Burnside Brewing, as well as lunch at Bridgeport, and a trip to Cascade Barrel House and Belmont Station.  We also had a church campout where, surprisingly, my pastor who always complains about the amount of hops in Pacific NW beers tried my DIPA with 1# of hops in 5 gallons and enjoyed it.  I also got a nice promotion at work which brought new hours and much more work.  The new hours are nice, they give me much more time with the family in the afternoons, and open up the potential for going home after work and getting in a full brewday which will keep weekends opened.  I can even bottle in the evening and not have to worry about finding time on a Saturday morning.

Speaking of brewing and bottling.  I have a second edition Hefeweisse in the works soon, as well as an English Bitter.  I will be bottling the Lambic I brewed last September from the yeast on Blackberry skins in the next week or so.  Gave it a taste this morning and it is very nice, fruity, clean lactic tartness, no acetic, maybe a little high on the oak, but I like oak character, so I am okay with that, no oxidation, slight funkiness.  


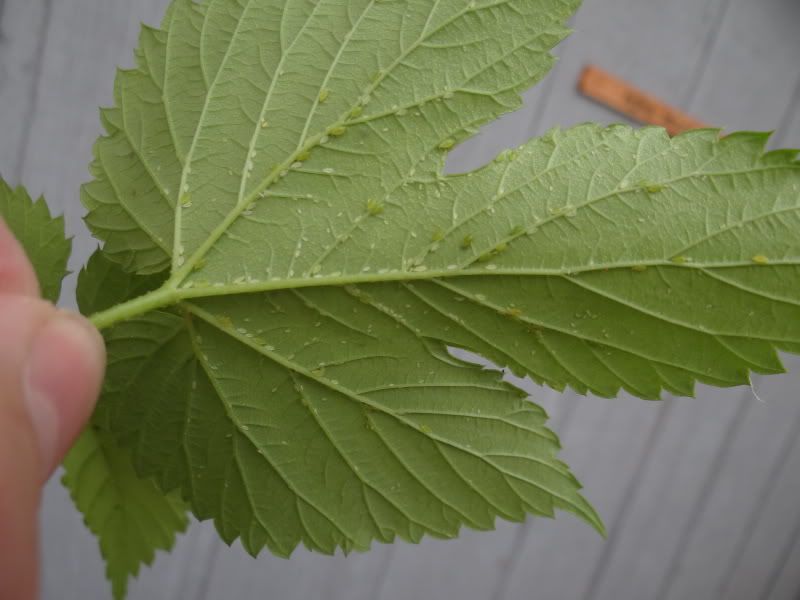
The new hops are coming along quite nicely with much better growth on some of my new first years compared to last years Chinook, which has already surpassed the height of the trellis and I am having to get creative with how to keep it out of the other varietals next to it.  I had quite a bit of Aphid issues this year, and the mild soap spray I used killed them all off, but scorched some of my leaves as well.  I had a buddy who grows lots of hops (I got most of my rhyzomes from his hop yard) come by to take a look at the plants and he recommended fertilizing and longer deeper waterings.  Since giving longer waterings and adding some Miracle Gro the plants are looking much healthier.  I've even got some healthy side arm growth going on my big plants.  All in all it is looking to be a good year of growth; hoping for a decent yield on my Brewer's Gold, AlphAroma, Cascade, Shinsuwase, and maybe even Blisk and Cerara.  Chinook should be good this year.

Tuesday, April 24, 2012

The New Hop Yard

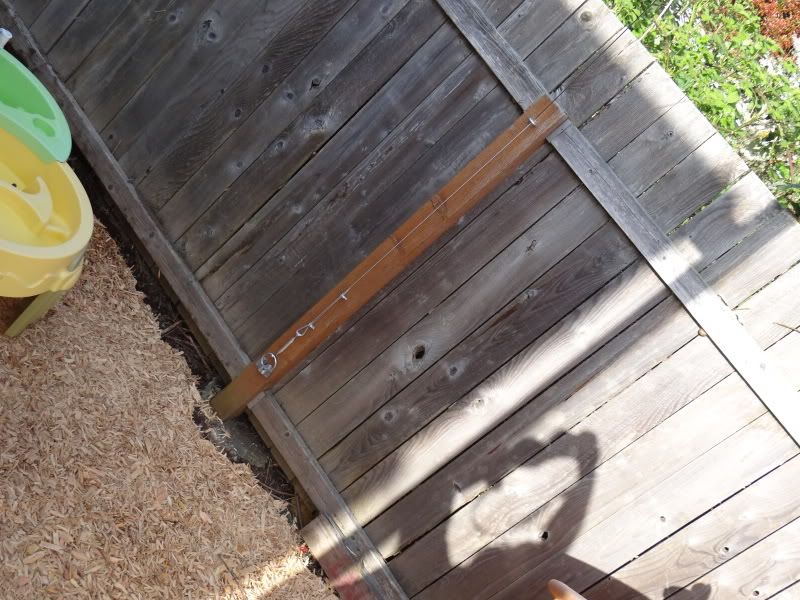
Last year I grew a single lowly hop plant, Chinook, and collected a whole 21 cones.  First year, potted, lacking knowledge concerning nutrient deficiencies, all of these culminated in a weak first year.  But now we enter a new season, new plants, new knowledge, new trellis system.  Last weekend I cleared out the entirety of our backyard from all forms of plant life.  We dug down the whole thing a good 3 - 5 inches.  We brought in Playground Chips and laid it on thick over landscaping fabric... except for one strip of land about 2 foot wide by 24 foot long.  It was here, along the back wall, in full exposure to the sun that I erected the hop trellis.  On each end, I dug a hole 20" deep by about a foot wide into which I dropped a 14' 4X4 treated post cemented into a 2 gallon bucket.  The cement helps to make it slightly more permanent as well as add weight for an anchor, and putting it in the bucket allows me to dig it up and move it if/when we buy a house.  At the top I threaded an eye-bolt screw to attach my wiring.  I ran a length of 3mm Aircraft Cable from one eye-bolt, through a hole in the top of a 2X4 sunk into the ground between the posts for mid-way support, and through the other eye-bolt, down the post to a third eye-bolt where I attached it via a turnbuckle.  From the same eye-bolts at the top, I ran more cable to the fence posts where it went through an eye-bolt at the top of the post down to a ring attached to the bottom where it connected via another turnbuckle.  These guy wires pull the posts outward to anchor them so they don't collapse in towards each other under the weight of the hop plants.  They also pull them back some since the posts are 5 feet from the back fence and the fence posts are 8 feet.  This pulls the posts against the overhang of the house, thus anchoring the post in all four directions.  They can't fall back because the house is there, they can't fall out because they are anchored to one another, and they can't fall forward or in because of the anchors to the fence.  The space provided allows me to plant 7 hops in between the posts, and an extra 2, 1 at each fence anchor to grow up the anchor wires and along the fence, giving me room for 9 varieties.  I then back filled the holes to ensure stability.  

Next I dug out the top 3 inches of soil across the top of the entire area and added about an inch and a half of fresh planting soil from Lane Forest Products.  I also took a pic-axe (wish I would have used this to dig the post holes) and used it to dig holes about every 3 feet that were about 3" wide, 8" long, and 6-8" deep which I filled with the same new soil and piled up on top to make mounds about 3 inches high ( giving a final depth of about a foot).  On top of this I added an inch and a half layer of bark mulch for ground cover, to keep weeds out, and to keep nutrients like Nitrogen in (something I didn't do last year).  I transplanted my Chinook from the Rubbermaid I used last year and put it to the outside edge of the trellis.  I underestimated the depth and size of the roots that these things put out.  I thought it would have some roots around it being a year old, but they went all the way through the 25 gallon Rubbermaid and even out the hole in the bottom.  I also bought a healthy rhizome from Falling Sky of Brewers Gold (mother variety to many of the high alpha American hops, with decent bittering [~10%], and aroma/flavor of spice, fruit, resin, and Black Currants).  The rhizome was shaped like a boomerang with shoots on the top of one end and coming from the bottom on the other with flip-flopped roots as well, so I cut it in half and planted them each roots down, shoots up, facing opposite ways in the same hill, and covered with soil and mulch.

I will be adding quite a few more varieties (see here for more info on these hops) along with these two, such as, commercial American varieties Cascade, Centennial, and Santiam, old-school New Zealand variety AplhAroma, French Tardif d' Bourgnone (Strisselspalt and Saaz like), as well as 2 experimental varietals: American high alpha, high aroma Blisk and the Continental / Saazer type variety Cerara.  There is also a Japanese variety called Shinsuwase with a very perfumey nose that I might try to plant as well (at the loss of another variety).  I will of course continue to update the progress of the hop yard with lots of pictures and hopefully some helpful hints on how to maintain, feed mid season, trouble shoot, harvesting and drying the hops, as well as experimenting with each variety in SmAsH beers to evaluate there contributions.

Monday, August 22, 2011

Hop Update

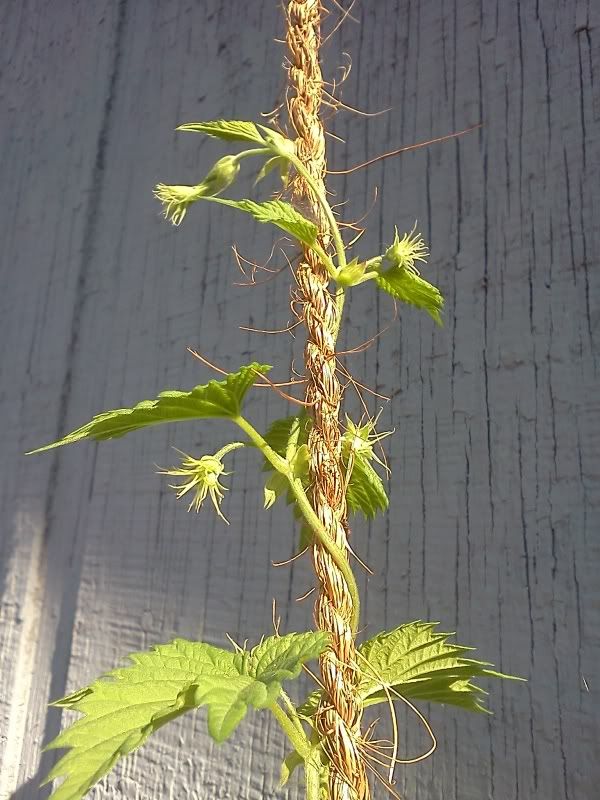
After the last update on my hops and their response to the fresh manure and manure tea (Nitrogen), I added some wood ash (Phosphorus) a week ago that we got while camping and continued to give it doses of manure tea. I was showing my dad our garden while they were in town this weekend and found these while I was looking at them. The shoots with the tiny spines coming out of the blooms are called "hop burrs", and these will soon become full hop cones. It is very exciting to see not just the new vegital growth from a few weeks ago, but new hop growth as well. With the already existing cones, and these new ones, the harvest will be up to 20 cones now.

Thursday, August 11, 2011

First Year Growing Hops

I planted a single rhizome of Chinook hops this spring. The soil in the backyard of our rented duplex is about 3" deep of straight hard, dry dirt, and compact rock for feet under it, so the hops are, at this point, in a 20 gallon Rubbermaid plastic storage bin. Planted it in brand new Nitrogen rich soil, veggie boost compost and such from Lane Forest Products. The shoots came up and I trained them onto coconut twine headed up to the peak of the roof and a screw in the wall along the south wall in the back yard. They get great sun. One bine took off like a rocket ship, and the other three have stopped around the 3' mark. I began watering well in June as the heat kicked up and the rain stopped. After a while the plant stopped growing, the leaves were a pale yellowish green, and the bines were a magenta hue. Having never grown hops, nor seen them, I didn't realize that these were all signs of Nitrogen deficiency, that is until I got the book The Homebrewer's Garden. After figuring out I need Nitrogen in the soil, I went back to Lane Forest and got the manure mix. I worked some of it into the top layer of soil, piled more on top and gave it a good watering. I also placed about 5" of manure into a 2.5 gallon bucket and let it "ferment" for a few days in the sun. I have been feeding the soil with this for a few days now, and the hops look great.

The bines are a nice green color, though there are some red streaks going through the big one. The leaves are a deep green again. There are even signs of new growth as new lateral growth beginning. So far I have about 17-22 hop cones, and it looks like I might have more on the way, but I’m not sure since, again, this is my first year so I have no clue what I am looking at. A buddy at Valley Vintner & Brewer, my local homebrew shop said that with the growth of the hops, I should be adding phosphorus as well, so I will be getting my hands on some wood ash soon. I will of course update more as I go.