
(1) 1/2" X 2" Brass Pipe Nipple
(1) 1/2" X 2" Brass Pipe Coupling
(2) 1/2" Brass Lock Nuts
(1) 3/4" Zinc Washer
(1) 3/4" Zinc Washer
(1) 1/2" Silicone Washer (got mine from Williams Brewing)
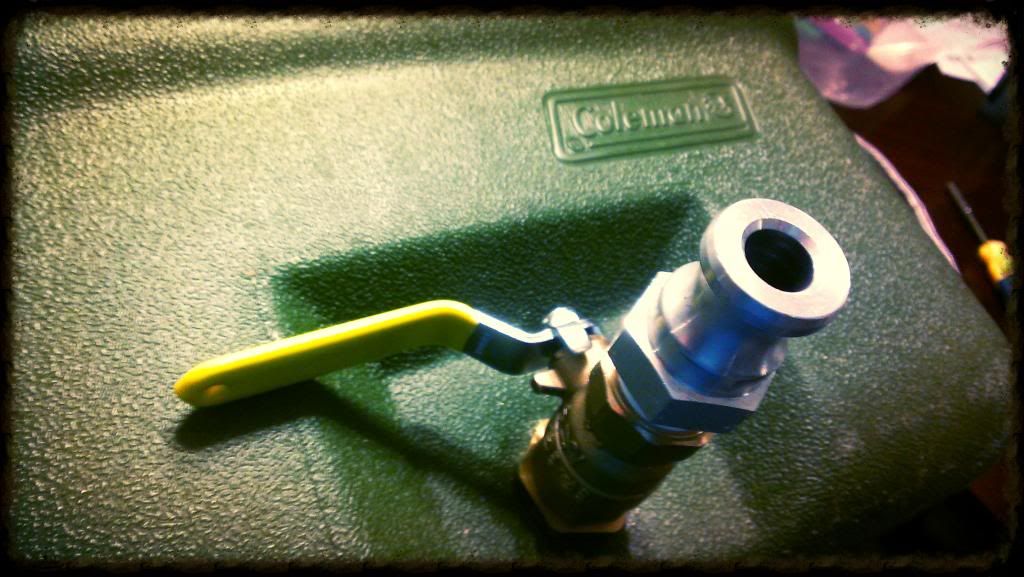
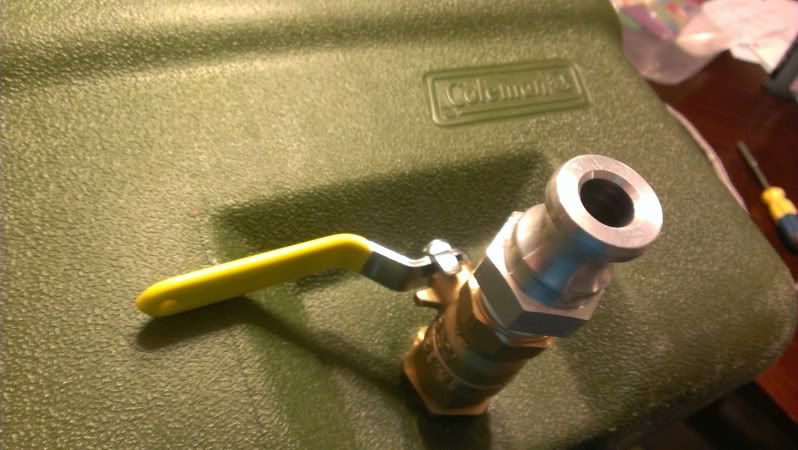
(1) 1/2" Brass Female In-Line Ball Valve
(1) 1/2" MPT to Camlock (or other quick disconnect)
(1) 1/2" Brass MPT to 3/8" compression fitting
Short piece of 3/8" OD copper tubing
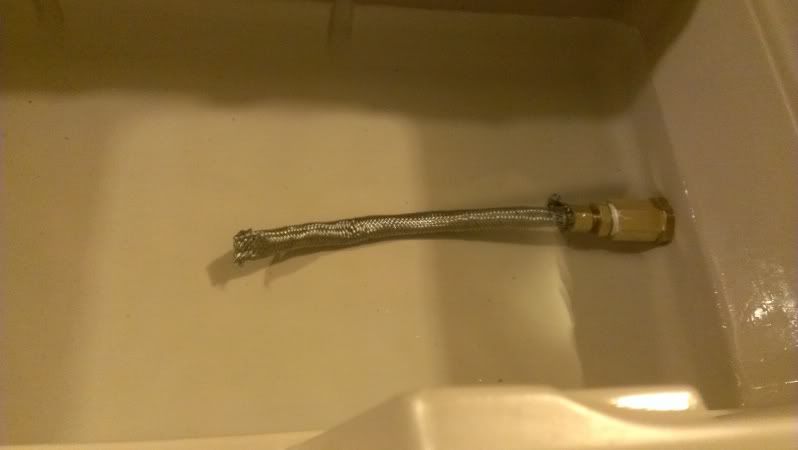
(1) SS Braided water line
(1) 1/4"-5/8" SS Hose Clamp (fully SS - all parts)
Teflon Tape
(1) 1/4"-5/8" SS Hose Clamp (fully SS - all parts)
Teflon Tape

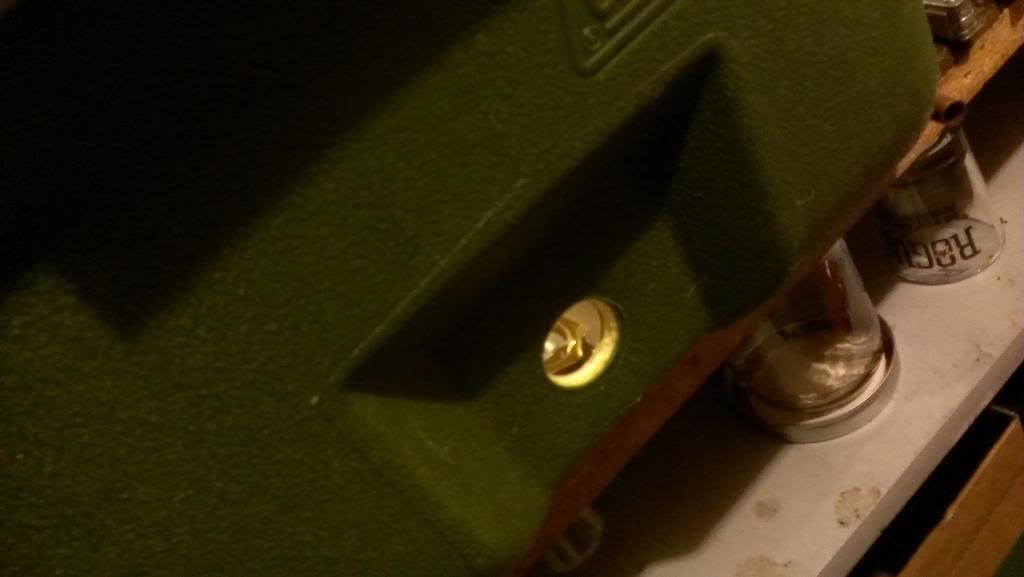
Pop out the nozzle on the side of your cooler and remove all parts (if your cooler is solid walled w/o a nozzle for draining, drill a 3/4" hole through one end at the bottom).
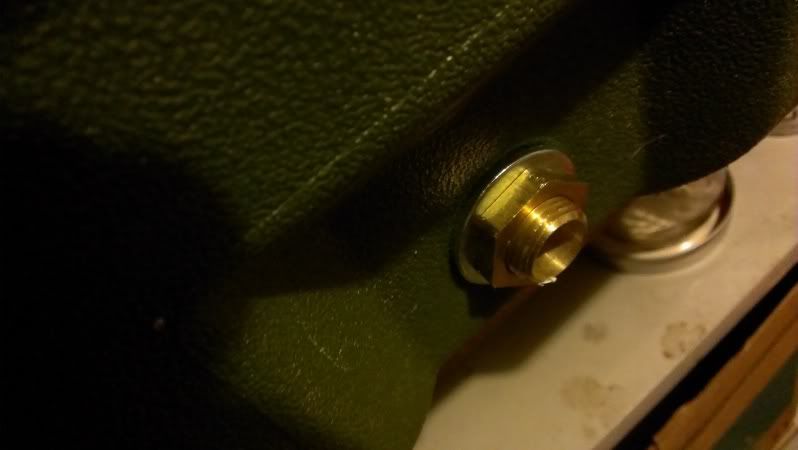
Slide the silicone washer over one end of the nipple nearly to the center of the nipple. Spin on one of the lock nuts until it buts up against the edge of the silicone washer. Wrap the balance of the nipple beyond the lock nut with Teflon Tape.
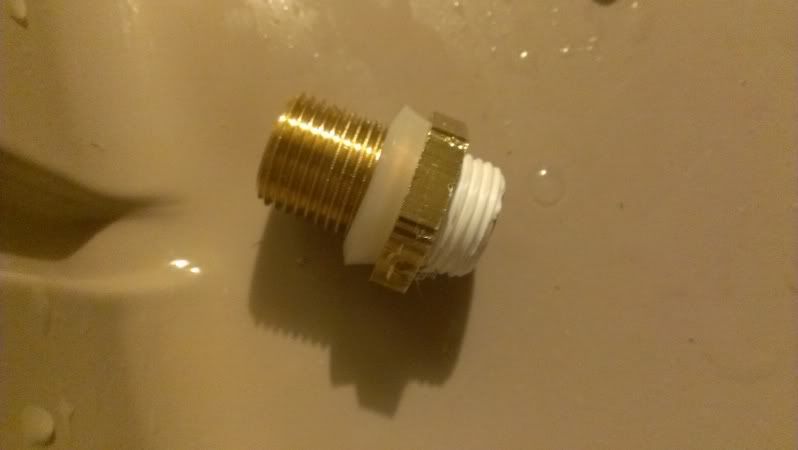
Thread the coupling over the Teflon Tape until it is tight up to the lock nut.

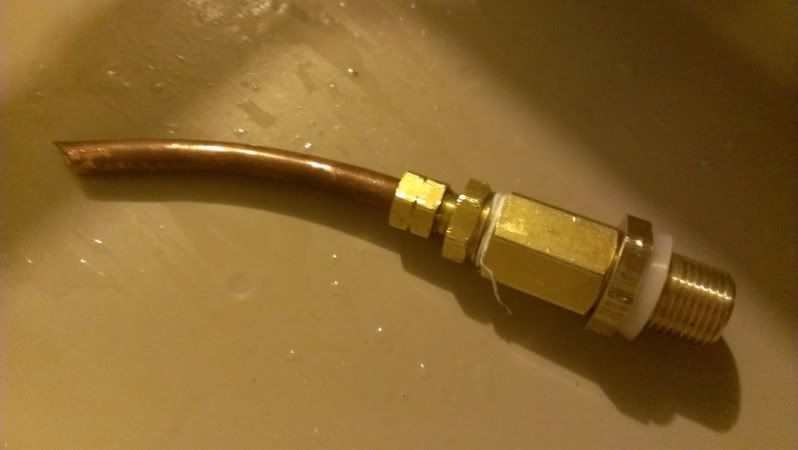
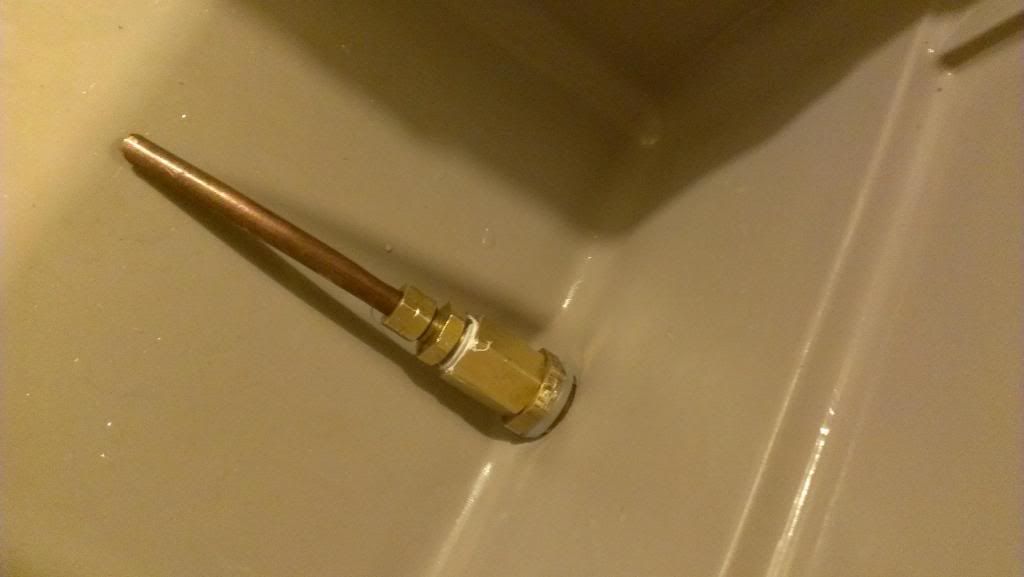
Remove the nut and ring for the compression fitting. Slide nut onto copper tubing, then the ring. Fit copper tubing into compression fitting and attach the nut tightening down w/ wrenches/pliers until the pipe is no longer loose.
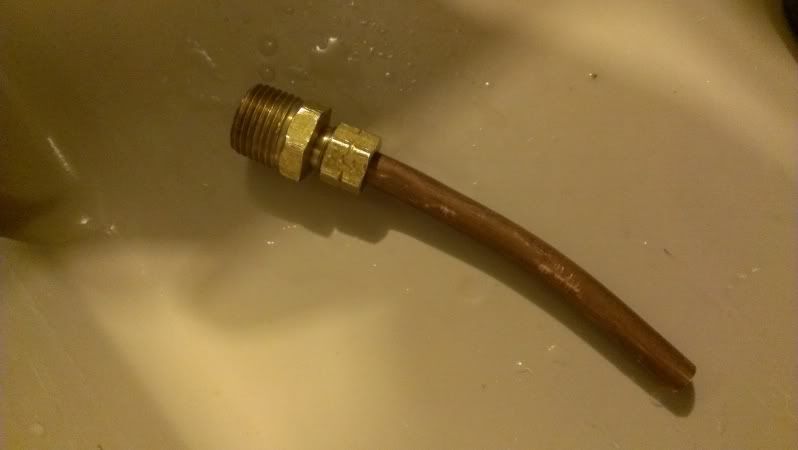
Wrap the threading on the newly created compression fitting and thread it into the coupling; tighten with wrenches/pliers.
Insert the other end of the nipple through the hole in the cooler from the inside so that entire build so far is inside the cooler.
Slide the metal washer over the end of the nipple on the outside, then thread the other lock nut over the nipple as well tightening with a wrench until the entire fitting is now set in place and the silicone washer is fit tightly on the inner wall creating a seal.
Wrap the remainder of the nipple with Teflon Tape and thread the ball valve onto the nipple until it is tight against the lock nut and sits at the correct angle (ball valve handle parallel to the ground/table).

Wrap the threads of the quick connect fitting with Teflon Tape and thread inside ball valve until tight (ensure that the ball valve stays straight).
Cut away the ends of the water hose and remove the plastic tubing from the inside of the SS braid. Crimp and fold one end shut. Slide the hose clamp over the copper tubing, followed by the SS braid, and secure the braid to the copper with the hose clamp. Ensure that the entire hose clamp is Stainless Steel, not just the clamp; many SS hose clamps have non SS screws and screw housing which will rust.
Fill the cooler until the entire bulkhead is submerged. Place the entire MLT on a raised surface with the ball valve and end of the cooler protruding slightly over the edge, and dangle a bucket from the ball valve so that it sits directly under the ball valve and outer edge of the cooler. Let it set as long as you feel is needed to check for leaks. If the bucket is completely dry after testing, then you are leak free; if not, tighten down the outer lock nut and ball valve more. After you are leak free, open up the ball valve to ensure you have good flow. Clean out the inside of the MLT well to ensure that you are free from the metal shavings that inevitably fell inside from the tools and tightening.

One last test you may want to run is to fill the MLT with a measured amount of water from a calibrated source that can be refilled (maybe a Better Bottle or your kettle). Once the MLT is filled, run the water off through the ball valve (and tubing to create a siphon) into the same vessel you just measured the water from until the MLT no longer siphons the liquid (you can even raise the opposite end of the MLT using a board to get as much of the liquid to the bulkhead as possible). Take the original volume of liquid, less the volume of liquid now in the container and this will tell you how much liquid was left behind in your MLT that you cannot get. This volume of liquid in the "dead space" will need to be accounted for in every batch of beer you mash (along with grain absorption and any liquids left in the pump and/or tubing).
Thank you very much for this useful article. I like it. gate valve manufacturer
ReplyDeleteBall valves are essential components in fluid control systems, known for their reliability and versatility. With a spherical disc mechanism, they provide efficient shut-off and flow control in pipelines. Their simple design allows for quick operation, making them ideal for various industrial applications. From oil and gas to water treatment, ball valves play a crucial role in ensuring seamless and precise fluid management.
ReplyDeleteBall Valve
Great blog with very useful information! Choosing a trusted Hex nipple stainless steel Manufacturer in India is important for ensuring durability, corrosion resistance, and reliable performance in industrial piping systems. Manufacturers in India are well known for delivering precision-engineered fittings at competitive prices, which makes them a preferred choice across various industries.
ReplyDeleteFor more visit below links
Hex nipple alloy steel Manufacturer in India
Hex nipple brass Manufacturer in India
Aluminum hex nipple Manufacturer in India