Showing posts with label DIY Projects N Equipment. Show all posts

Wednesday, November 12, 2014

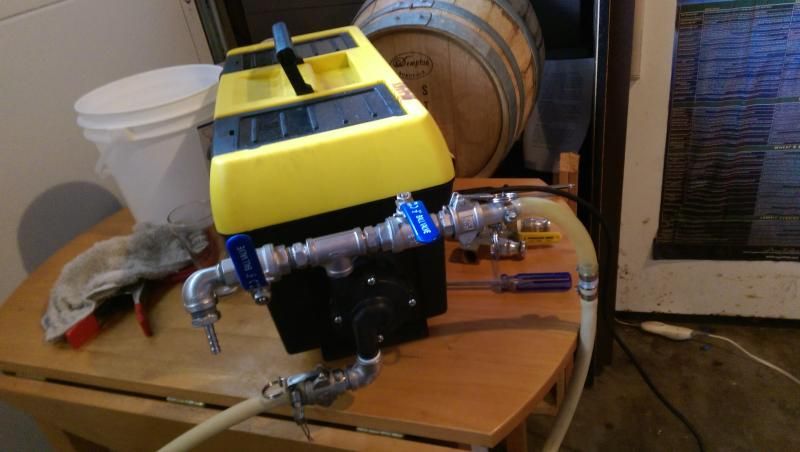
DIY Equipment: March Pump In Tool Box - Rebuild (Stainless Steel with Sample Port)


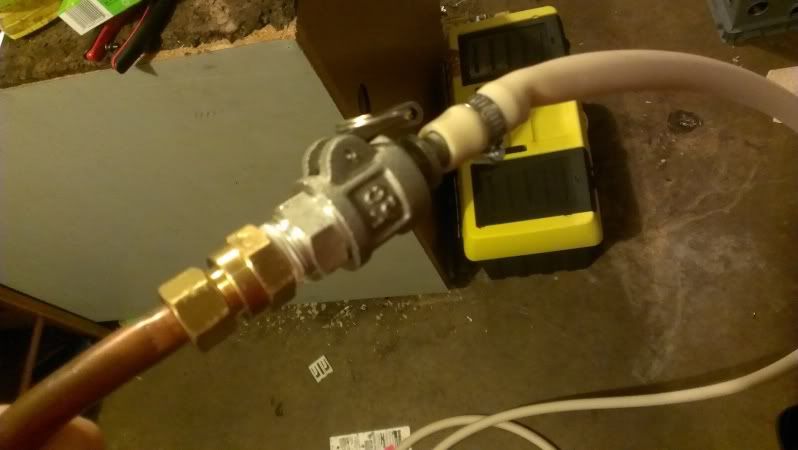
2 years ago for Christmas my Dad bought me a single present, the March Pump I had been wanting for quite a while.  Since I don't have a brew stand and have to tear down and move my brew house after every brewday the best option for my needs was to build it into a tool box.  I happened to have a tool box fit for the job as well.  Originally I had looked at BYO articles for the build, as well as a few others.  I opted to include an outlet along with the switch so that I can plug in other electrical equipment when needed like my vacuum sealer for resealing hops.  I also went with a flat light switch instead of the standard one that sticks out away from the surface, this will keep me from possibly catching something on it and accidentally turning it on while dry.

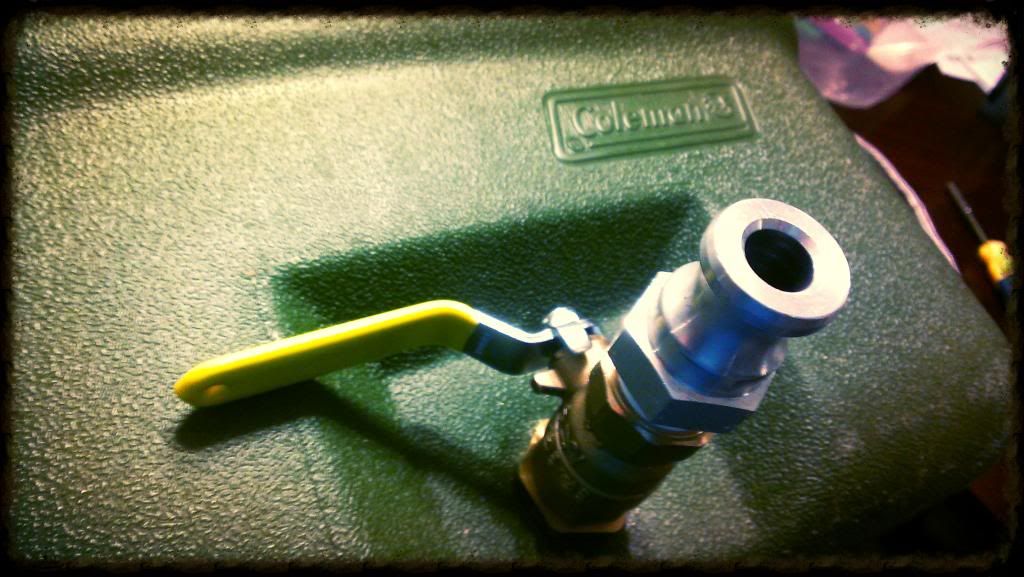
After a few years of using the original mixture of brass fittings with the aluminum camlocks I finally switched to all Stainless Steel.  This gives me the ability to know that there isn't any reacting of the metals, and allows me to use any SS safe cleaners with out worrying if that cleaner is safe for multiple metals.  And lets just be honest, the full SS looks sexier.  I scored SS cam locks for my birthday gift from my wife, and had some bonuses from work that allowed me to source the other pieces on eBay for a good deal.  On this iteration I also added a second ball valve on the out flow for bleeding off air and for pulling samples (thanks to the recent BYO article for giving me more info on this).

To make it easier on anyone wanting to build there own, I have included the original build of the pump into the tool box, and then updated the install of the fittings onto the pump head.

Monday, June 30, 2014

DIY: Digital Dual-Stage Temp Controller Build


This How-To will walk you through how to build your own Digital Dual-Stage Temperature Controller.  I sourced many of the extra parts (wire, outlet) from Goodwill.  The temperature control unit was purchased on eBay for $20 shipped.  The project box was purchased from RadioShack for $6.50.  Total cost for me $30, which is much cheaper than the Ranco and Johnson controllers sold for $150.00.

Here is the link to the Temperature Conversion Chart which includes the year round offerings from WYeast (plus quite a few of their PC strains), the temp range for each yeast, and if they recommend a diacetyl rest for the strain.

Wednesday, May 14, 2014

DIY: Making Yeast Extract

As I continue to bug out on bacteria and wild yeast (pun intended), I find more and more information on ways to culture and grow them.  I am also beginning to get more technical than simply adding dregs to starter wort and letting it go for awhile, though that works well.  Part of this is coming from reading a lot of information over on BK Yeast's blog, and part from the fact that I have been hanging out with Stephen, a buddy from church, who has a lab in his garage and works in microbiology.  In my reading I came across a post on BK Yeast about making Yeast Extract.  In the yeast ranching world Yeast Extract (YE) is an important component.  It is one of the main ingredients in agar plates for growing yeast and brewing bacterias, along with a sugar source (usually malt and glucose), and hydrolized protein.  In the DIY spirit of homebrewing he set out to make his own YE for plates and for growing cultures.  I followed most of his instructions to make my own, including information in his follow up post, and both Stephen and I used it with great success when mixed into our yeast starters.

Monday, September 16, 2013

DIY: Hop Oast

One of the more substantial cost for brewers from batch to batch is hops, especially if you want to brew lots of American styles, IPA and Double IPA in particular (as well as India Session Ales, Black IPAs, Red IPAs, etc.).  The other large cost is yeast, but with some effort, you can always purchase this once and repitch the yeast to keep costs down.  Finding a way to keep costs down on hops isn't as simple.  Though some brewers have supposedly dry hopped a beer and then put those hops into the kettle for bittering another brew, I wouldn't ever do this as you don't know what kind of bittering you will get out of it, and what do you do with the hops between brews to ensure they don't spoil?  

There are other, more effective ways to save money on hops.  One way that I have enjoyed is to get some hops in bulk when they are around at a great price.  I was able to get in on a group buy last year for Simcoe and Mosaic, 1# each, $10/#.  I also got a pound of CTZ for around $12.  These prices are great for the varietals, but there is still a much cheaper way to get great hops.  Grow them.  I am not going to tell you how to grow them here; there are many good resources both online and in print on how to grow them in your yard.  This post is what to do with them once you have grown them and established they are ready to pick (another topic I am not going to discuss here).  This is how to build a Hop Oast for drying them, then a secondary post on how to package them for storage and future use.

HOP OAST
Parts Needed: (around $30)
  • 7 @ 2X4X8' Kiln Dried Fir
  • 48" X 7' Aluminum Screen Material roll
  • 3" Wood Screws (56)
  • Staple Gun
  • Box Knife
  • Cordless Drill

Friday, June 21, 2013

DIY Project: Hop Sprinklers

Last year I tried running a drip irrigation system on my hops.  I continually blew the cap off the end due to the pressure.  This year I wanted to install something a little hardier to water my hop yard.  My pastor is moving away and had a lot of 1" PVC pipe he was getting rid of and I was able to get nearly 30' of it.  My original design was to just run 40' and drill 1/16" holes in front of the hops and leave it above ground.  The UV light from the sun would eventually degrade the PVC, but the frost would burst it if there was any water in the line once Winter came.  

Friday, April 12, 2013

New Weldless Ball Valve, Pick Up, and Hop Filter

When I first got my keggle, it came pre fit with a 1/2" OD nipple welded to the outside that the ball valve was threaded onto.  The weld on the inside is very rough, and getting 3/8" fittings to thread into it has always proved to be a pain.  With the addition of the larger chiller I got for Christmas, I had to change the pick up configuration from straight out into the middle to an angle to the side (the chiller would sit directly on top of the old pick up and push it down as well as tilt the chiller back).  When I pulled the old straight fitting and tried to put the 45 degree fitting in its place, it wouldn't hold, which caused me to lose suction at that joint (leaving nearly 3 quarts in the bottom).  It also makes for a difficult clean up since I have nearly 5 brass and copper parts in place to make the angles as well as to have the option of removal.

Compound this with all the failed attempts to filter out the hops and trub from my beers (a small hop taco and a large hop taco both clogged on 10 gallon hoppy batches), and I have been set for a change.  I was thinking about having a 90 SS street elbow welded to the inside to flow into the nipple and ball valve, but then I thought there might be a better option, especially with some of the infection issues I have had. 

Friday, March 1, 2013

!!FAILED!! Hop Taco Revisited... AGAIN!


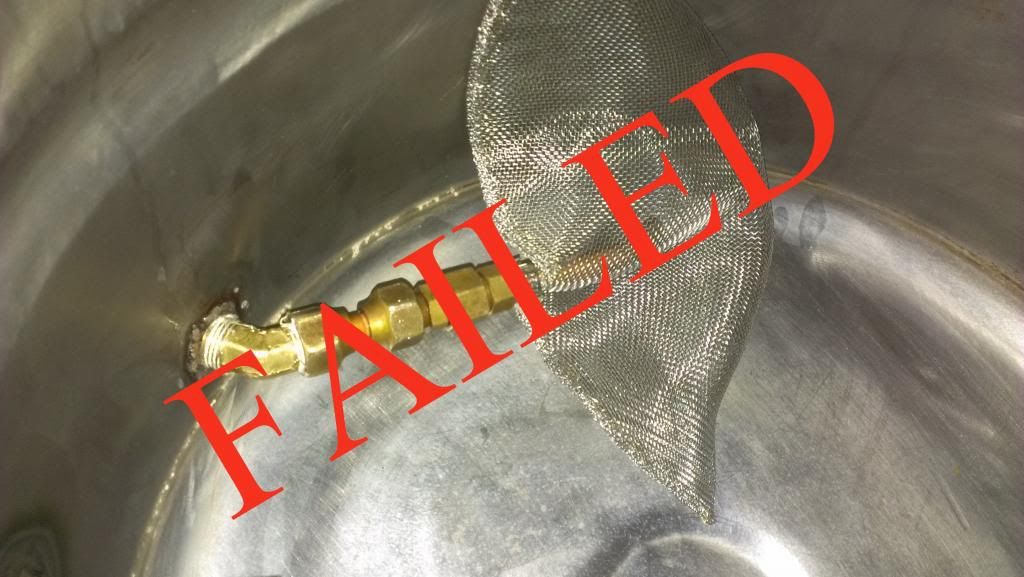
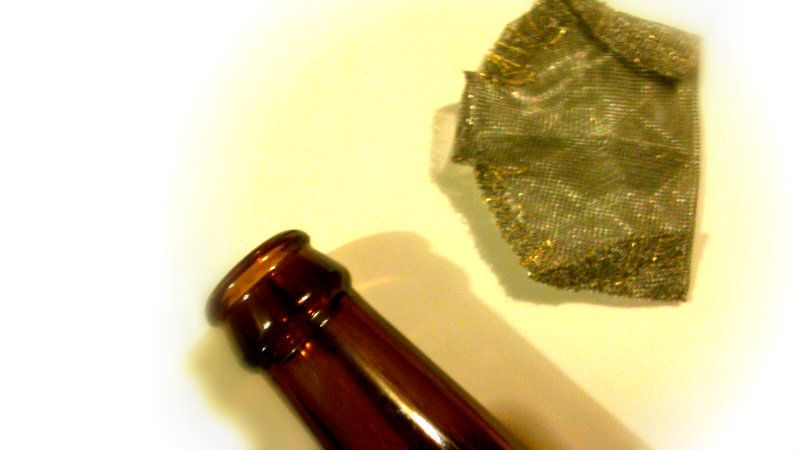
After my latest Hop Taco failed on brew day during a 10 gallon IPA using my brand new pump, I decided to make another one, bigger, and less tightly woven to maybe keep it from clogging again.  Needless to say, after buying a larger SS mesh strainer, pulling it apart, threading it with brass wire, and cutting up my fingers, and attaching it once again to my kettle, it too, failed the test of a 10 gallon hoppy beer.  Guess I am moving to another option, again!

Thursday, February 14, 2013

CO2 Forced Racking

Oxygen impacts both the flavor and stability of beer in many ways.  Small amounts of oxygen over extended periods of aging in big beers can impart lovely Sherry and dark fruit notes in beers like Barley Wines, Dopplebocks, and Scotch Ales, while Imperial Stouts can take on the flavor and aroma of soy sauce.   Small amounts of oxygen in sours can lead to the growth of acetic acid bacteria, while too much oxygen will turn the beer to vinegar.  If you've ever had a gathering at your home that included beer consumption and left the mess for the next morning, you know the smell of oxidized beer, a beer that has been exposed to way too much oxygen, the smell of wet cardboard.  Aside from aroma and flavor degridation, too much oxygen in the brewing process can lead to an unstable product that might taste good (not great) fresh, but quickly decline after packaging.  One of the fastest beers to decline from too much oxygen is an IPA; known for it's beautiful aromatics, oxygen exposure with hops make them dull quickly, this is the reason why so many homebrewers want kegs for at least their IPAs.

Friday, February 1, 2013

Mash Tun Ball Valve Bulkhead Build

When I first went all grain, I built the traditional cooler mash tun with SS water hose braid.  I used the set up that Denny Conn uses (rubber bung, nylon valve, vinyl tubing) which seemed a good fit since we are in the same brew club, and he was very helpful in answering my questions via email on how to build it.  It worked great for the past 2 years with few exceptions.  The biggest issue I have with it is that, with my set up, I have to run it off into my kettle on the ground, then move the kettle to the burner.  As I have increased my volumes, this aspect proves very difficult and dangerous.  At the end of each brew day, my back hurts quite a bit.  With my new pump, I can let the machine move the wort to the kettle that is already atop my burner awaiting my fresh wort, only problem is that my nylon valve and vinyl tubing won't work with my pump.  To remedy this, I decided to remove the old set up and install a ball valve with camlock fitting.  I priced many of the SS versions that sell at the homebrew shops, and just couldn't justify the extra cost to have SS, so I pieced it together myself for under $20 (bulkhead and ball valve only - cooler, camlock, copper tubing, SS braid are all extra costs).

Tuesday, January 22, 2013

March Pump in Tool Box Build

This year for Christmas my Dad bought me a single present, the March Pump I had been wanting for quite a while now.  Since I don't have a brew stand and have to tear down and move my brew house after every brewday the best option for my needs is to build it into a tool box.  I happened to have a tool box fit for the job as well.  I looked at the BYO article for the build as well as a few others and made a couple tweeks.  One tweek I added is to include an outlet along with the switch so that I can plug in other electrical equipment when needed like my aquarium pump for aerating my wort pre-fermentation.  I also went with a flat light switch instead of the standard one that sticks out away from the surface, this will keep me from possibly catching something on it and accidentally turning it on while dry.

Monday, January 14, 2013

New Brewhouse Additions

This year for my birthday and Christmas I was given a chance to expand my brewery equipment and make for a much easier brewday as well.

For my birthday I was able to purchase some aluminum cam lock fittings for the new tubing I am going to be using.  I shopped around and looked at the brass and Stainless Steel quick disconnects which are way too expensive, and I also looked at the SnapLocks from Williams Brewing, which looked great and were affordable, but I faced the issue of having to order, pay shipping and handling charges, and await delivery if I needed to replace an existing piece or expand my usage at all.  I found that A1 Coupling, a local store, carries ½” aluminum cam locks for just about the same price as Williams and I can buy them in town without shipping costs and times.  The aluminum may not look as nice as the SS, but they will work just as well.

I did end up doing an order from Williams Brewing for some other items though.  I bought their silicone washers to replace the washers in the cam locks since the silicone is rated for boiling temps and is food grade.  I also bought 10’ of their ½” thick wall thermoplastic tubing.  I can get silicone tubing here in town at the local brewshop, but it is outrageously priced and using hose clamps on silicone will destroy it.  The thermoplastic is stronger than silicone, cheaper than silicone, and works great with boiling temps, the only draw backs are that I can’t get it locally when I need it, and it is opaque making it impossible to see the liquid flowing through it.  I know another brewer who uses the same tubing in his brewhouse without issues, so I am fairly confident that it will work great for my purposes.

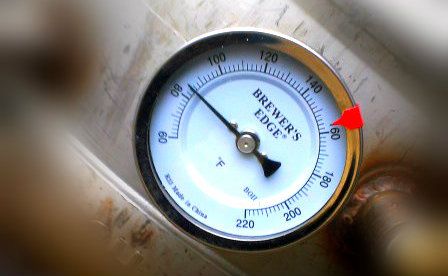
I also ordered a kettle thermometer from them as well (a Christmas present from my wife).  This is going to be a huge help on brewday.  Up until this point I have been dangling a probe thermometer inside my keggle from a piece of copper wire to monitor my temperature during chilling.  The huge problem with this is that I have to take the lid off of my kettle to check on my temperature which opens it up to airborne contaminants or to debris and bugs falling in.  With the new thermometer installed in the side of the keggle I can monitor the temperature of the wort from the outside, and with the new lid I have with a built in notch for my chiller I can keep the lid on from Knock Out to run off keeping the wort free from any outside contaminants.  Along with my new glass lab thermometer that will allow me to calibrate all my thermometers, I should be in good shape for great temperature measurements and more control in my temps.

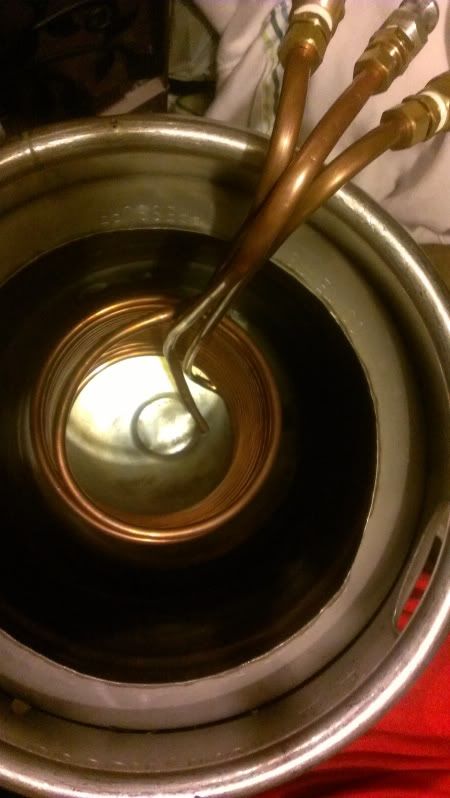
Speaking of efficient chilling and a notch in my lid for my chiller, I was able to take advantage of one of More Beer’s Deal of the Day items.  I had been planning on building a new wort chiller from 50’ of ½” copper tubing to replace my very ghetto 20’ – 3/8” one I built 2 years ago.  The cost of all the parts was going to be about $100, plus the labor to bend and twist all the pieces, as well as soldering, which I don’t know how to do, and hoping it looked attractive.  When More Beer had that exact chiller, professionally built, for a few dollars cheaper than the cost of the parts to build one, my wife was very gracious and gave me a “Great Daddy and Husband” present, and bought the last one.  I added to this a 2’ length of ½” copper tubing with a J like curve at the bottom as well as a bend at the top for a whirlpool arm like Jamil’s.  I attached a compression to ½” FPT fitting to it that allows me to connect my male cam lock fitting.


At this point, many of you may be thinking, why would I need cam lock fittings with silicone washers, thermoplastic tubing, and a whirlpool arm attachment?  This brings me to the priciest new addition to the brewhouse, the present from my dad: a March Pump.  But you’ll have to wait for more on that one.

Monday, December 3, 2012

Hop Taco Revisited


***SEE EDIT BELOW***

Awhile back I had made a Hop Taco for my kettle based on plans I found from Knights of the Mash Fork.  It seemed to work fairly well for keeping the hops out of the pickup tube and out of the carboy, but it made clean up very difficult.  It was cumbersome and awkward, I couldn't really clean it in place, I couldn't clean the kettle with it in place, and removing the pickup tube was difficult since the hop taco would inhibit spinning it.  Once free the Hop Taco was strewn with hop particles making it hard to clean as they would get caught on the wire ends that were frayed around the edge (also great for stabbing your hand during removal, cleaning, and replacing).  If I was able to get it clean, I then had to try to get it put back together again which proved to be just as difficult as removing it.  Finally, after a long and tiring double brewday I walked away leaving the hops, orange zest, and trub in the bottom of the kettle and didn’t go back to clean it until it was too late.  There was quite a bit of mold and what looked like possible rust on the taco and I ended up just throwing it out since it was difficult to use anyways.

I still needed a way to keep the hops from clogging my pickup tube though.  I made a version of the Hop Spider that proved useless.  Most of my hops would just get caught in the upper layer of nylon and remain suspended above the wort so I would have to remove the spider and dip it into the boiling wort with each addition.  After only a few batches that mechanism was relegated to the same fate as the Hop Taco.  Since then I have been using paint strainer bags or nylon sacks I got from the produce section (designed for keeping fruit free from fruit fly attacks while they sit out); they worked well until I had to clean out all those hop sacks after each brewday, some of which get caught under/around my pickup tube.

All of this leads me to a new dilemma, what is the easiest way to add hops to the boil allowing for the best extraction and aroma, as well as the easiest clean up afterwards while keeping hops (as well as spices) out of the pickup tube and carboy?  This has lead me back to the Hop Taco, just redesigned.  I found a small fine mesh Stainless Steel strainer at Walmart for $7.  The SS ensures that it won’t react negatively to the low pH and hot temperatures of the boiling wort as well as keeping it from rusting.  The fine mesh should keep more particles out, and I am hoping that this includes pellet material as well.  The smaller size allows for greater ease in cleaning as well as removal, and less to clean once the brew session is done (the larger one had more surface area to clean and more wire fray to catch hop pieces on).

For this version I used soft brass wire 0.41mm in thickness.  Many of the models I found online call for SS thread, but I can’t find any, and the copper wire I used on the last rendition was way too thick which made it difficult to get a tight stitch, and with the smaller size on this edition, the stitching needs to be tight.  I did break the wire a couple times, but was able to get a fairly tight stitch, and I doubled the coverage by looping around the outside first, then passing through along the edge as well.  I crimped the edges to leave a lip where the opening is for a hose clamp to grab onto and keep it on the pickup tube.

Now all I need to do is find some time to brew with it!  I've got a pound of 2012 Simcoe pellets, ½# Meridian and Calypso, and quite a few pounds of Chinook and Cascade homegrown hops waiting in the freezer, as well as a pound of Mosaic on the way.  And with nothing hoppy it looks like I am needing to brew an IPA very soon, which will be much easier with my new wort chiller that I am going to fit with a whirlpool option to attach to the new March Pump I am getting for Christmas.

***EDIT:  When used for a Dopplebock with whole leaf hops it worked great.  When used on a 10 gallon IPA with copious amounts of pellet and leaf hops it clogged shut rendering the pump and ball valve useless.  Will be trying a SS braid in its place to see how that works.***

Tuesday, April 24, 2012

The New Hop Yard

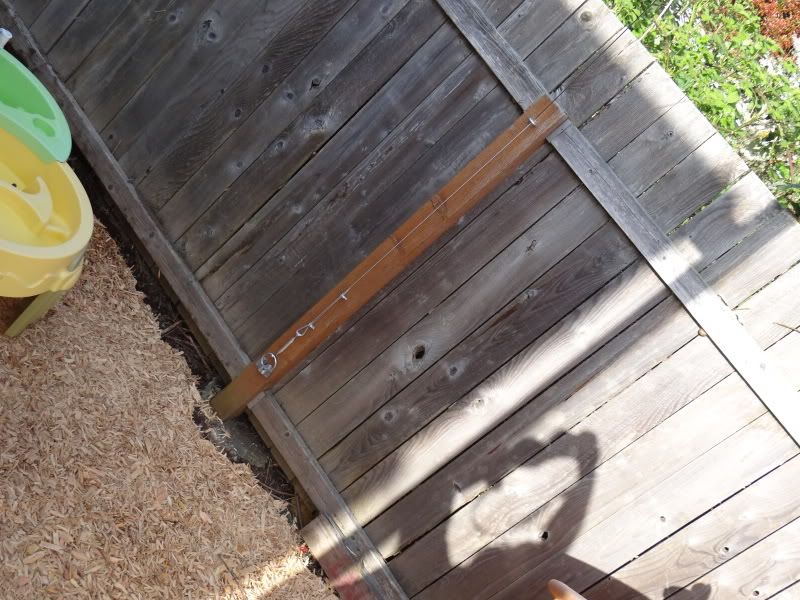
Last year I grew a single lowly hop plant, Chinook, and collected a whole 21 cones.  First year, potted, lacking knowledge concerning nutrient deficiencies, all of these culminated in a weak first year.  But now we enter a new season, new plants, new knowledge, new trellis system.  Last weekend I cleared out the entirety of our backyard from all forms of plant life.  We dug down the whole thing a good 3 - 5 inches.  We brought in Playground Chips and laid it on thick over landscaping fabric... except for one strip of land about 2 foot wide by 24 foot long.  It was here, along the back wall, in full exposure to the sun that I erected the hop trellis.  On each end, I dug a hole 20" deep by about a foot wide into which I dropped a 14' 4X4 treated post cemented into a 2 gallon bucket.  The cement helps to make it slightly more permanent as well as add weight for an anchor, and putting it in the bucket allows me to dig it up and move it if/when we buy a house.  At the top I threaded an eye-bolt screw to attach my wiring.  I ran a length of 3mm Aircraft Cable from one eye-bolt, through a hole in the top of a 2X4 sunk into the ground between the posts for mid-way support, and through the other eye-bolt, down the post to a third eye-bolt where I attached it via a turnbuckle.  From the same eye-bolts at the top, I ran more cable to the fence posts where it went through an eye-bolt at the top of the post down to a ring attached to the bottom where it connected via another turnbuckle.  These guy wires pull the posts outward to anchor them so they don't collapse in towards each other under the weight of the hop plants.  They also pull them back some since the posts are 5 feet from the back fence and the fence posts are 8 feet.  This pulls the posts against the overhang of the house, thus anchoring the post in all four directions.  They can't fall back because the house is there, they can't fall out because they are anchored to one another, and they can't fall forward or in because of the anchors to the fence.  The space provided allows me to plant 7 hops in between the posts, and an extra 2, 1 at each fence anchor to grow up the anchor wires and along the fence, giving me room for 9 varieties.  I then back filled the holes to ensure stability.  

Next I dug out the top 3 inches of soil across the top of the entire area and added about an inch and a half of fresh planting soil from Lane Forest Products.  I also took a pic-axe (wish I would have used this to dig the post holes) and used it to dig holes about every 3 feet that were about 3" wide, 8" long, and 6-8" deep which I filled with the same new soil and piled up on top to make mounds about 3 inches high ( giving a final depth of about a foot).  On top of this I added an inch and a half layer of bark mulch for ground cover, to keep weeds out, and to keep nutrients like Nitrogen in (something I didn't do last year).  I transplanted my Chinook from the Rubbermaid I used last year and put it to the outside edge of the trellis.  I underestimated the depth and size of the roots that these things put out.  I thought it would have some roots around it being a year old, but they went all the way through the 25 gallon Rubbermaid and even out the hole in the bottom.  I also bought a healthy rhizome from Falling Sky of Brewers Gold (mother variety to many of the high alpha American hops, with decent bittering [~10%], and aroma/flavor of spice, fruit, resin, and Black Currants).  The rhizome was shaped like a boomerang with shoots on the top of one end and coming from the bottom on the other with flip-flopped roots as well, so I cut it in half and planted them each roots down, shoots up, facing opposite ways in the same hill, and covered with soil and mulch.

I will be adding quite a few more varieties (see here for more info on these hops) along with these two, such as, commercial American varieties Cascade, Centennial, and Santiam, old-school New Zealand variety AplhAroma, French Tardif d' Bourgnone (Strisselspalt and Saaz like), as well as 2 experimental varietals: American high alpha, high aroma Blisk and the Continental / Saazer type variety Cerara.  There is also a Japanese variety called Shinsuwase with a very perfumey nose that I might try to plant as well (at the loss of another variety).  I will of course continue to update the progress of the hop yard with lots of pictures and hopefully some helpful hints on how to maintain, feed mid season, trouble shoot, harvesting and drying the hops, as well as experimenting with each variety in SmAsH beers to evaluate there contributions.

Monday, April 9, 2012

DIY: Stir Plate Build


Yeast... it is the key factor to fermentation.  Without yeast, there is no beer.  Yeast is what turns the sugars in the wort into CO2, alcohol, fruity esters and spicy phenols (where appropriate), and all the wonderful flavors we look for in beer.  Yeast also can add flavors that we don't want, off flavors, higher alcohols, and other things that can cause a beer to no longer be wonderful.  The key to making a great beer is healthy yeast.  Yeast, like us, can only do so much work before fatigue sets in and they have to stop.  In order to keep the yeast from quitting before their work is done they need sufficient nutrients, oxygen, and numbers.  Many hands make for light work.  The more yeast you pitch, the faster they can work, and the less stress exerted on them to finish their job.  

There are multiple ways to get an adequate amount of healthy yeast to pitch.  One way is to buy lots of yeast packs and pitch them all in.  Another way is to get a pitch of yeast from a brewery.  The standard way that a homebrewer has sufficient yeast of the strain they want for the best fermentation is to make a yeast starter.  Basically, you make a small amount of wort 1-2L of 1.040 wort with yeast nutrient, cool it, and pitch the yeast into it.  This will grow the amount of yeast and get them awake and active, ready for fermentation.  You can grow more yeast by adding oxygen as you pitch the yeast.  You can grow even more by shaking the starter whenever you pass it which sends oxygen into the wort while expelling the CO2 lowering the pressure in the vessel and allowing for more growth.  The best way to make a starter to optimize growth is to place it on a Stir Plate.  A Stir Plate uses magnets to create a constant vortex in the starter releasing CO2 and infusing with oxygen continually.  Commercial Stir Plates can easily cost $100, even on eBay.  But we're homebrewers, we don't pay absurd prices for beer we can make 5 gallons of for less than 3 6 packs (sometimes less than a bottle), so why would we pay that much for a piece of equipment that you can make for around $25?

Do you have access to a hard drive?  What about a computer fan?  What about a cigar box?  What about an extra 12V power supply (maybe to the old Sega)?  Grab a couple screws, nuts, washers, rubber washers, and some basic tools and you're good to go.  If you want more information on how to build a Stir Plate beyond how I did it, you can always read the article I used to build mine from Brew Your Own

What you’ll need:
Wooden cigar box
80mm 12-volt DC fan
12-volt AC/DC wall adapter
Rare earth magnet (from hard drive)
4 - #6-32 x 2” machine screws
4 - #6-32 machine screw nuts
#6 metal washers
4 - 1⁄4” flat neoprene wash
Plastic wire connectors


Tools:
Wire cutters
Drill
13/64 Drillbit
Countersink
Electrical Tape

Extra Needed Materials to Use:
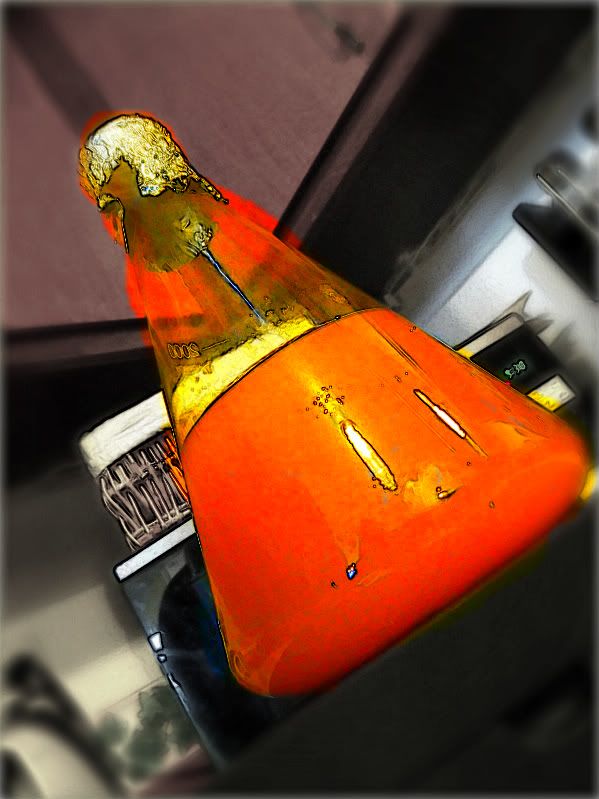
2000ml Erlenmeyer flask
Magnetic Stir Bar


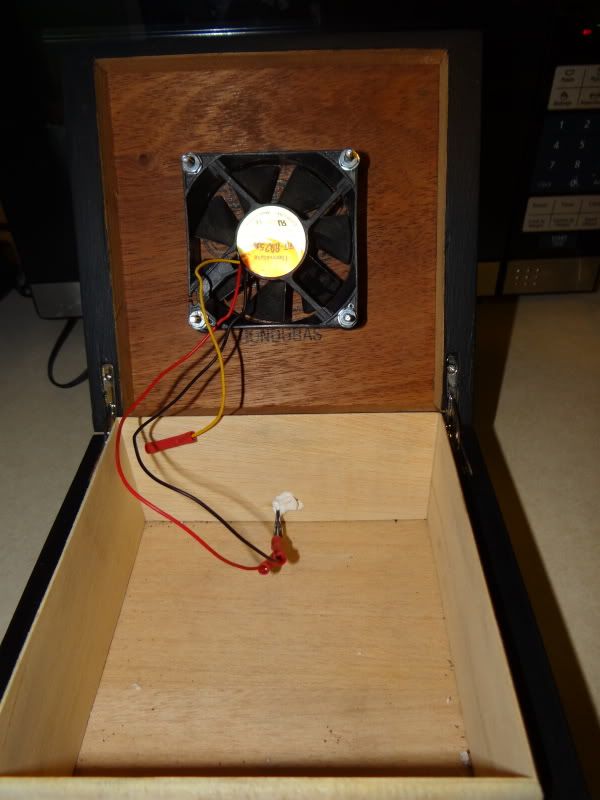
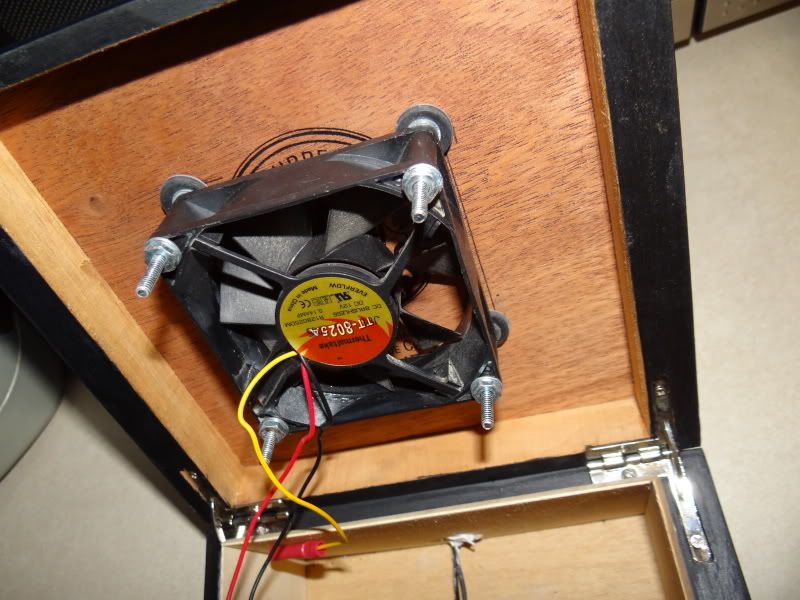
Start by opening up the hard drive and removing the rare earth magnet.  Once you have it, place it on the main hub of the fan and give it a spin to make sure the weight is distributed.  Mark it off with a pen, the superglue it in place.  Next measure the top of the cigar box to find the center and figure out where to drill your holes to attach the fan on the inside lid.  Once you have the holes marked out (use an inked q-tip), drill the holes so that they can sufficiently take the screw.  I did a countersink on mine that will allow not only for the head of the screw to fall below the level of the lid, but to have room for covering the head of the screws with wood putty (just sand it down and paint over for a clean look).  Open the lid and slide the screws through the top to the inside.  Slide the neoprene washer onto the screw, rubber side towards the box, then a couple washers; next slide the fan onto the screws, magnet towards the lid.  Add a washer to the screw next, then place the machine nut onto the screw and tighten it until the fan no longer moves (do this on all four screws).  If there is not enough clearance between the lid and fan for it to spin freely, add some more washers between the neoprene washer and the fan.  Once it is set you can wire it up.  Drill a hole through the back to slide the wire from the 12V power supply through.  Cut the wire of the 12V as close as possible to the part that attached to the device it was used for (typically the little circular plug).  Splice the ends of the fan wires to the 12V wires using plastic wire connectors and tape on tight.  (I just put the ground wire into a plastic wire connector and taped it off).  Check to see if you wired it up correctly and to see if it is stable; it might shake some, place a partially filled flask on top to see if it stops the rattling.  I filled in the hole around the wiring, and sanded it down as well to make a complete housing.  After a paint job it was ready for use.

Once it is ready, make your starter: go here to figure out what size starter to make for your specific batch of beer.  Once you know how big your starter needs to be, you take your flask, measure your water, and dump some of it out into a bowl where you will mix in the DME (1000ml of water to 100g DME makes 1.040 starter wort).  Add it back to the flask with some nutrient, and boil in the flask.  Add a couple drops of foam control to keep it from boiling over and to keep any krausen from blowing off during growth.  Drop in the magnetic stir bar during the boil to sanitize it.  After boiling, cover with foil and chill to pitching temps (below 80*F) in an ice bath (placing a cooling rack under the flask helps cool quicker).  Sanitize your yeast pack, open, pitch, and recover with the foil.  Tilt the flask so that the stir bar is at the outer edge, and place it on over the center of the plate.  You will see the bar magnetize to the magnet on the fan.  Slide it until the flask is centered.  Plug it in, and you will see the vortex form.  Place out of direct sunlight, and let her roar for a couple days.  You will see it get foggy and creamy.  After it is done, place it in the fridge.  On brew day, remove the flask from the fridge, let it warm up, and when you are ready to pitch - remove the foil, decant most of the wort, swirl up the yeast, and pitch it in – be careful not to toss the stir bar in with it.

UPDATE: This is an awesome tool to use as you step up your starters, but some times you have a small amount of yeast, like from a bottle or slant/plate, and need to do a 10ml starter, what then.  Build a Shaker Tray for the initial steps, then use your Stir Plate for the 100ml and 1000ml steps.

Wednesday, November 16, 2011

Recipe Calculator: Using My Efficiency Experiment Results

As stated in some of my previous posts, I have been having issues with my efficiency. I had found through an experiment that I am getting 82% efficiency in my Mash Tun (MLT), and that my falling efficiency is in my losses to hops and kettle. I took the information from my system and essentially built my own brewing software in Excel.

First I calculated my system volumes. I can input the desired volume I want in my fermenter, and it will account for hop losses (from where I input the hop additions), keggle losses, and boil off (based on length of boil), to calculate the pre-boil volume. It will also calculate the volume of sparge water to add based on 1.5qts/lb (water-to-grist ratio), and then for absorption losses giving me the needed amount of sparge water as well. I also configured the spread sheet to calculate the strike water temperature based on the input mash temp, and the total volume used in the MLT to ensure that I don't overflow it.

Next I set up my recipe calculations. I input the grain type, weight, lovibond (color), and the PPG (points-per-gallon: the maximum gravity points that can be obtained from 1# of that grain in 1 gallon of water @ 100% efficiency). With this information, the spread sheet will calculate SRM color (thanks to Beer Smith Blog for the calculations), OG, and percentage of each grain based on contribution to gravity as opposed to percentage of weight. The OG is based, not on final fermenter volume, but on post boil volume so that no matter how many hops there are, or how much is left behind in the kettle, my OG will remain the same, based on my extract efficiency instead of brew house.

The next step in my recipe calculations is IBUs. I configured the spread sheet to figure my IBUs based on the AA% (alpha acids) of the hop added, the weight in ounces, and the time in the boil, and factoring for gravity. Big thanks to cmac1075 on BeerAdvocate for allowing me to use his calculations in my spread sheet. I also set it up to factor for the real OG and volumes based on the actual brewday as opposed to the recipe so I can know what my real IBUs are for the batch (although I have no real way to know my IBUs w/o having my beer tested.) The hop formulation also effects the OG since as the amount of hops goes up, so does the post-boil volume (to account for hop absorption), thus lowering the OG. This is easily adjustable since another 1/2# of grain should easily fix the lost gravity points.

I also infused the Bru'nWater spread sheet into my spread sheet which allows me to change my water profile based on the recipe I am creating. A few clicks and "=" and it now autofills the grains, weights, colors, etc, and then I can adjust my water. Getting all of this to work was a little tricky since Bru'nWater is owned by someone else, so I couldn't just hit "=" on there formulated spaces to make them appear in another spot on my spread sheet, so I had to use some of their formulas to move the outcomes, but it worked. I was able to take the outcomes which are in grams to the tenth (which I can't accurately measure) and use the info from John Palmer to convert it to teaspoons. With some more help from a few more BA's I was able to calculate the sodium content in my home brew (Dr said I have to cut back on salt), and another BA told me that I can sub Pickling Lime for Baking Soda to buffer for mash pH and that will cut out the level of sodium I add to my brews.

Next I set up a "cover sheet", essentially it takes all the information compiled in all the other spread sheets and puts it in one, easy to read area that can be printed out and used to buy my ingredients or put into my brewing log book. This page lists beer name, style, batch #, brew and bottle dates, grains/fermentables, hops, strike water volume and temp w/ mash temp, mash adjustment additives in tsp., sparge volume, temp, and additives, kettle additions like Whirfloc, spices, etc, amounts, and times, yeast used, fermentation temp and length, sodium levels, calories (another Beer Smith steal), estimated FG (based on attenuation of yeast), estimated ABV (based on estimated (OG and FG), and even estimated cost. It also has a place for the OG and volumes of the actual batch, from which it calculates efficiency and brew house, and recalculates the IBUs based off of the actual numbers; then post fermentation, will calculate the real ABV based on the actual FG.

It was a major undertaking with lots of hours moving, and removing, formulating, and reformulating, scouring forums and websites, and then reconstructing again, but now, I can input my grains, hops, and yeast (all w/ accompanying information), length of boil, mash temp, and desired fermenter volume, and it will tell me strike water temp and volume, sparge water temp and volume, IBUs, SRM, OG, est FG, and est ABV. A few more clicks to adjust my water, and it tells me how many teaspoons of each addition to make.

Monday, October 17, 2011

Keggle Fittings: Hop Taco, Pick Up Tube, and Sight Glass


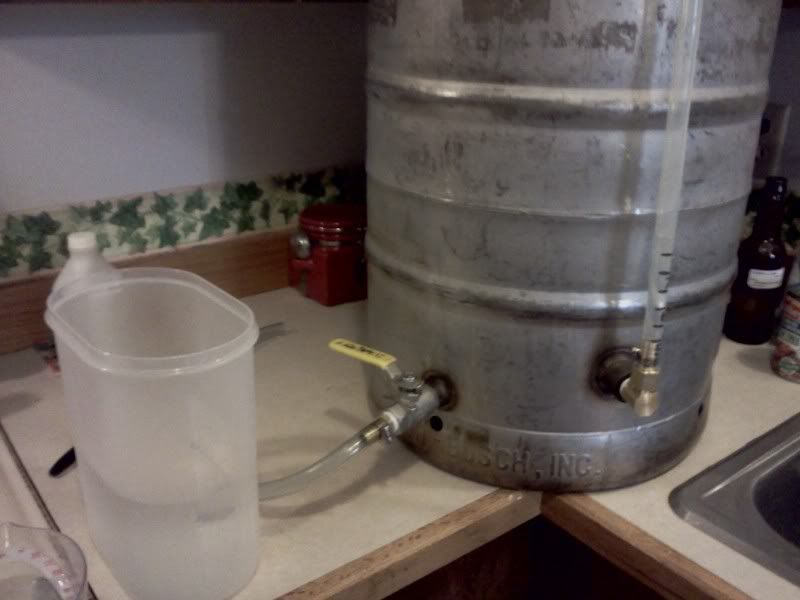
This weekend I fit my keggle (15.5 gal keg converted to use as a kettle) with a few things to make it easier to use. I added a sight glass, and fixed my hop taco and pick-up tube that had failed in a previous brew session. These items were not too difficult to add since the keggle I got from an ex-homebrewer was already fit with a ball valve for draining which was threaded on the inside for easy addition of the pick-up tube, and it was already fitted with a threaded female port that had a hole in it making for a simple sight glass addition.


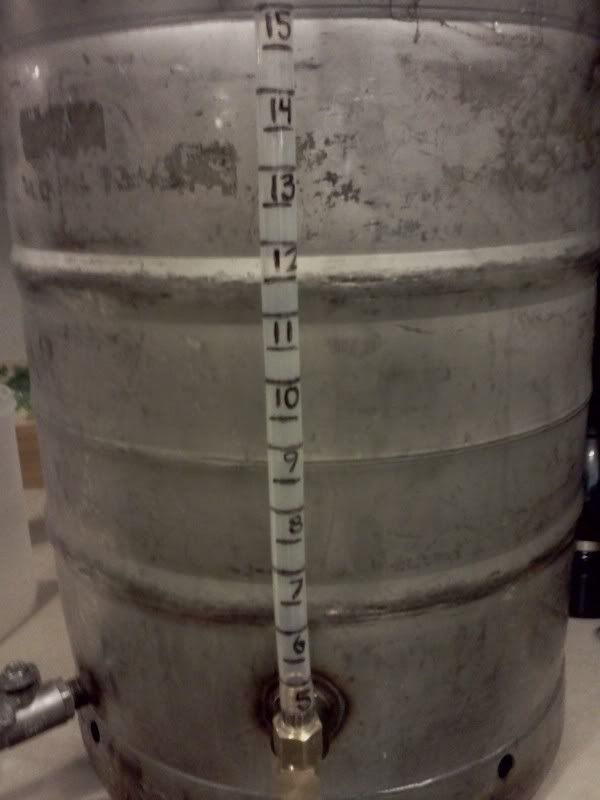
The most difficult aspects of adding the sight glass were finding the pieces to fit it with and drilling the hole at the top of the keg for the eye-bolt. I was trying to fit this keggle with a sight glass for as cheap as possible. The cheapest way was a nylon 1/2" male thread to 3/8" barb elbow, but that won't work with the boiling wort, so I had to go with brass, which doesn't have such a piece. This lead me to make a piece from two separate pieces, which is still difficult, and more costly. I ended up getting a brass elbow 1/2" male thread to 1/2" male flare, and a 1/2" female flare to 1/2" barb. This made for an easy addition with a little plumbers thread wrap to make the seals water tight (I didn't initially add this and then had to pull it all apart and add it after it leaked). I then added a length of 1/2" high temp vinyl tubing, and attached it through an eye-bolt to a 1/2" barb to 1/2" solder fitting so that it is opened at the top to avoid a vacuum in the sight glass.


Installing the eye-bolt was a difficult feat. I had numerous sizes of drill bits and planned to step it up as I went. The first, and smallest bit snapped off after making a small dent. The next size up snapped off as well. The next size up was too large to work properly. The second one to snap had broke off at the perfect spot to still fit into the drill and have 1/4" still showing, so it had no ability to snap again. After about 35 minutes of drilling with this broken bit, and stopping to dump the yeast on the conical for my Brown Ale and add the dry hops while my arms and drill took a rest, I switched out the battery and drilled for another 5 minutes and finally broke through the wall of the keg. Next I stepped it up 3 times. At this point I had one more bit left, my largest one, which was the size I needed to get the eye-bolt through. As I drilled through the keg it ate away at the bit and wore it down as opposed to opening up. I finally got the bit through, and between its work and the kegs work on it, I was able to twist the eye-bolt in and throw away the bit. I pushed the tubing up through the eye-bolt which had a nut on both sides of the keg to keep it in position, and then I pushed the 1/2" barb to solder fitting down into the tubing and through the eye-bolt which made for a very snug fit. Just for good measure I slid a hose clamp up the tubing and attached it under the eye-bolt to ensure proper fitting. I pulled the hose taught, cut it to the proper length to fit on the elbow to hose barb fitting, and then attached it with a hose clamp.


After an over night check for leaks, I calibrated it the next morning. I added a gallon of cold (hot would 1) be a waste of energy, and 2) have a higher volume since hot water is expanded and thus makes for a slightly higher volume) water at a time until it showed inside the tubing. It didn't show until 5 gallons, which will be fine for final volumes, but will not help figure out my first runnings and ensure that I have the correct sparge water, so I will be measuring quart-by-quart up to 5 gallons on a wooden dowel that I have so that I can measure my lower volumes accurately as well. After I reached the first mark, I measured out 1/2 gallon of water at a time and added this to the keggle, marking every full and half gallon on the vinyl tubing, all the way up to 15 gallons.


This sight glass will now let me accurately know how much wort I have collected from the mash, and how much I have post boil and chilling so I know how much I lost to evaporation, and once I move it into the fermenter I will know how much I lost to trub, hops, and keggle dead space (keggle volume minus fermenter volume).


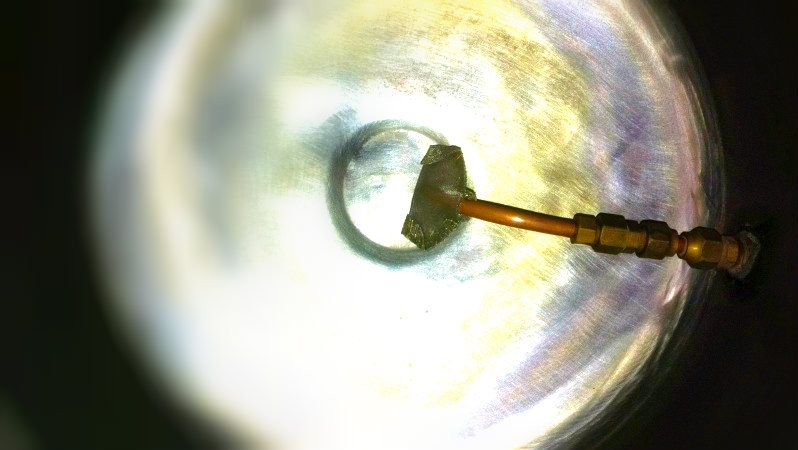
For getting the wort out of the keggle into the fermenter I fit the keggle with a pick-up tube and hop taco. The pick-up tube is a length of 3/8" copper tubing that curves down towards the bottom and through vaccum force will draw all the wort from the keggle through the ball valve into the fermenter. The pick-up tube is attached to a 3/8" female flare to 3/8" compression fitting. This initially screwed onto a 3/8" male thread (into the keggle ball valve) to 3/8" male flare, but on my Brown Ale it lost its vacuum. The way that it originally was set up didn't work well since it was attached to a hop taco (more to follow on how to make one) which makes it difficult to turn and remove, and if it is not connected perfectly the pick-up tube could be pointing up or side ways instead of down. To fix this issue I added a 3/8" female flare to 3/8" female flare piece that allows the flares to free spin on their own until tight. Now it is fit to the pick-up tube and free spins onto the keggle fitting allowing the pick-up tube and hop taco to stay in the position they should be while I spin the other flare onto the threads and tighten which gives me perfect position and seal, and ease of removal for cleaning.


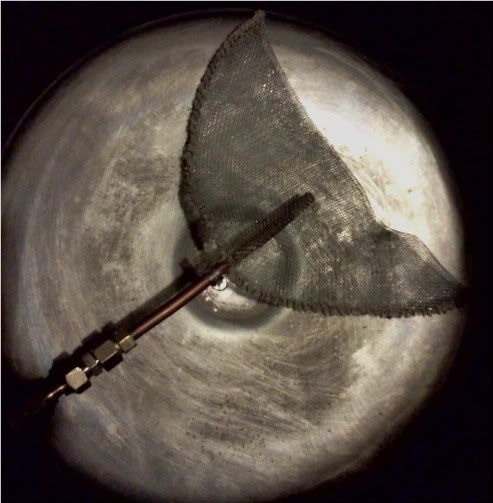
The hop taco is a mesh screen that slides over the end of the pick-up tube to keep hops and even some trub from clogging the tube or going into the fermenter. To make it I bought a stainless steel strainer and removed the mesh from the frame. I then folded this in half and "sewed" it closed using copper wire, stainless steel wire would have worked easier and what was supposed to be used per the instructions from the creators, but I couldn't find any and was in a rush so I used copper. I "threaded" the wire through the mesh and pulled tight using needle nose pliers. I left an opening in the top middle for the pick-up tube to slide inside. I also put a few short pieces of copper wire through this section and left them dangling so I could use a hose clamp to keep the hop taco from sliding off the pick-up tube.

UPDATE 12/3/2012: NEW HOP TACO DESIGN

Monday, September 26, 2011

Primary Fermenter Turned Bottler

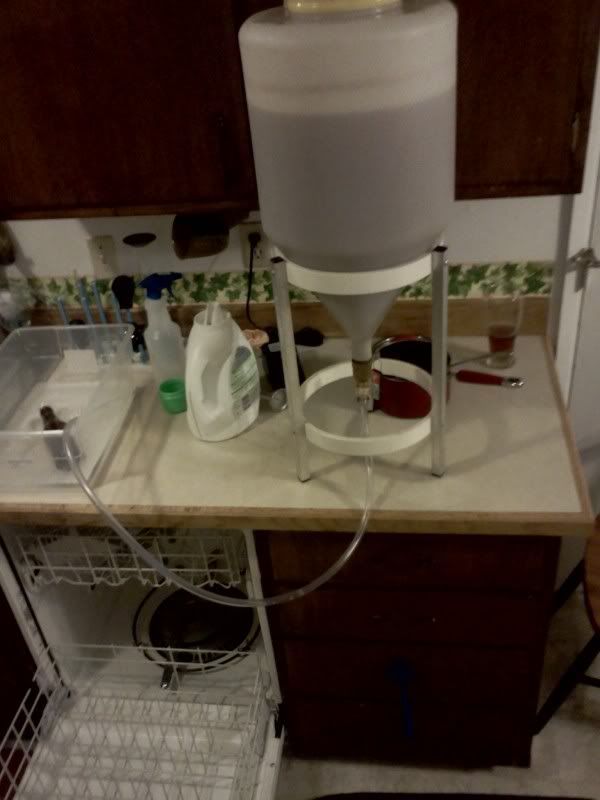
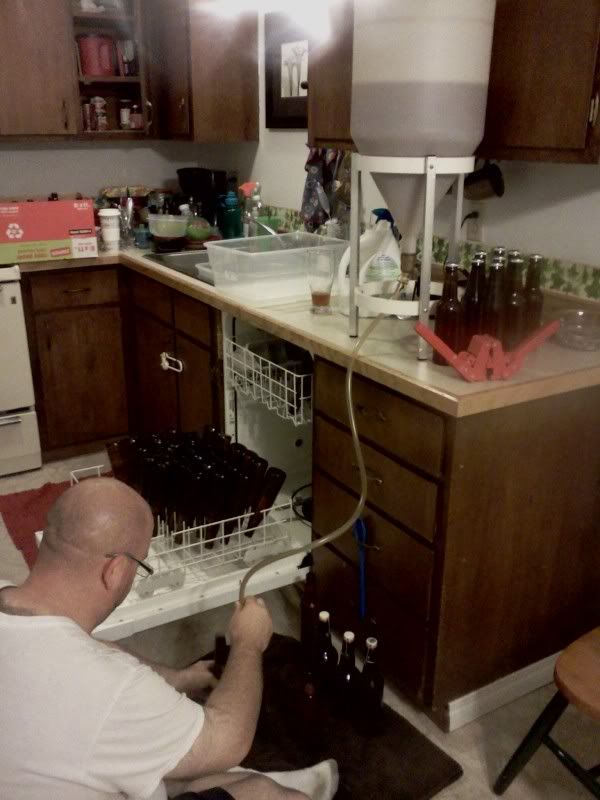
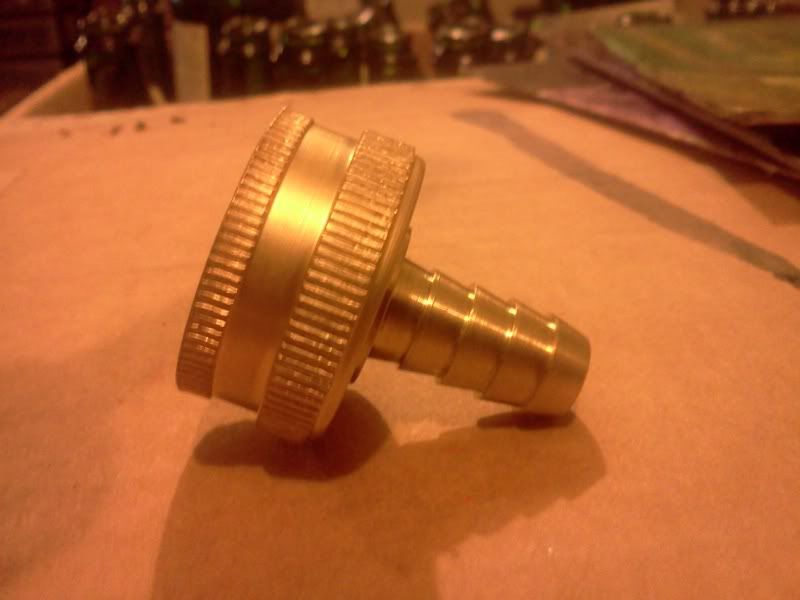
In previous posts I have talked about the "new" conical that I scored from the guys @ VV&B, and some tweaks I had made to it. This weekend I took a stab at using another function that I equipped my conical to do. When I was piecing together the parts to fit the conical with, I bought a 3/4" female hose thread to 3/8" barb adapter to attach to the ball valve for transferring the beer since the ball valve would allow too much beer to flow at once, and it would just spew it causing tons of splashing and aeration. Another possibility for this use is to attach a bottling wand to the transfer hose, and bottle directly from the primary conical fermenter.

After opening the ball valve and removing the trub and yeast collected at the bottom of the cone (3 pint glasses worth), I added my priming solution directly to the fermenter and mixed it in well with a sanitized slotted spoon. We (my wonderful wife always helps bottle, and I am grateful for it since she is amazing with the capper, and I am not) then began bottling directly from the fermenter. The first bottle was a flop as it had quite a bit of yeast in it, but from that point on, it was smooth sailing. And in the end, I only had to clean the fermenter which I would have to do anyways, no extra equipment... no bottling bucket to clean. We will see soon how well it worked once I can taste a bottle of my Fresh Hop IPA, and see how much yeast sediment is in the bottles, and how it carbonated. So far it looks about normal in the bottles.

Friday, September 23, 2011

Conical Update

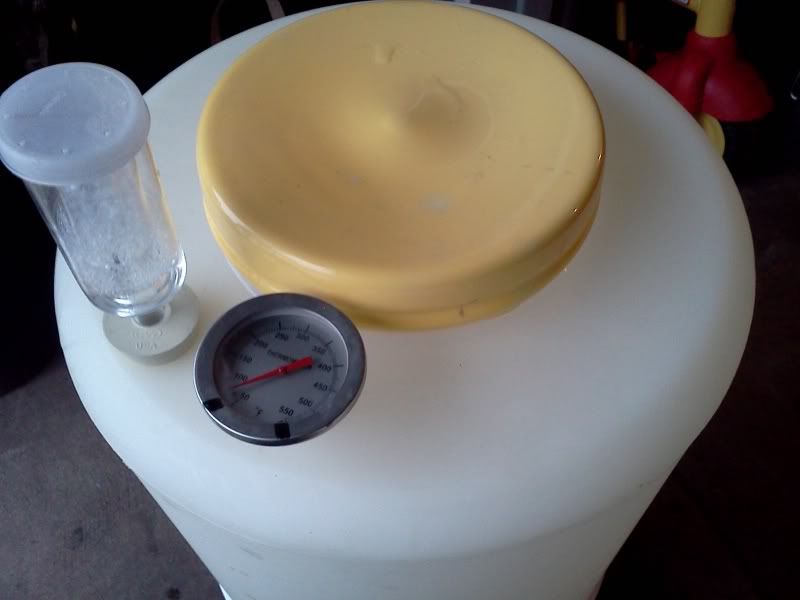
A few weeks ago I got a conical fermenter and assembled it to brew my Mild. It worked fairly well except that there was no way of knowing the temperature of the fermentation with out removing the airlock to insert a thermometer, which defeats the purpose of a conical to keep oxygen out of the beer. This past weekend I brewed a fresh hop beer with 1# of wet Simcoe hops, and 1# of wet Citra hops in the last 15 minutes of the boil. While that was cooling I cut a hole in the top of the conical to fit a small rubber bung, and forced (quite difficultly) a thermometer through the bung into the fermenter. This will give me the ability to know the exact fermentation temperature of the beer inside the fermenter. Now I just need to get a different thermometer since my spare only reads in 5 degree increments as opposed to 2 degrees like my other one, meaning that 71F and 74F look almost the same, yet are worlds apart in the world of ale fermentation. Next up is a sample port so I can keep the system fully closed until packaging or secondary additions, and then a stationary insulated chamber for temperature control.

Monday, August 29, 2011

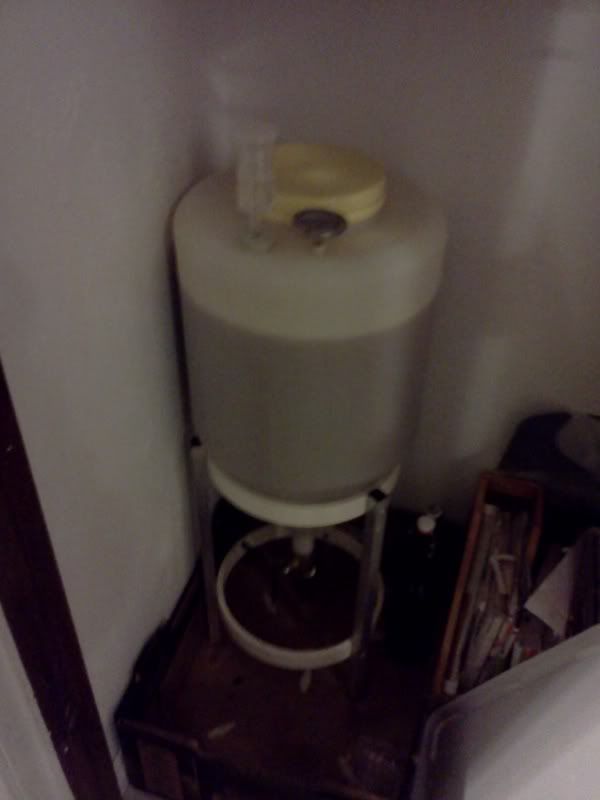
Conical Fermenter

Oxygen wreaks havoc on a finished beer. It will stale the beer and make it taste like wet cardboard. When using a typical carboy, bucket, or Better Bottle (PET plastic carboy), you have to rack (transfer via syphon) the beer out of the container into a new one to remove the trub (the globs of matter from the boil), hops, or yeast. Some beers need longer bulk storage to age and it is best to do this off of the yeast; once the yeast are done fermenting if they stay in the beer and under pressure at room temp they can die and autolyse spewing their innards into the beer wrecking it. It is also advantageous to remove the beer from the yeast when you Dry Hop (add hops to the fermented beer for fresh aroma); yeast still in suspension can grab some of the oils from the hops and take them out of the beer causing the Dry Hops to lose some of the desired effect on the beer, and the same goes for adding fruit or spices. Whenever you transfer the beer from one vessel to another you expose the beer to oxygen (the second container is full of it). Then, when you transfer from the secondary to a bottling bucket you expose it again.

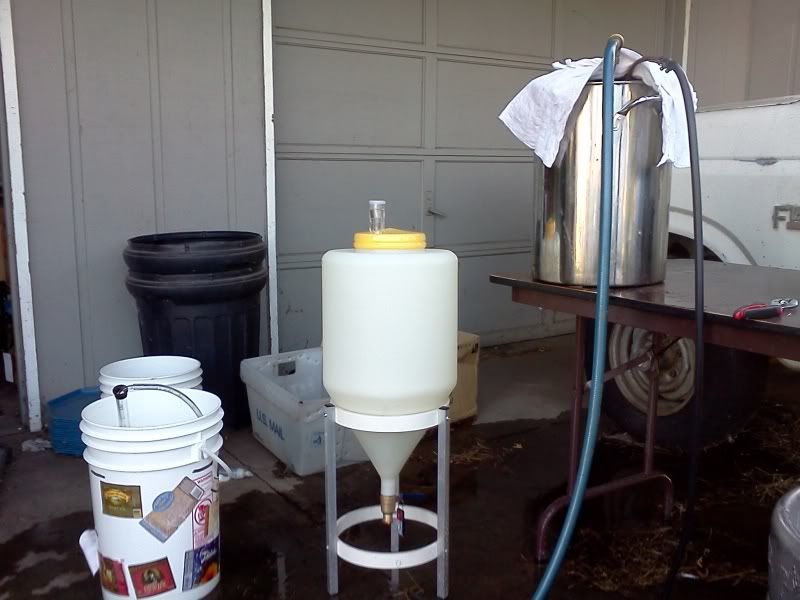
A conical is another type of fermenting vessel that is typically used in the brewing industry for different reasons. One huge advantage of a conical is that when it is fit with a port at the bottom you can keep the fermenter as a closed system, avoiding the oxidation you just read about above. In a (sanitized) conical, you add the wort after chilling, pitch your yeast, and "seal" the vessel. During fermentation the yeast produce CO2 which escapes the system via a blow off tube or air lock, and it pushes any oxygen in the vessel out with it. Once fermentation is finished the vessel has no oxygen in it to damage the beer. To remove the trub, hops, and/or yeast, you open the port at the bottom of the vessel allowing it to flow out, and then reseal the port once it is cleared. The vessel is still oxygen free, and it is now free of the yeast and trub as well. At this point you can add your fruits, hops, spices, etc. to the vessel through an opening in the top and then reseal it; the CO2 layer on top will help to protect from too much oxygen getting in when you open it (much more than moving an entire 5 gallons into a 5 gallon container of air).

Once your beer is done and ready to package, you can drain it from the bottom of the conical into a keg, or bottling bucket, or, as I hope to do, add the priming sugar to the beer in the vessel, gently stir, and then attach a bottling wand to the port and bottle from the fermenter itself.

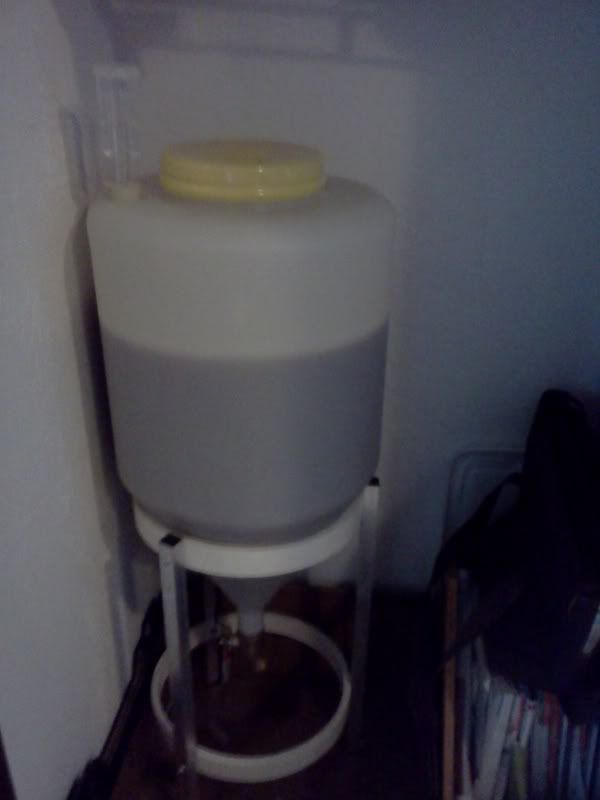
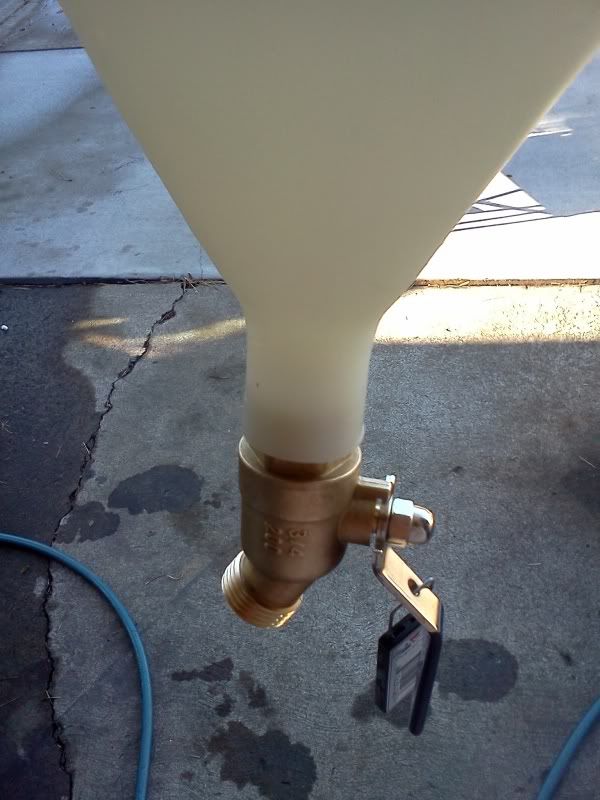
All this to say, I scored a conical from the home brew shop last week, and it is currently holding the Mild I brewed over the weekend. The conical was just the vessel itself, and I had to buy the fittings for it. I went to Lowes and bought a brass ball valve hose bib for $9, and then also bought a 3/4" female threaded hose end to 3/8" barb adapter so I can attach it for bottling or transferring the beer. For running off the trub and yeast the ball valve is good as it has a wider opening (1/2") so nothing will clog. But I don't want the beer flowing at that unimpeded rate (causing excessive splashing, thus defeating the purpose of avoiding oxygen), nor do I want it passing through a tube the size garden hose, which is why I have the adapter, I can now control the flow through the ball valve and the narrower tubing.

One problem I have found is that the thicker wall of the plastic conical makes it harder to know what temperature the fermenting beer is at. At this point I have been removing the airlock and inserting a thermometer a few times a day. To solve this problem I am going to drill a hole in the top of the vessel (between beers of course), insert a small rubber bung and pierce a thermometer through it into the wort so I can have a constant reading on the actual fermentation temperature. I also need to find some way to control the temp on it since I can't put it into a water bath and add ice as I could with my Better Bottle, bucket, or carboy, which may cause a few problems with this beer since it got up to 75*F and the yeast is only supposed to go to 72*F. I would also like to add a sampling port to the side of the conical so I can take taste tests or gravity readings without opening the vessel to air. I am also looking for a tallish cupboard that I can drill a hole in the top of to hold the fermenter, this will allow me to keep it higher and more stable (away from my son who would love to play with it), and to put another vessel under it if needed (bottling bucket, glass carboy for souring, bottles, etc), and if i get a double level cupboard I can attempt to temp control the fermenter.