Showing posts with label Hop Growing. Show all posts

Thursday, September 19, 2013

Technique: Packaging Hops

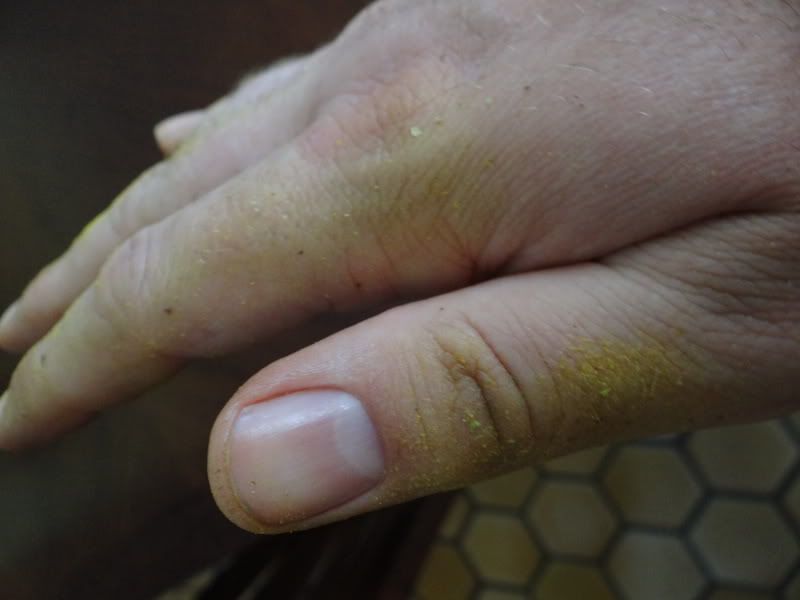
Lupulin On Hands From Pushing Through Funnel
Previously I posted about how to build an oast for drying hops.  Once you have your hops dried, it is necessary to package them for future use.  In the days before refrigeration, hops would be stored in the open, and would degrade quickly.  Many places, including home brew shops and breweries, keep there hops in large tight packed bails which they get them from hop growers in.  As needed they will break off chunks to brew with, or in the case of home brew shops, to package.  While not in use, these hops are stored in freezers, but still open to atmospheric oxygen, which causes hops to degrade.  In a brewery situation this is not as bad as hops are used up quicker.  In a home brew shop they move much slower and therefore begin to oxidize.  Pellet hops are easier as they come in 11# vacuum sealed mylar packaging and you can go through 11# in a brew house much quicker.

The best way to keep hops at there freshest is to flush them with inert gas like nitrogen, and vacuum package them in mylar bags that are then stored cold.  Of course, for homebrewers, this is a bit excessive.  For us, the best option is to vacuum seal them and store them cold, the colder the better.  Some people try to cram as much into a vacuum seal bag as possible, packaging them in 1# blocks.  This at first seems like a great idea, but as I thought about it more, I changed the way I packaged hops.  I was influenced by Matt Brynildson from Fierstone Walker Brewing, and a local brew-farm.  Matt talked about how Chinook taken out of the package and left exposed to oxygen in a refridgerator awaiting the late boil additions goes from pine bomb and wonderfully fruity to cat pee in a very short time.  Our brew club also had the hop guy come talk last month from a local brew-farm.  They grow their own hops, chiles, spices, and even some grains for use in their beers.  He was talking about how they have started packaging their hops in recipe quantities.  So if they know their recipe uses a total of 3# of Cascade in the boil, they package as many 3# Cascades as they need for the year.

Monday, September 16, 2013

DIY: Hop Oast

One of the more substantial cost for brewers from batch to batch is hops, especially if you want to brew lots of American styles, IPA and Double IPA in particular (as well as India Session Ales, Black IPAs, Red IPAs, etc.).  The other large cost is yeast, but with some effort, you can always purchase this once and repitch the yeast to keep costs down.  Finding a way to keep costs down on hops isn't as simple.  Though some brewers have supposedly dry hopped a beer and then put those hops into the kettle for bittering another brew, I wouldn't ever do this as you don't know what kind of bittering you will get out of it, and what do you do with the hops between brews to ensure they don't spoil?  

There are other, more effective ways to save money on hops.  One way that I have enjoyed is to get some hops in bulk when they are around at a great price.  I was able to get in on a group buy last year for Simcoe and Mosaic, 1# each, $10/#.  I also got a pound of CTZ for around $12.  These prices are great for the varietals, but there is still a much cheaper way to get great hops.  Grow them.  I am not going to tell you how to grow them here; there are many good resources both online and in print on how to grow them in your yard.  This post is what to do with them once you have grown them and established they are ready to pick (another topic I am not going to discuss here).  This is how to build a Hop Oast for drying them, then a secondary post on how to package them for storage and future use.

HOP OAST
Parts Needed: (around $30)
  • 7 @ 2X4X8' Kiln Dried Fir
  • 48" X 7' Aluminum Screen Material roll
  • 3" Wood Screws (56)
  • Staple Gun
  • Box Knife
  • Cordless Drill

Friday, June 21, 2013

DIY Project: Hop Sprinklers

Last year I tried running a drip irrigation system on my hops.  I continually blew the cap off the end due to the pressure.  This year I wanted to install something a little hardier to water my hop yard.  My pastor is moving away and had a lot of 1" PVC pipe he was getting rid of and I was able to get nearly 30' of it.  My original design was to just run 40' and drill 1/16" holes in front of the hops and leave it above ground.  The UV light from the sun would eventually degrade the PVC, but the frost would burst it if there was any water in the line once Winter came.  

Wednesday, August 22, 2012

Hop Harvest Pending

Sorry for the long break from posting.  I had been in California for two weeks as my mother suffered from cancer and was taken to glory.  I don't have anything in the works at this time outside of an impending hop harvest, so I thought I would let you all enjoy some great shots of my hops awaiting the final stages of maturity, as well as a shot of some seeds from my Brewer's Gold plant.


Wednesday, July 18, 2012

Update: Hops, Promotion and New Schedule, Vacations

It has been awhile since I last posted, there was a nice vacation to Portland with family which included a couple visits to Full Sail's Pilsner Room which was a short walk from the hotel, dinner at Burnside Brewing, as well as lunch at Bridgeport, and a trip to Cascade Barrel House and Belmont Station.  We also had a church campout where, surprisingly, my pastor who always complains about the amount of hops in Pacific NW beers tried my DIPA with 1# of hops in 5 gallons and enjoyed it.  I also got a nice promotion at work which brought new hours and much more work.  The new hours are nice, they give me much more time with the family in the afternoons, and open up the potential for going home after work and getting in a full brewday which will keep weekends opened.  I can even bottle in the evening and not have to worry about finding time on a Saturday morning.

Speaking of brewing and bottling.  I have a second edition Hefeweisse in the works soon, as well as an English Bitter.  I will be bottling the Lambic I brewed last September from the yeast on Blackberry skins in the next week or so.  Gave it a taste this morning and it is very nice, fruity, clean lactic tartness, no acetic, maybe a little high on the oak, but I like oak character, so I am okay with that, no oxidation, slight funkiness.  


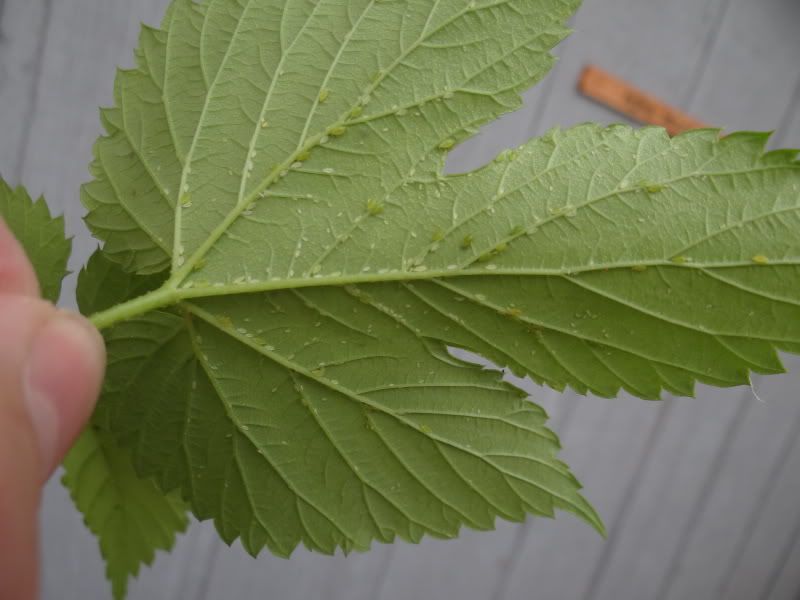
The new hops are coming along quite nicely with much better growth on some of my new first years compared to last years Chinook, which has already surpassed the height of the trellis and I am having to get creative with how to keep it out of the other varietals next to it.  I had quite a bit of Aphid issues this year, and the mild soap spray I used killed them all off, but scorched some of my leaves as well.  I had a buddy who grows lots of hops (I got most of my rhyzomes from his hop yard) come by to take a look at the plants and he recommended fertilizing and longer deeper waterings.  Since giving longer waterings and adding some Miracle Gro the plants are looking much healthier.  I've even got some healthy side arm growth going on my big plants.  All in all it is looking to be a good year of growth; hoping for a decent yield on my Brewer's Gold, AlphAroma, Cascade, Shinsuwase, and maybe even Blisk and Cerara.  Chinook should be good this year.

Tuesday, April 24, 2012

The New Hop Yard

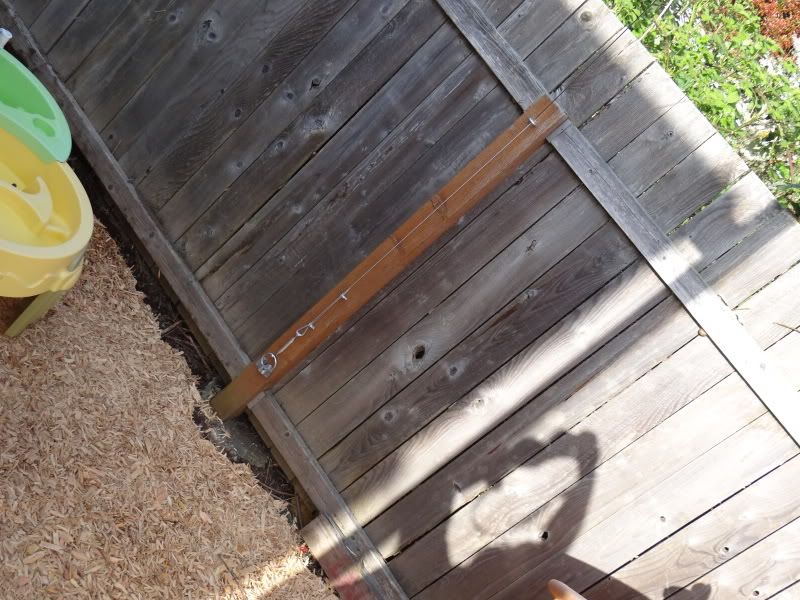
Last year I grew a single lowly hop plant, Chinook, and collected a whole 21 cones.  First year, potted, lacking knowledge concerning nutrient deficiencies, all of these culminated in a weak first year.  But now we enter a new season, new plants, new knowledge, new trellis system.  Last weekend I cleared out the entirety of our backyard from all forms of plant life.  We dug down the whole thing a good 3 - 5 inches.  We brought in Playground Chips and laid it on thick over landscaping fabric... except for one strip of land about 2 foot wide by 24 foot long.  It was here, along the back wall, in full exposure to the sun that I erected the hop trellis.  On each end, I dug a hole 20" deep by about a foot wide into which I dropped a 14' 4X4 treated post cemented into a 2 gallon bucket.  The cement helps to make it slightly more permanent as well as add weight for an anchor, and putting it in the bucket allows me to dig it up and move it if/when we buy a house.  At the top I threaded an eye-bolt screw to attach my wiring.  I ran a length of 3mm Aircraft Cable from one eye-bolt, through a hole in the top of a 2X4 sunk into the ground between the posts for mid-way support, and through the other eye-bolt, down the post to a third eye-bolt where I attached it via a turnbuckle.  From the same eye-bolts at the top, I ran more cable to the fence posts where it went through an eye-bolt at the top of the post down to a ring attached to the bottom where it connected via another turnbuckle.  These guy wires pull the posts outward to anchor them so they don't collapse in towards each other under the weight of the hop plants.  They also pull them back some since the posts are 5 feet from the back fence and the fence posts are 8 feet.  This pulls the posts against the overhang of the house, thus anchoring the post in all four directions.  They can't fall back because the house is there, they can't fall out because they are anchored to one another, and they can't fall forward or in because of the anchors to the fence.  The space provided allows me to plant 7 hops in between the posts, and an extra 2, 1 at each fence anchor to grow up the anchor wires and along the fence, giving me room for 9 varieties.  I then back filled the holes to ensure stability.  

Next I dug out the top 3 inches of soil across the top of the entire area and added about an inch and a half of fresh planting soil from Lane Forest Products.  I also took a pic-axe (wish I would have used this to dig the post holes) and used it to dig holes about every 3 feet that were about 3" wide, 8" long, and 6-8" deep which I filled with the same new soil and piled up on top to make mounds about 3 inches high ( giving a final depth of about a foot).  On top of this I added an inch and a half layer of bark mulch for ground cover, to keep weeds out, and to keep nutrients like Nitrogen in (something I didn't do last year).  I transplanted my Chinook from the Rubbermaid I used last year and put it to the outside edge of the trellis.  I underestimated the depth and size of the roots that these things put out.  I thought it would have some roots around it being a year old, but they went all the way through the 25 gallon Rubbermaid and even out the hole in the bottom.  I also bought a healthy rhizome from Falling Sky of Brewers Gold (mother variety to many of the high alpha American hops, with decent bittering [~10%], and aroma/flavor of spice, fruit, resin, and Black Currants).  The rhizome was shaped like a boomerang with shoots on the top of one end and coming from the bottom on the other with flip-flopped roots as well, so I cut it in half and planted them each roots down, shoots up, facing opposite ways in the same hill, and covered with soil and mulch.

I will be adding quite a few more varieties (see here for more info on these hops) along with these two, such as, commercial American varieties Cascade, Centennial, and Santiam, old-school New Zealand variety AplhAroma, French Tardif d' Bourgnone (Strisselspalt and Saaz like), as well as 2 experimental varietals: American high alpha, high aroma Blisk and the Continental / Saazer type variety Cerara.  There is also a Japanese variety called Shinsuwase with a very perfumey nose that I might try to plant as well (at the loss of another variety).  I will of course continue to update the progress of the hop yard with lots of pictures and hopefully some helpful hints on how to maintain, feed mid season, trouble shoot, harvesting and drying the hops, as well as experimenting with each variety in SmAsH beers to evaluate there contributions.

Monday, August 22, 2011

Hop Update

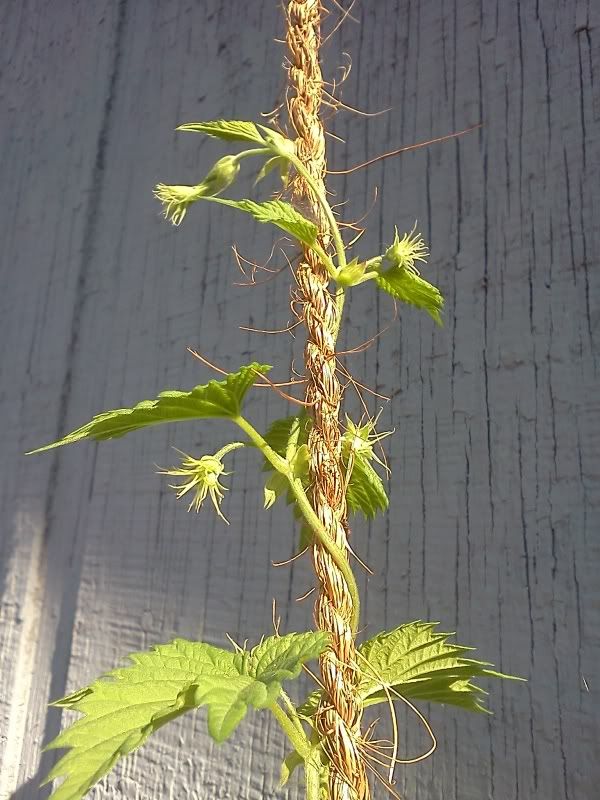
After the last update on my hops and their response to the fresh manure and manure tea (Nitrogen), I added some wood ash (Phosphorus) a week ago that we got while camping and continued to give it doses of manure tea. I was showing my dad our garden while they were in town this weekend and found these while I was looking at them. The shoots with the tiny spines coming out of the blooms are called "hop burrs", and these will soon become full hop cones. It is very exciting to see not just the new vegital growth from a few weeks ago, but new hop growth as well. With the already existing cones, and these new ones, the harvest will be up to 20 cones now.

Thursday, August 11, 2011

First Year Growing Hops

I planted a single rhizome of Chinook hops this spring. The soil in the backyard of our rented duplex is about 3" deep of straight hard, dry dirt, and compact rock for feet under it, so the hops are, at this point, in a 20 gallon Rubbermaid plastic storage bin. Planted it in brand new Nitrogen rich soil, veggie boost compost and such from Lane Forest Products. The shoots came up and I trained them onto coconut twine headed up to the peak of the roof and a screw in the wall along the south wall in the back yard. They get great sun. One bine took off like a rocket ship, and the other three have stopped around the 3' mark. I began watering well in June as the heat kicked up and the rain stopped. After a while the plant stopped growing, the leaves were a pale yellowish green, and the bines were a magenta hue. Having never grown hops, nor seen them, I didn't realize that these were all signs of Nitrogen deficiency, that is until I got the book The Homebrewer's Garden. After figuring out I need Nitrogen in the soil, I went back to Lane Forest and got the manure mix. I worked some of it into the top layer of soil, piled more on top and gave it a good watering. I also placed about 5" of manure into a 2.5 gallon bucket and let it "ferment" for a few days in the sun. I have been feeding the soil with this for a few days now, and the hops look great.

The bines are a nice green color, though there are some red streaks going through the big one. The leaves are a deep green again. There are even signs of new growth as new lateral growth beginning. So far I have about 17-22 hop cones, and it looks like I might have more on the way, but I’m not sure since, again, this is my first year so I have no clue what I am looking at. A buddy at Valley Vintner & Brewer, my local homebrew shop said that with the growth of the hops, I should be adding phosphorus as well, so I will be getting my hands on some wood ash soon. I will of course update more as I go.