Monday, December 12, 2011

Brewing Better Beer by Gordon Strong

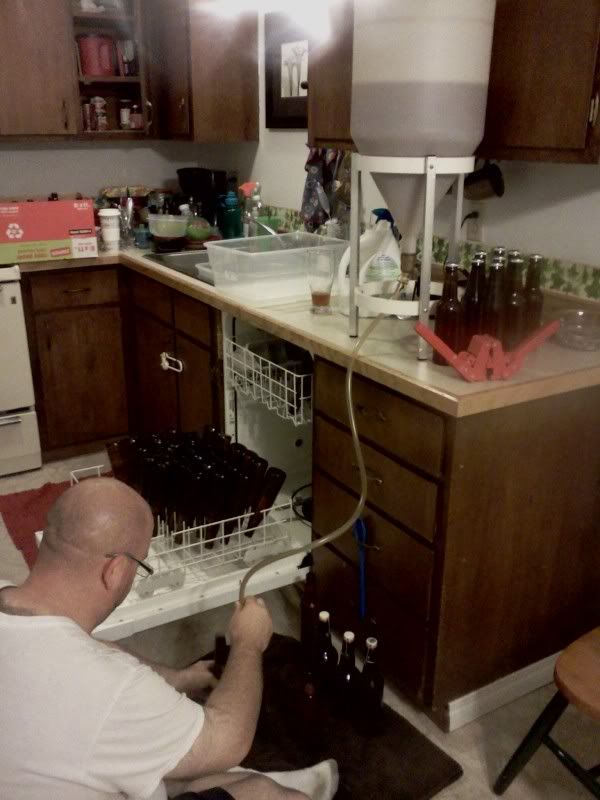
Thought it would be a good idea to pull some of the little gems and tidbits that I am gleaning from Gordon Strong's book Brewing Better Beer.

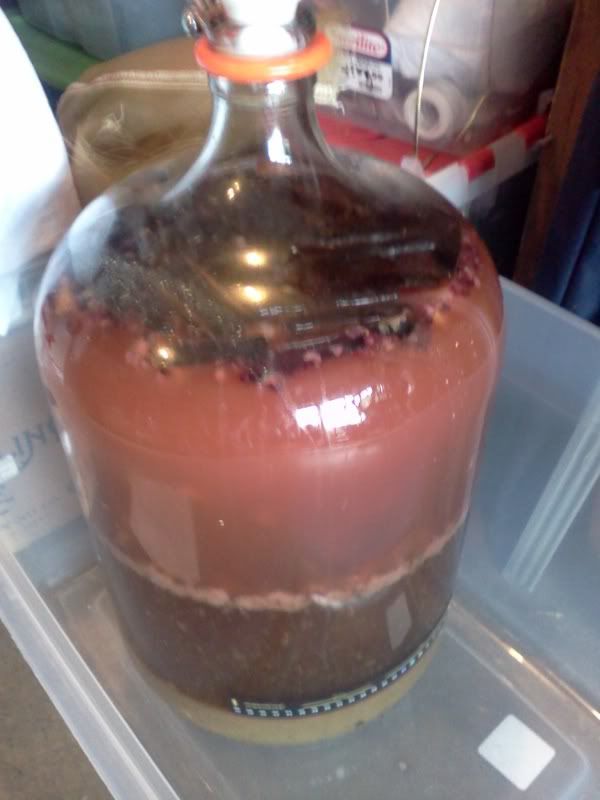
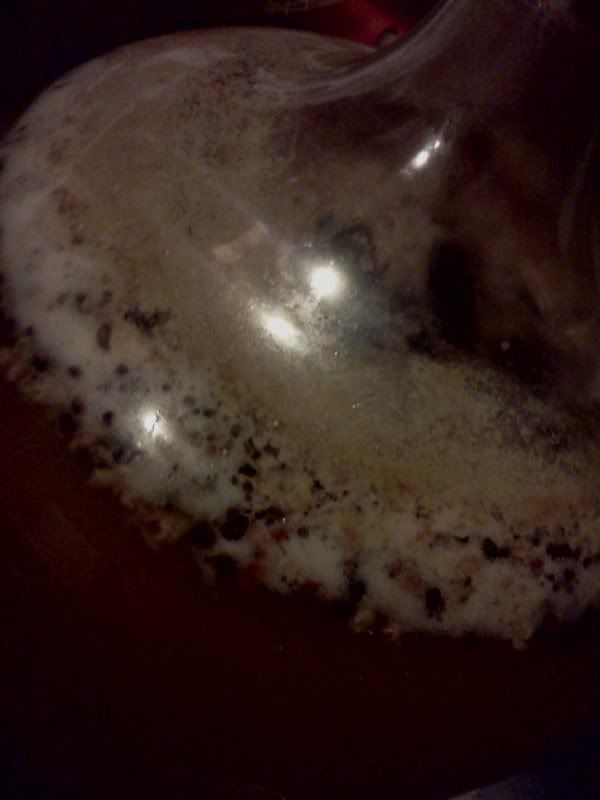
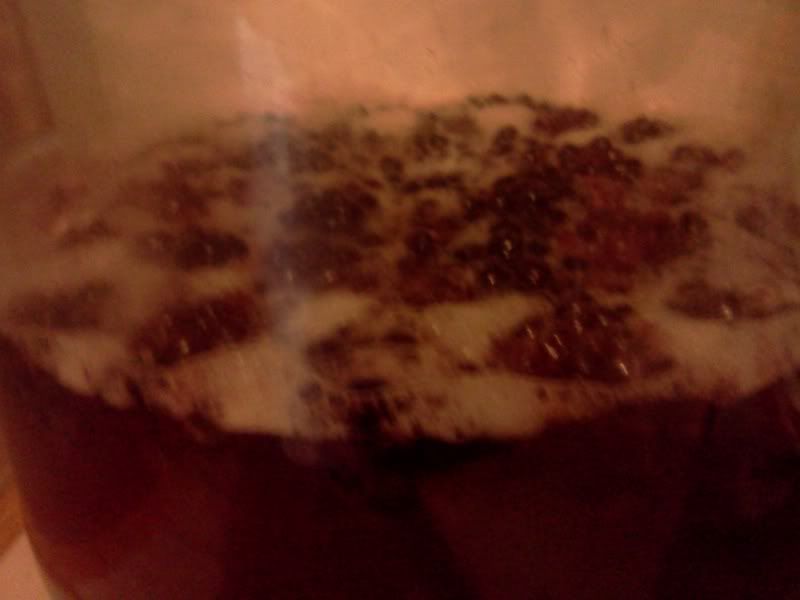
One thing that he points out that is good to know, and I wish I had known before I brewed my massive stout a week ago, is that when brewing a beer with dark grains, they do not have to be in the mash. Dark grains are pre converted, so the sugars are easily accessible and do not require mashing to convert (crystal malts work the same way). The character is also easily imparted without mashing as well. Strong gives 4 ways to use dark and crystal grains in a beer without mashing them.
  1. Steep them in your wort after it has run off into the kettle, and then remove them and boil as normal. Doing this will still impart some of the harsh and astringent bitterness that comes from the dark grains, so this method is good for stouts.
  2. Add the grains to the mash after it is complete, and stir them in, then lauter (drain) and sparge. This will impart all of the desired character, and the harsh and astringent just like steeping (effectively this is steeping in the mash instead of in the kettle).
  3. Cold steep and short boil. With this trick you will steep the grains in cold water for 24 hours, then, after removing the grains, you will give it short boil to sanitize before adding it to the fermenter (after cooling, of course), or, if you plan ahead, you can add the cold steeped wort to the kettle the last 5 minutes of the boil and then cool and move with the rest. This will add a little bit of the harsh and astringent character, but not much since it is a very short boil.
  4. Cold steep, no boil. In this method, you cold steep the grains for 24 hours, remove the grain, and then add it to the fermenter during fermentation, relying on the pH of the fermented beer, and the alcohol to inhibit any bacterial infection.

Using these would greatly benefit my mash. In a big stout like the one I just brewed, I would need lots of kettle salts to buffer the mash and ensure the mash pH is prime for conversion. If I were to leave the dark grains (chocolate, Carafa, black patent, roast barley) out of the mash, the pH would have been perfect for conversion, then adding them in afterwards and running off, would have given me all the character I was looking for without needing to add mash salts.

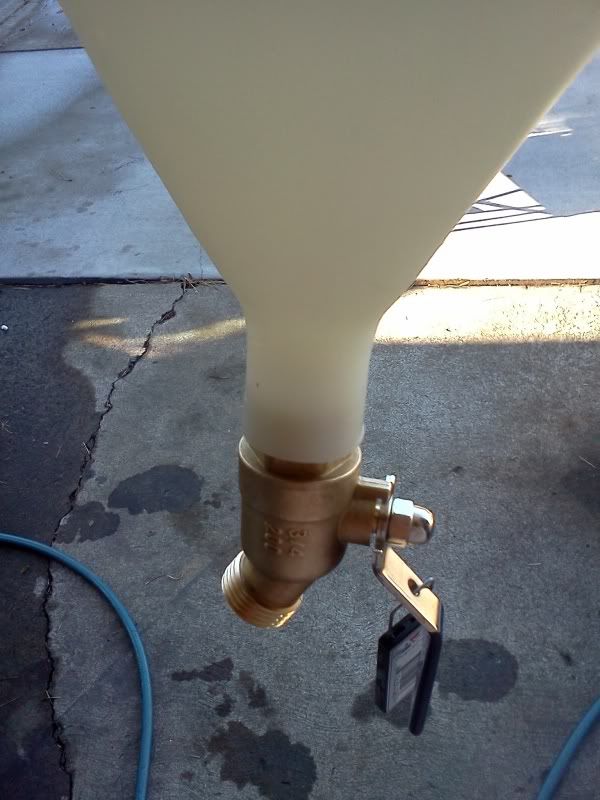
Another thing that I picked up from the book is that adding rice hulls to the mash will help even out the temperature in the mash. At any given point in the mash, the temperature can range quite a bit. On this last beer I brewed (a 10.5% Imperial Stout) one corner of the mash was 151*F, while the rest of the mash ranged from 142*F to 145*F. Using rice hulls would help the temp to even out consistently around the entire MLT.

Concerning boil overs, bittering hops, and hot break, Strong recommends waiting 15 minutes after the boil starts to add the hops to help keep boil overs at bay, or adding the hops before the boil. The reason for this is that as the wort begins to boil it is releasing oxygen that is in suspension, but this will be accelerated if a large dose of hops are added causing nucleation sites. Also, the tannins in the hops can facilitate boil over.

There were many other things that were interesting and helpful for brewing. In the section on finishing beer, he talks about different ways to correct your beer if it hasn’t finished as you’d liked. For flavoring he talks extensively about blending. Using a fairly dry, clean beer in a sweet beer can help to balance it and dry it out. Using a slightly sour beer can help balance a flabby beer, as can adding lactic or phosphoric acid, but too much will make the beer watery and sour. Some things are unfixable like soured infections and oxidation. If the maltiness or bitterness do not pop as you were wanting, he also talks briefly about adding Gypsum or Calcium Chloride after the fermentation.

Another beneficial section is on balance in beer. Sweetness and bitter balance each other. Sweet and sour balance each other. Sweet and alcohol balance each other. Sour and bitterness clash, as in a local brewer who decided to try his hand at souring one of his beers but used his Winter Warmer and made a train wreck. He states that dark grains and citrus hops clash, though I am not sure I agree. I did a Black IPA with Cascade and Simcoe hops, i.e., Grapefruit & Pine Sap, and it worked great, and I have had quite a few Black IPAs that use many of the citrusy and fruity hops. In a stout or porter this may be true, but the dark grain character just doesn’t come through on a Black IPA.

All in all, some of the stuff is fairly common sense, like changing only one thing at a time when trying to dial in a recipe. Others, as I have already stated are very helpful and beneficial. He also stresses learning how to critically judge beer so that you can find issues related to style, balance, infections, off flavors, oxidation, and the like. The more I critically assess commercial beers, the more I feel comfortable assessing where I need to make changes in my own beers.

Wednesday, November 16, 2011

Recipe Calculator: Using My Efficiency Experiment Results

As stated in some of my previous posts, I have been having issues with my efficiency. I had found through an experiment that I am getting 82% efficiency in my Mash Tun (MLT), and that my falling efficiency is in my losses to hops and kettle. I took the information from my system and essentially built my own brewing software in Excel.

First I calculated my system volumes. I can input the desired volume I want in my fermenter, and it will account for hop losses (from where I input the hop additions), keggle losses, and boil off (based on length of boil), to calculate the pre-boil volume. It will also calculate the volume of sparge water to add based on 1.5qts/lb (water-to-grist ratio), and then for absorption losses giving me the needed amount of sparge water as well. I also configured the spread sheet to calculate the strike water temperature based on the input mash temp, and the total volume used in the MLT to ensure that I don't overflow it.

Next I set up my recipe calculations. I input the grain type, weight, lovibond (color), and the PPG (points-per-gallon: the maximum gravity points that can be obtained from 1# of that grain in 1 gallon of water @ 100% efficiency). With this information, the spread sheet will calculate SRM color (thanks to Beer Smith Blog for the calculations), OG, and percentage of each grain based on contribution to gravity as opposed to percentage of weight. The OG is based, not on final fermenter volume, but on post boil volume so that no matter how many hops there are, or how much is left behind in the kettle, my OG will remain the same, based on my extract efficiency instead of brew house.

The next step in my recipe calculations is IBUs. I configured the spread sheet to figure my IBUs based on the AA% (alpha acids) of the hop added, the weight in ounces, and the time in the boil, and factoring for gravity. Big thanks to cmac1075 on BeerAdvocate for allowing me to use his calculations in my spread sheet. I also set it up to factor for the real OG and volumes based on the actual brewday as opposed to the recipe so I can know what my real IBUs are for the batch (although I have no real way to know my IBUs w/o having my beer tested.) The hop formulation also effects the OG since as the amount of hops goes up, so does the post-boil volume (to account for hop absorption), thus lowering the OG. This is easily adjustable since another 1/2# of grain should easily fix the lost gravity points.

I also infused the Bru'nWater spread sheet into my spread sheet which allows me to change my water profile based on the recipe I am creating. A few clicks and "=" and it now autofills the grains, weights, colors, etc, and then I can adjust my water. Getting all of this to work was a little tricky since Bru'nWater is owned by someone else, so I couldn't just hit "=" on there formulated spaces to make them appear in another spot on my spread sheet, so I had to use some of their formulas to move the outcomes, but it worked. I was able to take the outcomes which are in grams to the tenth (which I can't accurately measure) and use the info from John Palmer to convert it to teaspoons. With some more help from a few more BA's I was able to calculate the sodium content in my home brew (Dr said I have to cut back on salt), and another BA told me that I can sub Pickling Lime for Baking Soda to buffer for mash pH and that will cut out the level of sodium I add to my brews.

Next I set up a "cover sheet", essentially it takes all the information compiled in all the other spread sheets and puts it in one, easy to read area that can be printed out and used to buy my ingredients or put into my brewing log book. This page lists beer name, style, batch #, brew and bottle dates, grains/fermentables, hops, strike water volume and temp w/ mash temp, mash adjustment additives in tsp., sparge volume, temp, and additives, kettle additions like Whirfloc, spices, etc, amounts, and times, yeast used, fermentation temp and length, sodium levels, calories (another Beer Smith steal), estimated FG (based on attenuation of yeast), estimated ABV (based on estimated (OG and FG), and even estimated cost. It also has a place for the OG and volumes of the actual batch, from which it calculates efficiency and brew house, and recalculates the IBUs based off of the actual numbers; then post fermentation, will calculate the real ABV based on the actual FG.

It was a major undertaking with lots of hours moving, and removing, formulating, and reformulating, scouring forums and websites, and then reconstructing again, but now, I can input my grains, hops, and yeast (all w/ accompanying information), length of boil, mash temp, and desired fermenter volume, and it will tell me strike water temp and volume, sparge water temp and volume, IBUs, SRM, OG, est FG, and est ABV. A few more clicks to adjust my water, and it tells me how many teaspoons of each addition to make.

Monday, October 24, 2011

Efficiency Experiment: The Results Show

As planned, I did my efficiency experiment this past weekend and I think I found my culprits. I double milled my malts to ensure a good crush. I mashed with 1.5 qts/lb. I ran off my first runnings and measured them so I could hit my sparge water volume perfectly. I got my pre-boil volume perfect. I boiled for an hour, and added hops on schedule and lost exactly 1 gallon to boil off which is what I wanted. I hit 80% efficiency (measured pre and post boil).

When I went to fill the conical... not even enough volume to register on my measurements (which start at 4.5 gallons.) I topped it up with a measured 1 gallon of water to see where I was at, and hit 5 gallons on the nose. I lost 1.5 gallons of wort to my hops and kettle! I had been chatting with Denny Conn about my issues as well and he said that he figures about 12oz of beer lost to 1oz of hops. I had 7.5 oz of hops (5.5 whole, 2 pellet) and that would give me roughly 3/4 of a gallon lost to hops, and 3/4 gal lost to keggle pick up tube. That brought my efficiency down to 60%.

Friday, October 21, 2011

Efficiency Experiment

As stated in a previous post, my efficiency on my last batch was shotty. I took a look at all 11 of my all grain brews and the efficiencies I've had, and they are always jumping. My first batch, a Black IPA, I got 66% from 13# of grain, using US Pale base malt. The second, an English Bitter, I got 83% from 8# of grain, Marris Otter base. The third and fourth, both Wheat beers, I got 76% from 19#, on a split batch, 65% Wheat, 35% Pils, batch 5 was a sour of the remaining wort from that mash, in which I hit (I assume) about 78%. Batch 6, a Saison, was 70% from 9.75#, Pils base. Batch 7, same day, a second Saison, 76% from 8.25#, Pils base & 25% Rye. Batch 8, a Mild, 72% from 8#, Munich I & Victory base. Batch 9, a Lambic, 75% from 11.5#, Pils, Vienna, and Wheat. Batch 10, same day, a Fresh Hop IPA, 68% from 13.5#, US Pale base malt. Batch 11, a Brown, 62% from 14.5#, US 2Row base. As you can see, there isn't any real consistency in my efficiency, so I decided I need to actually get the process refined and find my efficiency. I will be conducting an experiment to find out my volume losses and efficiency.

Wednesday, October 19, 2011

Spontaneous Fermentation Update

Awhile back I did a time line blog of the yeast starters I was making from the wild yeast and bacteria living on the skins of wild blackberries living in my neighbor's yard and from locally grown organic peaches. The brew day has come and gone, and I thought I would fill in the specifics and update on how the beer has progressed thus far.

The recipe:
6.25# Pilsner Malt (54%)
2.25# Vienna Malt (20%)
2.00# Flaked Wheat (17%)
1.00# Caravienne (9%)

90 minute boil
FW Hops 0.4oz Styrian Bobek 3.8AA pellets
15 min 0.6oz Styrian Bobek 3.8AA pellets

10 min 1.50z Cake Flour
5 min 1tsp Coriander, Crushed

Mashed 60 mins @ 152*F
Sparged w/ Boiling water

5.25 gals
OG 1.057
FG 1.002
IBU 10
ABV 7.2%


I mashed at 152*F, I was shooting for 154, but added too much cold water when I was too hot, and it cooled it down too much. I sparged with boiling water to try to extract as much sugar as possible and even some tannins as well. At the end of the 90 minute boil I added some cake flour for extra dextrins and starches for the Brett to chew on over the long fermentation. I cooled it as usual and ran it into the fermenter. I added the 2 starters to it whole, all the wort, fruit, bacteria, yeast, a couple ants, everything. I didn't aerate it since oxygen feeds bad bacteria, and inhibits Lacto growth. It looked kind of stratified until the next day as the different parts were layered, wort, trub, break material, fruit, starter, etc.


After a few days I noticed some odd activity. There was no krausen, but I had used S-Foam, and foam inhibitor, so it is quite possible that it was fermenting and not putting up a krausen. I did notice lots of little tiny bubbles shooting up and feeding a fluffy foam at the top though, and I assume this was from the Lacto working since it releases CO2. Another day later and I saw the wort churning away like any other beer fermentation, so things were going good.


I let it go for a few weeks with out tasting it, and finally on week 3 I gave it a taste. Nice, light, clean tartness, clean fermentation, no off flavors, mild funkiness, slightly fruity, not much oak character, gravity was 1.005. Quite happy with it. I tasted it again 1 week later and the oak is starting to show some; I will be watching this since I don't want it to be too oaky. If it gets where I want it I am going to rack the beer off, remove the oak, and add the beer back to the trub, yeast, and fruit for longer conditioning and funkdifying. So far I am very pleased. I even used the yeast to ferment a cider.

NOTE: This beer took 1st place in Sour Beers and won BEST OF SHOW in February 2014 at the KLCC BJCP comp.

Monday, October 17, 2011

Keggle Fittings: Hop Taco, Pick Up Tube, and Sight Glass


This weekend I fit my keggle (15.5 gal keg converted to use as a kettle) with a few things to make it easier to use. I added a sight glass, and fixed my hop taco and pick-up tube that had failed in a previous brew session. These items were not too difficult to add since the keggle I got from an ex-homebrewer was already fit with a ball valve for draining which was threaded on the inside for easy addition of the pick-up tube, and it was already fitted with a threaded female port that had a hole in it making for a simple sight glass addition.


The most difficult aspects of adding the sight glass were finding the pieces to fit it with and drilling the hole at the top of the keg for the eye-bolt. I was trying to fit this keggle with a sight glass for as cheap as possible. The cheapest way was a nylon 1/2" male thread to 3/8" barb elbow, but that won't work with the boiling wort, so I had to go with brass, which doesn't have such a piece. This lead me to make a piece from two separate pieces, which is still difficult, and more costly. I ended up getting a brass elbow 1/2" male thread to 1/2" male flare, and a 1/2" female flare to 1/2" barb. This made for an easy addition with a little plumbers thread wrap to make the seals water tight (I didn't initially add this and then had to pull it all apart and add it after it leaked). I then added a length of 1/2" high temp vinyl tubing, and attached it through an eye-bolt to a 1/2" barb to 1/2" solder fitting so that it is opened at the top to avoid a vacuum in the sight glass.


Installing the eye-bolt was a difficult feat. I had numerous sizes of drill bits and planned to step it up as I went. The first, and smallest bit snapped off after making a small dent. The next size up snapped off as well. The next size up was too large to work properly. The second one to snap had broke off at the perfect spot to still fit into the drill and have 1/4" still showing, so it had no ability to snap again. After about 35 minutes of drilling with this broken bit, and stopping to dump the yeast on the conical for my Brown Ale and add the dry hops while my arms and drill took a rest, I switched out the battery and drilled for another 5 minutes and finally broke through the wall of the keg. Next I stepped it up 3 times. At this point I had one more bit left, my largest one, which was the size I needed to get the eye-bolt through. As I drilled through the keg it ate away at the bit and wore it down as opposed to opening up. I finally got the bit through, and between its work and the kegs work on it, I was able to twist the eye-bolt in and throw away the bit. I pushed the tubing up through the eye-bolt which had a nut on both sides of the keg to keep it in position, and then I pushed the 1/2" barb to solder fitting down into the tubing and through the eye-bolt which made for a very snug fit. Just for good measure I slid a hose clamp up the tubing and attached it under the eye-bolt to ensure proper fitting. I pulled the hose taught, cut it to the proper length to fit on the elbow to hose barb fitting, and then attached it with a hose clamp.


After an over night check for leaks, I calibrated it the next morning. I added a gallon of cold (hot would 1) be a waste of energy, and 2) have a higher volume since hot water is expanded and thus makes for a slightly higher volume) water at a time until it showed inside the tubing. It didn't show until 5 gallons, which will be fine for final volumes, but will not help figure out my first runnings and ensure that I have the correct sparge water, so I will be measuring quart-by-quart up to 5 gallons on a wooden dowel that I have so that I can measure my lower volumes accurately as well. After I reached the first mark, I measured out 1/2 gallon of water at a time and added this to the keggle, marking every full and half gallon on the vinyl tubing, all the way up to 15 gallons.


This sight glass will now let me accurately know how much wort I have collected from the mash, and how much I have post boil and chilling so I know how much I lost to evaporation, and once I move it into the fermenter I will know how much I lost to trub, hops, and keggle dead space (keggle volume minus fermenter volume).


For getting the wort out of the keggle into the fermenter I fit the keggle with a pick-up tube and hop taco. The pick-up tube is a length of 3/8" copper tubing that curves down towards the bottom and through vaccum force will draw all the wort from the keggle through the ball valve into the fermenter. The pick-up tube is attached to a 3/8" female flare to 3/8" compression fitting. This initially screwed onto a 3/8" male thread (into the keggle ball valve) to 3/8" male flare, but on my Brown Ale it lost its vacuum. The way that it originally was set up didn't work well since it was attached to a hop taco (more to follow on how to make one) which makes it difficult to turn and remove, and if it is not connected perfectly the pick-up tube could be pointing up or side ways instead of down. To fix this issue I added a 3/8" female flare to 3/8" female flare piece that allows the flares to free spin on their own until tight. Now it is fit to the pick-up tube and free spins onto the keggle fitting allowing the pick-up tube and hop taco to stay in the position they should be while I spin the other flare onto the threads and tighten which gives me perfect position and seal, and ease of removal for cleaning.


The hop taco is a mesh screen that slides over the end of the pick-up tube to keep hops and even some trub from clogging the tube or going into the fermenter. To make it I bought a stainless steel strainer and removed the mesh from the frame. I then folded this in half and "sewed" it closed using copper wire, stainless steel wire would have worked easier and what was supposed to be used per the instructions from the creators, but I couldn't find any and was in a rush so I used copper. I "threaded" the wire through the mesh and pulled tight using needle nose pliers. I left an opening in the top middle for the pick-up tube to slide inside. I also put a few short pieces of copper wire through this section and left them dangling so I could use a hose clamp to keep the hop taco from sliding off the pick-up tube.

UPDATE 12/3/2012: NEW HOP TACO DESIGN

Wednesday, October 12, 2011

Broke Down Brown

Seeing as the leaves are changing, the sun is mostly gone, the days are shorter, the skies are gloomy, the temps have dropped, and everything is wet here in Eugene, I took a look at my brews. I have a Mild in the bottles, as well as a Fresh Hop IPA. I have a partigyle Wee Heavy & 70- Scottish Ale planned for early November, and an Imperial Stout / Oatmeal Chocolate Stout partigyle planned for early December. So I have 2 beers ready that need to be consumed quickly, and the next brews won't be ready to drink until mid to late December; I thought it would be nice to have a nice, dark, smooth, malty beer to snuggle up to on the cold, gloomy fall evenings. I wrote up a recipe for a Brown Ale with American Two-Row, Abbey Malt for maltiness, lots of Pale Chocolate Malt, a healthy dose of C60, and some Flaked Barley to give it a nice smooth mouth feel. Gave it generous additions of Nugget, Zues, and Amarillo hops, and its set for some dryhopping this weekend. But then... where did the name come from?

I had my buddy over to help me brew, and we did it after work on Friday (late start). I worked up the water additions and everything on this one. We let the strike water heat while we ate dinner, then doughed in... wait a second... I forgot the additives I spent 3 hours figuring out! Go to measure them out... wait a second... my scale just jumped from 0 grams to 4 grams... it's not measuring accurately! Pinch of this, pinch of that... fingers crossed!

Set the Brew Timer on my smart phone... wait a second... it keeps stalling, the timers went off as they should, but I had no way of knowing how long had passed, nor how long was left!

I added the sparge water at almost boiling to the mash to try to get up the temp for the sugars to move more fluidly... dumb mistake... now this is a no-sparge!

Collected our wort and fired up the burner... just about 195*F I notice there is no longer a flickering under the pot... wait a second... out of propane!

Hooked up the second tank and commenced to boil. Added all my hops, everything is going good. My buddy, a new father, had to take off while we were chilling, so I was going to drain the kettle myself, no problem since I usually brew solo anyways. Everything is sanitized, draining from the Keggle into the conical perfectly. Check my OG, 1.061, just right! Clean up my stuff and then look at the fermenter... wait a second... the volume is at 4 gals and not moving anymore! 2 gals short!

Look inside the keggle and... wait a second... the pick up tube stopped working! Tried to get it working to no avail. Sanitized my hands and un hooked it, tipped it up, still nothing. Sanitized a strainer and removed the hops. Still nothing. Sanitized a mason jar and drained it by hand, one scoop at a time. Got to 5.2 gals @ 1.061... wait a second... that's only 62% Efficiency!

I ended up boiling a pot of water, and after cooling, added it to the conical to bring the volume up, the gravity and the IBUs down.

Needless to say, I think you know why the name is Broked Down Brown!

Monday, September 26, 2011

Primary Fermenter Turned Bottler

In previous posts I have talked about the "new" conical that I scored from the guys @ VV&B, and some tweaks I had made to it. This weekend I took a stab at using another function that I equipped my conical to do. When I was piecing together the parts to fit the conical with, I bought a 3/4" female hose thread to 3/8" barb adapter to attach to the ball valve for transferring the beer since the ball valve would allow too much beer to flow at once, and it would just spew it causing tons of splashing and aeration. Another possibility for this use is to attach a bottling wand to the transfer hose, and bottle directly from the primary conical fermenter.

After opening the ball valve and removing the trub and yeast collected at the bottom of the cone (3 pint glasses worth), I added my priming solution directly to the fermenter and mixed it in well with a sanitized slotted spoon. We (my wonderful wife always helps bottle, and I am grateful for it since she is amazing with the capper, and I am not) then began bottling directly from the fermenter. The first bottle was a flop as it had quite a bit of yeast in it, but from that point on, it was smooth sailing. And in the end, I only had to clean the fermenter which I would have to do anyways, no extra equipment... no bottling bucket to clean. We will see soon how well it worked once I can taste a bottle of my Fresh Hop IPA, and see how much yeast sediment is in the bottles, and how it carbonated. So far it looks about normal in the bottles.

Friday, September 23, 2011

Conical Update

A few weeks ago I got a conical fermenter and assembled it to brew my Mild. It worked fairly well except that there was no way of knowing the temperature of the fermentation with out removing the airlock to insert a thermometer, which defeats the purpose of a conical to keep oxygen out of the beer. This past weekend I brewed a fresh hop beer with 1# of wet Simcoe hops, and 1# of wet Citra hops in the last 15 minutes of the boil. While that was cooling I cut a hole in the top of the conical to fit a small rubber bung, and forced (quite difficultly) a thermometer through the bung into the fermenter. This will give me the ability to know the exact fermentation temperature of the beer inside the fermenter. Now I just need to get a different thermometer since my spare only reads in 5 degree increments as opposed to 2 degrees like my other one, meaning that 71F and 74F look almost the same, yet are worlds apart in the world of ale fermentation. Next up is a sample port so I can keep the system fully closed until packaging or secondary additions, and then a stationary insulated chamber for temperature control.

How Did That Happen?

Thought this was kinda interesting... I brewed 3 beers from one mash awhile back, and this is one of the first times that I had them poured side by side. The two beers in the picture are almost the same OG and FG, both had 90 minute boils. The only difference is hops, yeast, and fermentation. The one on the left is my Bavarian Hefe that was fermented open with Sierra Nevada's Kellerwiesse yeast. The one on the right has 7oz of Falconer's Flight hops, fermented w/ American Ale 1056, and has a pineapple in the secondary with the dry hops. It is quite astounding the difference in color on these two beers. Granted, the Hefe has yeast in the glass, and the Wheat has lots of hops (for the style at least) and pineapple (juice included). Hard to believe they both came from the same mash. I might have one Hefe left to do a 3 way comparison with the "Berliner Wiesse" that was made from the last runnings, which will inevitably be lighter seeing as it was a thinner wort to begin with and almost 1/2 the OG.

Monday, August 29, 2011

Conical Fermenter

Oxygen wreaks havoc on a finished beer. It will stale the beer and make it taste like wet cardboard. When using a typical carboy, bucket, or Better Bottle (PET plastic carboy), you have to rack (transfer via syphon) the beer out of the container into a new one to remove the trub (the globs of matter from the boil), hops, or yeast. Some beers need longer bulk storage to age and it is best to do this off of the yeast; once the yeast are done fermenting if they stay in the beer and under pressure at room temp they can die and autolyse spewing their innards into the beer wrecking it. It is also advantageous to remove the beer from the yeast when you Dry Hop (add hops to the fermented beer for fresh aroma); yeast still in suspension can grab some of the oils from the hops and take them out of the beer causing the Dry Hops to lose some of the desired effect on the beer, and the same goes for adding fruit or spices. Whenever you transfer the beer from one vessel to another you expose the beer to oxygen (the second container is full of it). Then, when you transfer from the secondary to a bottling bucket you expose it again.

A conical is another type of fermenting vessel that is typically used in the brewing industry for different reasons. One huge advantage of a conical is that when it is fit with a port at the bottom you can keep the fermenter as a closed system, avoiding the oxidation you just read about above. In a (sanitized) conical, you add the wort after chilling, pitch your yeast, and "seal" the vessel. During fermentation the yeast produce CO2 which escapes the system via a blow off tube or air lock, and it pushes any oxygen in the vessel out with it. Once fermentation is finished the vessel has no oxygen in it to damage the beer. To remove the trub, hops, and/or yeast, you open the port at the bottom of the vessel allowing it to flow out, and then reseal the port once it is cleared. The vessel is still oxygen free, and it is now free of the yeast and trub as well. At this point you can add your fruits, hops, spices, etc. to the vessel through an opening in the top and then reseal it; the CO2 layer on top will help to protect from too much oxygen getting in when you open it (much more than moving an entire 5 gallons into a 5 gallon container of air).

Once your beer is done and ready to package, you can drain it from the bottom of the conical into a keg, or bottling bucket, or, as I hope to do, add the priming sugar to the beer in the vessel, gently stir, and then attach a bottling wand to the port and bottle from the fermenter itself.

All this to say, I scored a conical from the home brew shop last week, and it is currently holding the Mild I brewed over the weekend. The conical was just the vessel itself, and I had to buy the fittings for it. I went to Lowes and bought a brass ball valve hose bib for $9, and then also bought a 3/4" female threaded hose end to 3/8" barb adapter so I can attach it for bottling or transferring the beer. For running off the trub and yeast the ball valve is good as it has a wider opening (1/2") so nothing will clog. But I don't want the beer flowing at that unimpeded rate (causing excessive splashing, thus defeating the purpose of avoiding oxygen), nor do I want it passing through a tube the size garden hose, which is why I have the adapter, I can now control the flow through the ball valve and the narrower tubing.

One problem I have found is that the thicker wall of the plastic conical makes it harder to know what temperature the fermenting beer is at. At this point I have been removing the airlock and inserting a thermometer a few times a day. To solve this problem I am going to drill a hole in the top of the vessel (between beers of course), insert a small rubber bung and pierce a thermometer through it into the wort so I can have a constant reading on the actual fermentation temperature. I also need to find some way to control the temp on it since I can't put it into a water bath and add ice as I could with my Better Bottle, bucket, or carboy, which may cause a few problems with this beer since it got up to 75*F and the yeast is only supposed to go to 72*F. I would also like to add a sampling port to the side of the conical so I can take taste tests or gravity readings without opening the vessel to air. I am also looking for a tallish cupboard that I can drill a hole in the top of to hold the fermenter, this will allow me to keep it higher and more stable (away from my son who would love to play with it), and to put another vessel under it if needed (bottling bucket, glass carboy for souring, bottles, etc), and if i get a double level cupboard I can attempt to temp control the fermenter.

Monday, August 22, 2011

Hop Update

After the last update on my hops and their response to the fresh manure and manure tea (Nitrogen), I added some wood ash (Phosphorus) a week ago that we got while camping and continued to give it doses of manure tea. I was showing my dad our garden while they were in town this weekend and found these while I was looking at them. The shoots with the tiny spines coming out of the blooms are called "hop burrs", and these will soon become full hop cones. It is very exciting to see not just the new vegital growth from a few weeks ago, but new hop growth as well. With the already existing cones, and these new ones, the harvest will be up to 20 cones now.

Friday, August 19, 2011

A Yeast Starter w/o Yeast?

I am preparing to make a beer in 3 weeks that will not have yeast added to it for fermentation... well, not directly; I will be adding fruit directly to the unfermented wort to do what is called a Spontaneous Fermentation. Spontaneous fermentation is used in Belgium to make Lambics; the hot wort is pumped into a cool ship (a flat, shallow steel container with no lid) that sits high in a pathway for good night time breezes and awaits the breeze to bring local microflora: wild yeasts, and beer souring bacteria. After a night of cooling and being innoculated with these wild strains, it is transfered into a wooden barrel that is home to wild yeasts and bacterias, and it ferments here for years.

I will be doing something like this, but not quite. The wild yeasts and bacteria that are in the air used by Lambic brewers are mostly from fruit. Fruit have all the organisms needed to make a wild ale: Saccharomyces, Lactobiccilus, Pediococcus, and Brettanomyces. My plan is to add the fruit with these microflora on them directly to the beer and allow the resident critters to do what they naturally do. The fruits contain sugars that will be eaten and increase the alcohol in the beer as well as helping to dry it out, and they contain acids that will help add another layer of sourness to the finished product. I am going to use blackberries and peaches, the blackberries will give a nice acidic and fruitiness, and the peaches will have a large amount of Brett living on the fuzzy skins. I also will be adding French Oak cubes to primary to add some more depth, as well as any microflora living in the wood.


One huge risk I run by doing this is if there is too much oxygen, acetobacterer can grow which can turn the beer to vinegar. So to avoid a slow start to fermentation, I am taking a precaution. I am making starters from the fruit, that I will pitch along with more fruit when it comes time to ferment. So far I have made the starter wort: 200ml Simply Apple Juice and 800ml of water, to 50 grams of light DME, boiled with yeast nutrients. To this I added 15-20 fresh blackberries from my neighbor's bush. It has been 4 days, and it has hit high krausen, has a substantial amount of yeast on the bottom, and is forming a pellicle. It tastes great. Lots of fruit, light alcohol, clean sourness that is more than straight tart blackberry. Here is a progression:
12 Hours - Some signs of growth as the slurry on the bottom is larger than before.


24 hours - the blackberries are starting to float around a bit, and there is quite a bit of yeast (I assume) on the berries on the cores.


36 hours - many of them floating on top and what appears to be fermentation signs on the top. Progressing nicely.


44 hours - definite signs of a good fermentation.


48 hours - krausen has formed, and smells of fermentation.

84 hours - fermentation seems about done, there is a substantial amount of yeast on the bottom, and I see signs of a pellicle forming on top.


I will be updating again soon as I do the starter for the peaches (the Farmer's Market was sold out the other day, hoping to get some tomorrow morning), and again as I step them up, and of course, brew day!

NOTE: This beer took 1st place in Sour Beers and BEST OF SHOW in February 2014 at the KLCC BJCP comp.

Monday, August 15, 2011

Free Bag O Malt Mild

Went into my local homebrew shop today on lunch to chat it up with the guys about the progress on their brew pub opening and about my upcoming spontaneous fermentation. While I was there one of the guys was doing a little clean up in the back room and found a brown paper bag full of malt that had been sitting there. Looked inside and saw that it had 5# Weyermann Munich I, and 2# Victory in it. He kindly looked over to me and said "You want 5# of Munich I and 2# Victory malt?" I, of course, accepted. I was tossin' around ideas in my head of what to make with it. They had said it could make a porter, or an ESB (Extra Special Bitter). I did some research on the malts and what they will give to the beer, and came up with the idea of doing a Mild. I have wanted to have a Mild for a while now, but no one makes them around here, and exporting them is difficult due to the low alcohol and hops. So I looked at the BJCP guidelines for Mild, and it boils down to this:
Clear copper to dark brown (12-25 srm), offwhite head with pour retention and low carbonation. Smells of malts (caramely, grainy, toasted, nutty, chocolate, or lightly roasted) and some fruitiness, with little to no hop aromas and no diacetyl. Tastes is very malt and yeast driven (malty, sweet, caramel, toffee, toast, nutty, chocolate, coffee, roast, vinous, fruit, licorice, molasses, plum, raisin), can finish sweet or dry with enough hop bitterness to balance the malts but not overpower them, and little to no hop flavors. Mouthfeel should be light to medium body with low carbonation. A flavorful beer very driven by malts and designed to be low alcohol for continued enjoyment.
Sounds perfect. The Munich I has a very malty sweet flavor and is typically used in malt driven beers such as Bocks and Marzens. The Victory is a nutty malt, and 2# should make it quite heavy on the nuttiness. I also had some Roasted Wheat and Brown Malt that they were sampling out a few months ago still around the brew house, as well as a 4-5oz mix of C60, Special B and Pale Chocolate left over from a malted milk bread pudding I made for our anniversary. Put all that together and we have what should be a fairly flavorful malt bill: sweet malt, nutty, a little roasty, slight caramel, light dark fruits, a dash of chocolate, and a hint of biscuit. Went with some UK First Gold hops for a nice smooth bitterness with a light spiciness.


Fermentables (60 min mash @ 151*F)
5.0# Munich I
2.0# Victory
7oz Roasted Wheat Malt
50z Brown Malt
2oz US Crystal 60
2oz Belgian Special B
1oz UK Pale Chocolate


Hops
1.0oz FWH UK WGV hop plugs 7.0% AA (24 IBUs)


45 minute boil


Yeast Wyeast 1968 London ESB (slurry from Ninkasi)


Kettle Additions Calcium Carbonate 2g (split)
Gypsum (C. Sulfate) 2g (split)
Baking Soda 1g (split)
Epsom Salts 1g (split)


Stats
Target OG 1.037
Target FG 1.010
Target IBU 24
Target Volume 5.5 gallons
Target SRM 26
Target ABV 3.6%

Thursday, August 11, 2011

What I'm Working On Now

Wanted to put out an update on what I have going right now. No beers fermenting. No beers in secondary. The 2 Saisons are carbing up right now, and should be ready in the next few days. I have 2 recipes written up for September, one super hopped pale ale, and one spontaneous fermentation (another blog post will be dedicated to that one soon).

At this point what I'm working on is starters/cultures. As stated in an earlier post 3 Beers, 1 Mash, I did a Berliner Weisse with the soured last runnings of a mash that made my Hefe and hoppy American Wheat, and then pitched WY 1007 German Ale, and a starter I had cultured from the dregs of Russian River Supplication into primary together. The beer is amazing, and I didn't make the same mistake with the yeast cake on that as I did with the starter of yeast I cultured for the Hefe (dumped it all). But I needed something to do with the yeast to save it. As I was brewing my Saisons 6 weeks ago, I drew off the last runnings from both mashes and boiled them with a small amount of hop pellets for about 45-60 minutes. I let them cool and then dumped it into a 3 gallon bucket. I added the entire slurry (full mason jar) to the 1.5 gallons of wort, and added about 30 used medium toast French Oak cubes I got from a buddy who goes to church with a Vintner in Lodi that had come from their barrells. The thought was to save the yeast by inoccluating the oak for future sours. I strapped the lid and air lock on and let it go.

5 weeks later as my son and I were hanging out in the brew house (garage) he was grabbing stuff that looked cool as any 16 month old does, and he pulled the airlock off the bucket. I took it and told him not to touch it like a dad should, but as I was replacing it, I gazed throught the hole and freaked out. What I saw was a giant blob of mold... or so I thought. After posting a How Do I Save It From The Mold forum on BeerAdvocate I was informed it was the pellicle (a layer of Brett that floats on top of the beer as they use the oxygen to reproduce, and also keeps oxygen out, as well as prevents mold and Acetobacteria). Having never seen one before (other than in the bottles of Berliner), I had no way to know. I also sent an email to The Mad Fermentationist who confirmed the same. After chatting it up with him over quite a few emails I decided to rack the beer into glass jars to continue as opposed to leaving them in a bucket that is permeable to oxygen and has about 1.5 gallons worth of head space. When I opened the bucket it smelled very sour, like a strong aroma from Rodenbach condensed. Almost vinegary, but not quite. I racked the beer into a 1 gallon jug and a 1/2 gallon jug, siphoned up a lot of slurry, forced as many oak cubes in as I could fit, and then added a little sugar to it to kick start a little fermentation to fill the head space with CO2. After 5 days, the beer has cleared, and a pellicle is forming on top again (see the big pic at the top of this post).

I also have a starter from a bottle of Orval I have built up that I used some of in bottling one of my Saisons. It should give me some nice Brett character here in the coming months, and taste great next summer. I also enjoyed a RR Consecration a few weeks ago and have built up a starter of the dregs from that as well. It has a very soft powdery coating on top with a layer of slime underneath, and some white, slimy looking flat things floating here and there... sounds like it is working, this is what pedio is supposed to do... right!?! My hope is to get them built up for future sours/wilds, including an all Brett beer fermented with only wild yeast.

I will continue to post updates from time to time as things progress, and new experiments pop up.

First Year Growing Hops

I planted a single rhizome of Chinook hops this spring. The soil in the backyard of our rented duplex is about 3" deep of straight hard, dry dirt, and compact rock for feet under it, so the hops are, at this point, in a 20 gallon Rubbermaid plastic storage bin. Planted it in brand new Nitrogen rich soil, veggie boost compost and such from Lane Forest Products. The shoots came up and I trained them onto coconut twine headed up to the peak of the roof and a screw in the wall along the south wall in the back yard. They get great sun. One bine took off like a rocket ship, and the other three have stopped around the 3' mark. I began watering well in June as the heat kicked up and the rain stopped. After a while the plant stopped growing, the leaves were a pale yellowish green, and the bines were a magenta hue. Having never grown hops, nor seen them, I didn't realize that these were all signs of Nitrogen deficiency, that is until I got the book The Homebrewer's Garden. After figuring out I need Nitrogen in the soil, I went back to Lane Forest and got the manure mix. I worked some of it into the top layer of soil, piled more on top and gave it a good watering. I also placed about 5" of manure into a 2.5 gallon bucket and let it "ferment" for a few days in the sun. I have been feeding the soil with this for a few days now, and the hops look great.

The bines are a nice green color, though there are some red streaks going through the big one. The leaves are a deep green again. There are even signs of new growth as new lateral growth beginning. So far I have about 17-22 hop cones, and it looks like I might have more on the way, but I’m not sure since, again, this is my first year so I have no clue what I am looking at. A buddy at Valley Vintner & Brewer, my local homebrew shop said that with the growth of the hops, I should be adding phosphorus as well, so I will be getting my hands on some wood ash soon. I will of course update more as I go.

3 Beers, 1 Mash

Back at the very end of August I had a difficult brew day, difficult because of what I had planned. I originally had set out to brew 2 beers with wheat. I wanted to do a Bavarian Hefeweisse and an American Wheat w/ fruit for my wife. So I set out to brew them both from 1 mash. I had been tossing around the idea of how I was going to do the American Wheat: blackberry, strawberry, blueberry, all 3, something completely different. This was also the same time that Falconer's Flight proprietary hop blend came out. As I was doing some research on them I thought, "ooh, lots of tropical notes, pineapple, some pine and grapefruit, sounds like a 'fruity' beer to me!", so I approached my wife about doing a hoppy wheat beer that would taste tropical and she loved it (except for the hoppy part). So the plan was set, 1 Bavarian Hefe that I would culture the yeast from Sierra Nevada Kellerweisse to brew, and a hoppy American Wheat with 7oz of hops and a whole pineapple (as if the hops weren't enough). Then, about a week before brew day, I got a wild hair, literally: Berliner Weisse! Berliner Weisse is a very low gravity, low alcohol, super dry, sour German wheat beer with a slight Brett funk, and I could do it from the left over runnings from the other 2 beers. What began as 2 beers became 3!


Here is the grain bill:
7# Pilsner Malt (37%)
10# Wheat Malt (53%)
1# German Dark Wheat Malt (5%)
1# Flaked Wheat (5%)

This was my first attempt at a lot of things, seeing as it was my 6th batch of homebrew, and 3rd all-grain, this was a feat in itself. It was the first attempt at culturing yeast from a bottle. First attempt at doing a double sized mash. First time using wheat (and 63% at that). First attempt at step mashing. First sour mash. First sour. First open fermentation. First time using fruit.

The mash started off difficult, I had to fit 19# of malt into my mash tun, and do a step mash (which requires infusing extra water to take the temperature up to the next level). I started out by doing an acid rest @ 113 to create the precursors for 4 vinyl guaiacol (the clove flavor in Hefe). Then I scrambled to get enough boiling water ready to get it up to 120 for a protien rest. After that I scrambled again to get enough boiling water to get it up to the sacc rest @ 152. Got it to 148... NO! Had to add some more boiling water (wasn't ready) which put it to the brim of my cooler mash tun, and barely hit 152. I thought I would have to do my first decoction mash to get it right, but it worked. Mashed for an hour, then started to vorlauf. I took the first runnings into the kettle to measure, then hit the MLT (mash-lauter tun) with the sparge water. I drained this into a 15 gallon rubbermaid storage container (I had to have all 13 gallons in 1 master volume and then split it for the beers to be equal gravity), as I siphoned the 6.5 gallon from the kettle into it as well and stirred. Mean while I hit the grain bed with more water and added some more pils and some acid malt, and let it rest for a couple hours.

I syphoned 6.5 gallons into the kettle, added .25oz of Simcoe hops, and brought it to a boil for 90 minutes, cooled, topped off with water because I was short on volume, and then syphoned it into my 6.5 gallon fermenting bucket. I added the yeast I had cultured from the SN Kellerweisse, and put one of my large mesh sacks over top and taped it off... that's right, no lid, open fermentation. As you can see in the picture, the krausen got huge, no restraint or stress on those yeasties!

I then added the remaining 6.5 gallons of wort to the kettle and comenced the boiling sequence for it, adding quite a lot of hops as the boil came to a close. I cooled it, syphoned into the Better Bottle, and attached the blow off tube after adding a slurry of 1056 from Oakshire Brewing and aeration.

Now back to the MLT. I added enough cool water to drop the temp to 118 F and fill the MLT to the brim. I didn't put saran wrap or foil on top (to protect from oxygen which feeds the wrong bacteria) like I should have, but it turned out good in the end. I placed it inside an old sleeping bag and put it inside over night. 22 hours later I took it out and popped the top to the most horrid smell ever; like death climbed into my MLT and used it as a jacuzzi. I got it outside and ran off 6.5 gallons, and started the boil with aged hops that made it smell worse. I topped it off as it boiled with more runnings as it boiled for 2.25 hours. Finally I cooled it and racked it into my glass carboy. I added a smack pack of WY 1007 German Ale, and a 2L starter of built up dregs from RR Supplication (Lacto, Pedio, Brett). Sour mash, and souring bugs in primary... what did I get myself into! That thing continued to reek through fermentation.

After a few days I scooped off the krausen from the Hefe and put a lid on it just to ensure that nothing got into it (especially since I had a wild 4 feet away). Then after 2 weeks I racked the hoppy wheat into a 5 gallon bucket and added an entire pineapple that I had cored and chopped up. The next day I added 2 oz of dry hops. After another week, we bottled both "Cavendish and Cloves Collide" and "Harmonious Convergence" (named such as it was a harmonious convergence of my wife's desire for a fruity wheat, and my desire for a hoppy one). "Left Out Left Overs", the Berliner Weisse stayed in primary another 4 weeks. At a total of 7 weeks we bottled "Left Out Left Overs" and let it carb for 2 weeks in the warm garage inside rubbermaid storage containers with lids just in case of bottle bombs (when an over carbonated bottle explodes due to pressure), but none hit. I put one case into the fridge after the 2 weeks, and left another out for 6. They went into the fridge @ 1.007, but after the 6th week bottled, I degassed 2 beers (one of the 2 week crew, and one of the 6 week) to compare gravities. Both clocked in @ 1.004! They dropped another 3 points after bottling; that is amazing they didn't blow.

They all taste great. The Hefe has a lot of over-ripe banana, vanilla, and a clove kick on the back end, very smooth and creamy, superb head and lacing, but they have gone almost crystal clear in just over a month. The hoppy wheat is nice and tropical, lots of pineapple, grapefruit, a little pine, tart wheat, smooth, dry finish, lots of haze, great head retention, and a nice bitter bite. The Berliner is quite sour, smells of ripe fruit, greek yogurt, and funk, with a dry, fizzy, sour punch in the throat; lots of white bubbly head that quickly disipates. Very impressed with all three, but will probably never do the entire thing over again.