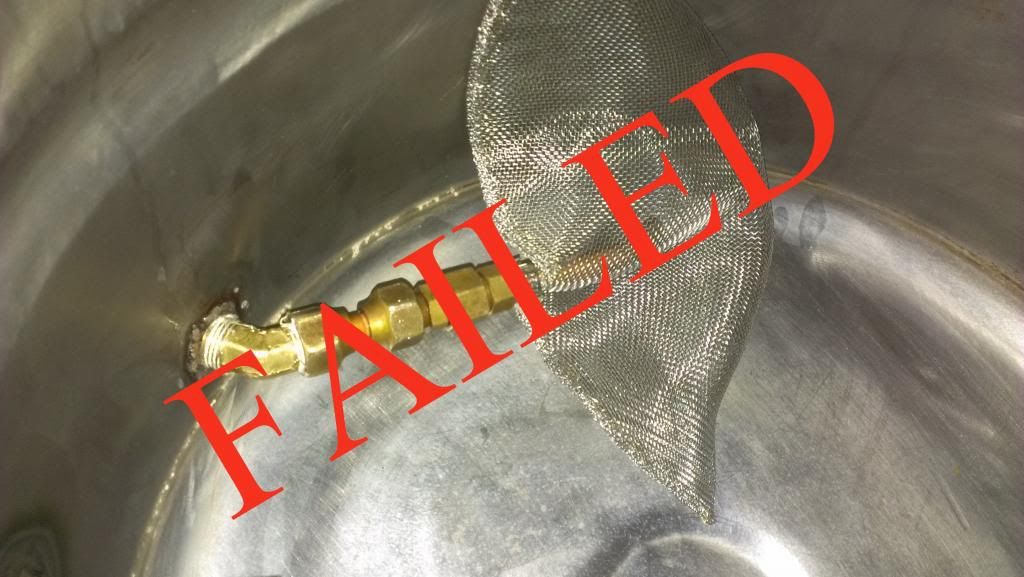
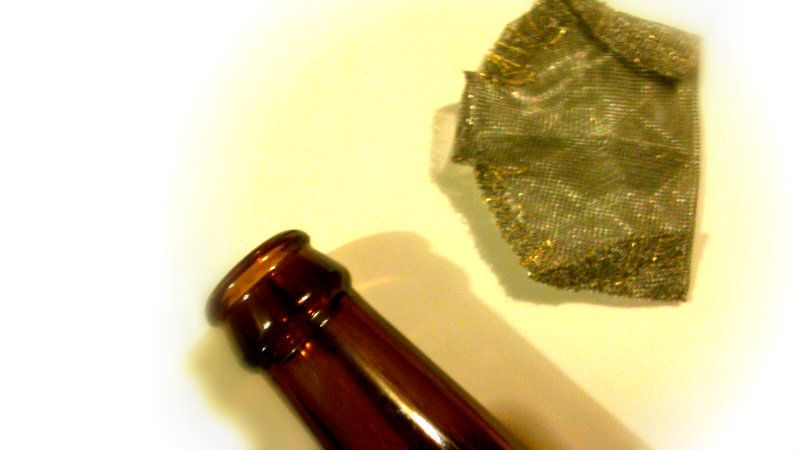
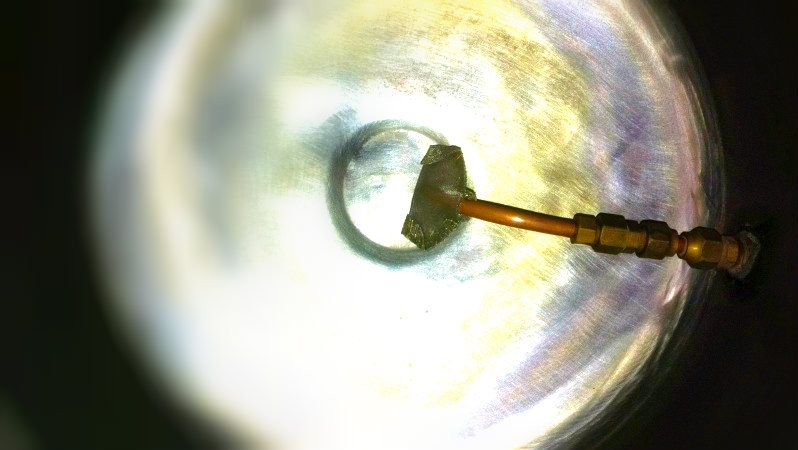
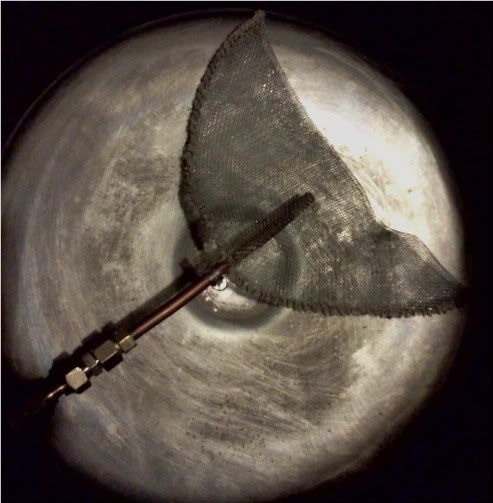
After my latest Hop Taco failed on brew day during a 10 gallon IPA using my brand new pump, I decided to make another one, bigger, and less tightly woven to maybe keep it from clogging again. Needless to say, after buying a larger SS mesh strainer, pulling it apart, threading it with brass wire, and cutting up my fingers, and attaching it once again to my kettle, it too, failed the test of a 10 gallon hoppy beer. Guess I am moving to another option, again!
Showing posts with label hop taco. Show all posts
Friday, March 1, 2013
Monday, December 3, 2012
Hop Taco Revisited
***SEE EDIT BELOW***
Awhile back I had made a Hop Taco for my kettle based on plans I found from Knights of the Mash Fork. It seemed to work fairly well for keeping the hops out of the pickup tube and out of the carboy, but it made clean up very difficult. It was cumbersome and awkward, I couldn't really clean it in place, I couldn't clean the kettle with it in place, and removing the pickup tube was difficult since the hop taco would inhibit spinning it. Once free the Hop Taco was strewn with hop particles making it hard to clean as they would get caught on the wire ends that were frayed around the edge (also great for stabbing your hand during removal, cleaning, and replacing). If I was able to get it clean, I then had to try to get it put back together again which proved to be just as difficult as removing it. Finally, after a long and tiring double brewday I walked away leaving the hops, orange zest, and trub in the bottom of the kettle and didn’t go back to clean it until it was too late. There was quite a bit of mold and what looked like possible rust on the taco and I ended up just throwing it out since it was difficult to use anyways.
I still needed a way to keep the hops from clogging my pickup tube though. I made a version of the Hop Spider that proved useless. Most of my hops would just get caught in the upper layer of nylon and remain suspended above the wort so I would have to remove the spider and dip it into the boiling wort with each addition. After only a few batches that mechanism was relegated to the same fate as the Hop Taco. Since then I have been using paint strainer bags or nylon sacks I got from the produce section (designed for keeping fruit free from fruit fly attacks while they sit out); they worked well until I had to clean out all those hop sacks after each brewday, some of which get caught under/around my pickup tube.
All of this leads me to a new dilemma, what is the easiest way to add hops to the boil allowing for the best extraction and aroma, as well as the easiest clean up afterwards while keeping hops (as well as spices) out of the pickup tube and carboy? This has lead me back to the Hop Taco, just redesigned. I found a small fine mesh Stainless Steel strainer at Walmart for $7. The SS ensures that it won’t react negatively to the low pH and hot temperatures of the boiling wort as well as keeping it from rusting. The fine mesh should keep more particles out, and I am hoping that this includes pellet material as well. The smaller size allows for greater ease in cleaning as well as removal, and less to clean once the brew session is done (the larger one had more surface area to clean and more wire fray to catch hop pieces on).
For this version I used soft brass wire 0.41mm in thickness. Many of the models I found online call for SS thread, but I can’t find any, and the copper wire I used on the last rendition was way too thick which made it difficult to get a tight stitch, and with the smaller size on this edition, the stitching needs to be tight. I did break the wire a couple times, but was able to get a fairly tight stitch, and I doubled the coverage by looping around the outside first, then passing through along the edge as well. I crimped the edges to leave a lip where the opening is for a hose clamp to grab onto and keep it on the pickup tube.
Now all I need to do is find some time to brew with it! I've got a pound of 2012 Simcoe pellets, ½# Meridian and Calypso, and quite a few pounds of Chinook and Cascade homegrown hops waiting in the freezer, as well as a pound of Mosaic on the way. And with nothing hoppy it looks like I am needing to brew an IPA very soon, which will be much easier with my new wort chiller that I am going to fit with a whirlpool option to attach to the new March Pump I am getting for Christmas.
***EDIT: When used for a Dopplebock with whole leaf hops it worked great. When used on a 10 gallon IPA with copious amounts of pellet and leaf hops it clogged shut rendering the pump and ball valve useless. Will be trying a SS braid in its place to see how that works.***
Friday, October 21, 2011
Efficiency Experiment
As stated in a previous post, my efficiency on my last batch was shotty. I took a look at all 11 of my all grain brews and the efficiencies I've had, and they are always jumping. My first batch, a Black IPA, I got 66% from 13# of grain, using US Pale base malt. The second, an English Bitter, I got 83% from 8# of grain, Marris Otter base. The third and fourth, both Wheat beers, I got 76% from 19#, on a split batch, 65% Wheat, 35% Pils, batch 5 was a sour of the remaining wort from that mash, in which I hit (I assume) about 78%. Batch 6, a Saison, was 70% from 9.75#, Pils base. Batch 7, same day, a second Saison, 76% from 8.25#, Pils base & 25% Rye. Batch 8, a Mild, 72% from 8#, Munich I & Victory base. Batch 9, a Lambic, 75% from 11.5#, Pils, Vienna, and Wheat. Batch 10, same day, a Fresh Hop IPA, 68% from 13.5#, US Pale base malt. Batch 11, a Brown, 62% from 14.5#, US 2Row base. As you can see, there isn't any real consistency in my efficiency, so I decided I need to actually get the process refined and find my efficiency. I will be conducting an experiment to find out my volume losses and efficiency.
Monday, October 17, 2011
Keggle Fittings: Hop Taco, Pick Up Tube, and Sight Glass
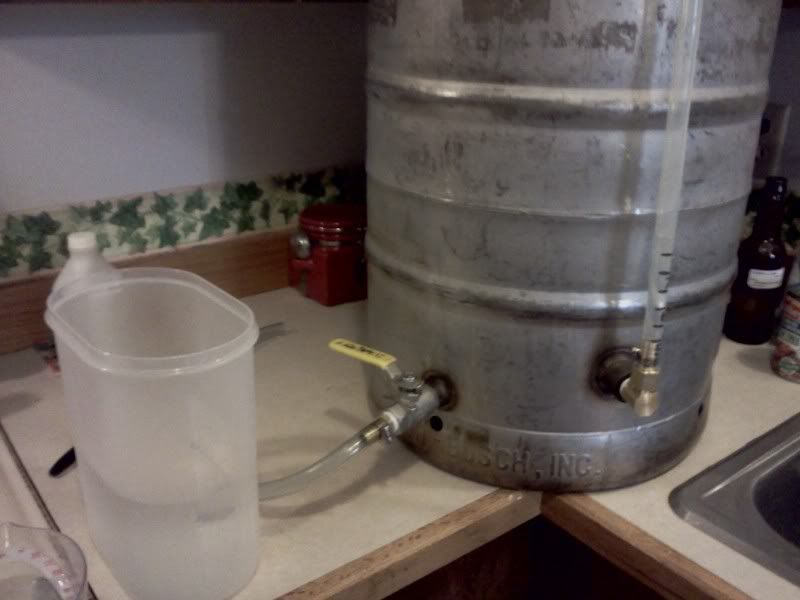
This weekend I fit my keggle (15.5 gal keg converted to use as a kettle) with a few things to make it easier to use. I added a sight glass, and fixed my hop taco and pick-up tube that had failed in a previous brew session. These items were not too difficult to add since the keggle I got from an ex-homebrewer was already fit with a ball valve for draining which was threaded on the inside for easy addition of the pick-up tube, and it was already fitted with a threaded female port that had a hole in it making for a simple sight glass addition.
The
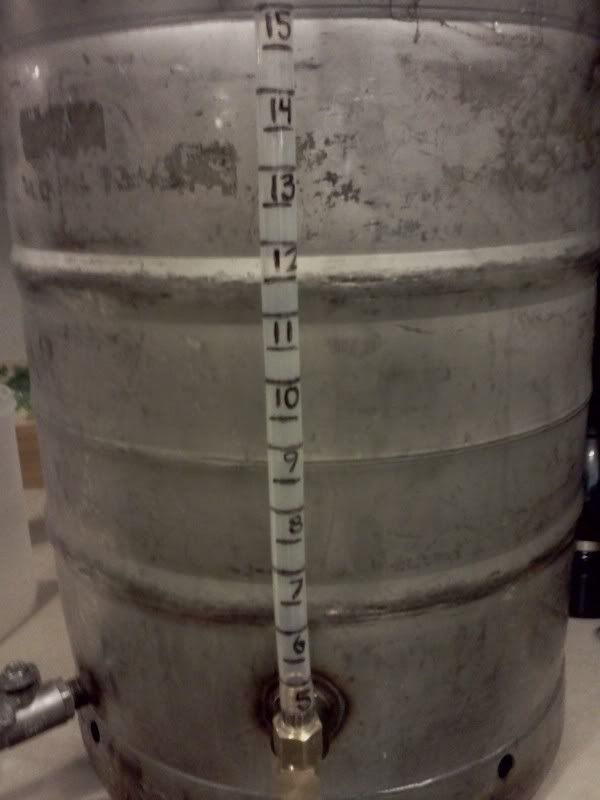
most difficult aspects of adding the sight glass were finding the pieces to fit it with and drilling the hole at the top of the keg for the eye-bolt. I was trying to fit this keggle with a sight glass for as cheap as possible. The cheapest way was a nylon 1/2" male thread to 3/8" barb elbow, but that won't work with the boiling wort, so I had to go with brass, which doesn't have such a piece. This lead me to make a piece from two separate pieces, which is still difficult, and more costly. I ended up getting a brass elbow 1/2" male thread to 1/2" male flare, and a 1/2" female flare to 1/2" barb. This made for an easy addition with a little plumbers thread wrap to make the seals water tight (I didn't initially add this and then had to pull it all apart and add it after it leaked). I then added a length of 1/2" high temp vinyl tubing, and attached it through an eye-bolt to a 1/2" barb to 1/2" solder fitting so that it is opened at the top to avoid a vacuum in the sight glass.
Installing the eye-bolt was a difficult feat. I had numerous sizes of drill bits and planned to step it up as I went. The first, and smallest bit snapped off after making a small dent. The next size up snapped off as well. The next size up was too large to work properly. The second one to snap had broke off at the perfect spot to still fit
into the drill and have 1/4" still showing, so it had no ability to snap again. After about 35 minutes of drilling with this broken bit, and stopping to dump the yeast on the conical for my Brown Ale and add the dry hops while my arms and drill took a rest, I switched out the battery and drilled for another 5 minutes and finally broke through the wall of the keg. Next I stepped it up 3 times. At this point I had one more bit left, my largest one, which was the size I needed to get the eye-bolt through. As I drilled through the keg it ate away at the bit and wore it down as opposed to opening up. I finally got the bit through, and between its work and the kegs work on it, I was able to twist the eye-bolt in and throw away the bit. I pushed the tubing up through the eye-bolt which had a nut on both sides of the keg to keep it in position, and then I pushed the 1/2" barb to solder fitting down into the tubing and through the eye-bolt which made for a very snug fit. Just for good measure I slid a hose clamp up the tubing and attached it under the eye-bolt to ensure proper fitting. I pulled the hose taught, cut it to the proper length to fit on the elbow to hose barb fitting, and then attached it with a hose clamp.
This sight glass will now let me accurately know how much wort I have collected from the mash, and how much I have post boil and chilling so I know how much I lost to evaporation, and once I move it into the fermenter I will know how much I lost to trub, hops, and keggle dead space (keggle volume minus fermenter volume).
For getting the wort out of the keggle into the fermenter I fit the keggle with a pick-up tube and hop taco. The pick-up tube is a length of 3/8" copper tubing that curves down towards the bottom and through vaccum force will draw all the wort from the keggle through the ball valve into the fermenter. The pick-up tube is attached to a 3/8" female flare to 3/8" compression fitting. This initially screwed onto a 3/8" male thread (into the keggle ball valve) to 3/8" male
flare, but on my Brown Ale it lost its vacuum. The way that it originally was set up didn't work well since it was attached to a hop taco (more to follow on how to make one) which makes it difficult to turn and remove, and if it is not connected perfectly the pick-up tube could be pointing up or side ways instead of down. To fix this issue I added a 3/8" female flare to 3/8" female flare piece that allows the flares to free spin on their own until tight. Now it is fit to the pick-up tube and free spins onto the keggle fitting allowing the pick-up tube and hop taco to stay in the position they should be while I spin the other flare onto the threads and tighten which gives me perfect position and seal, and ease of removal for cleaning.
UPDATE 12/3/2012: NEW HOP TACO DESIGN
Wednesday, October 12, 2011
Broke Down Brown
I had my buddy over to help me brew, and we did it after work on Friday (late start). I worked up the water additions and everything on this one. We let the strike water heat while we ate dinner, then doughed in... wait a second... I forgot the additives I spent 3 hours figuring out! Go to measure them out... wait a second... my scale just jumped from 0 grams to 4 grams... it's not measuring accurately! Pinch of this, pinch of that... fingers crossed!
Set the Brew Timer on my smart phone... wait a second... it keeps stalling, the timers went off as they should, but I had no way of knowing how long had passed, nor how long was left!
I added the sparge water at almost boiling to the mash to try to get up the temp for the sugars to move more fluidly... dumb mistake... now this is a no-sparge!
Collected our wort and fired up the burner... just about 195*F I notice there is no longer a flickering under the pot... wait a second... out of propane!
Hooked up the second tank and commenced to boil. Added all my hops, everything is going good. My buddy, a new father, had to take off while we were chilling, so I was going to drain the kettle myself, no problem since I usually brew solo anyways. Everything is sanitized, draining from the Keggle into the conical perfectly. Check my OG, 1.061, just right! Clean up my stuff and then look at the fermenter... wait a second... the volume is at 4 gals and not moving anymore! 2 gals short!
Look inside the keggle and... wait a second... the pick up tube stopped working! Tried to get it working to no avail. Sanitized my hands and un hooked it, tipped it up, still nothing. Sanitized a strainer and removed the hops. Still nothing. Sanitized a mason jar and drained it by hand, one scoop at a time. Got to 5.2 gals @ 1.061... wait a second... that's only 62% Efficiency!
I ended up boiling a pot of water, and after cooling, added it to the conical to bring the volume up, the gravity and the IBUs down.
Needless to say, I think you know why the name is Broked Down Brown!
Labels:
Conical,
dry hops,
efficiency,
hop taco,
keggle,
pick up tube,
Recipe
Subscribe to:
Posts (Atom)