Monday, April 30, 2012

Recipe: Antiquated Ambush (Sour Saison)

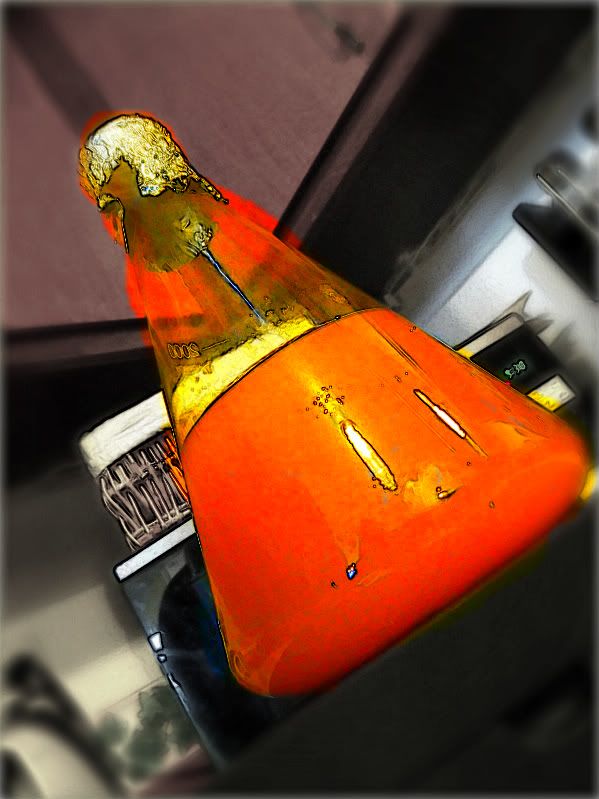
I originally brewed this recipe 2 months ago.  It turned out really well, very tasty, but it is going so quick.  I diverted a gallon of the first batch to a glass jug that I hit with Brett to bulk age for awhile, and then bottled in mostly 750ml champagne bottles, which gives me 3 tulip fills per bottle.  Needless to say, we are flying through the first batch with those large bottles.  I took a bottle into the home brew shop and had them try it out, and got really good feedback on it.  I have been wanting more of it, so I set out to brew another batch of it with some twists.  Seeing as I still have the yeast, the bittering hops, and the left over .5 oz of Hallertauer and Saphir from the first brew, it will only cost me around $13 for the three malts and an oz of Bobek.  Not bad for 5.5 gallons of wonderfully tasty beer.


On this iteration I did change a few things.  First, I did a step mash instead of a single infusion; on the first edition, I did 147*F, for this one I am doing 70 minutes at 144*F and 20 mins at 157*F (which I missed) to target a very fermentable wort that still has some body to it.  This will also up the efficiency some (I assume), so I accounted for that as well.  Second, I pushed the flavor hops back from 15 minutes to 25 to get more flavor from them.  Lastly, I upped the fermentation temp 2*F to 77 this go round, and fermented for 4 weeks opposed to the 75*F for 7 days on the last one (yes, only one week from boil to bottle).  I also ended up diverting 3/4 gallon on day one that I hit with Lacto, Pedio, and Brett, and added this back at bottling time for a sour Saison.  My hope is for this beer to be slightly dryer, sour and funky with a little more hop flavor, and a little more head retention.
________________________________________
Saison
5.75 gallons
18 IBUs
4 SRM
5.3 ABV
________________________________________
3.5# GW Pale Malt
3.5# Weyermann Pilsner Malt
1.5# German Dark Wheat
Batch Sparge
45 minute rest @ 144*F (infuse w/ 13q 155*F water)
20 minute rest @ 148*F (infuse w/ 4q boiling water)
80% Efficiency (hit 86%)
________________________________________
90 minute boil
40 mins    0.4oz    Nugget                       15.0%AA
25 mins    0.6oz    Styrian Bobek             3.8%AA
0   mins    0.4oz    Styrian Bobek             3.8%AA
0   mins    0.5oz    German Saphir           3.8%AA
0   mins    0.5oz    Hallertauer Mittelfruh   4.6%AA
________________________________________
3/8 tsp   Gypsum - Mash
3/8 tsp   Calcium Chloride - Mash
3/8 tsp   Gypsum - Boil
3/8 tsp   Calcium Chloride - Boil
1 tab      Whirfloc 12 minutes
1/4 tsp   Yeast Nutrient 12 minutes
________________________________________
Chill to 68*F
1.5L Starter WY 3726 Farmhouse Ale (kept from previous batch)
77*F for 14 days
Ambient for 7 days
Bottle with 5.5 oz Dextrose for 2.8 vols CO2 @ 72*F for 14 days
________________________________________ 
OG  1.043
FG   1.003


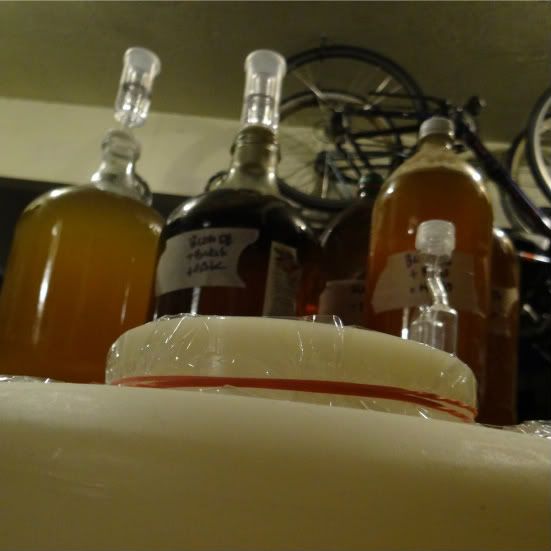
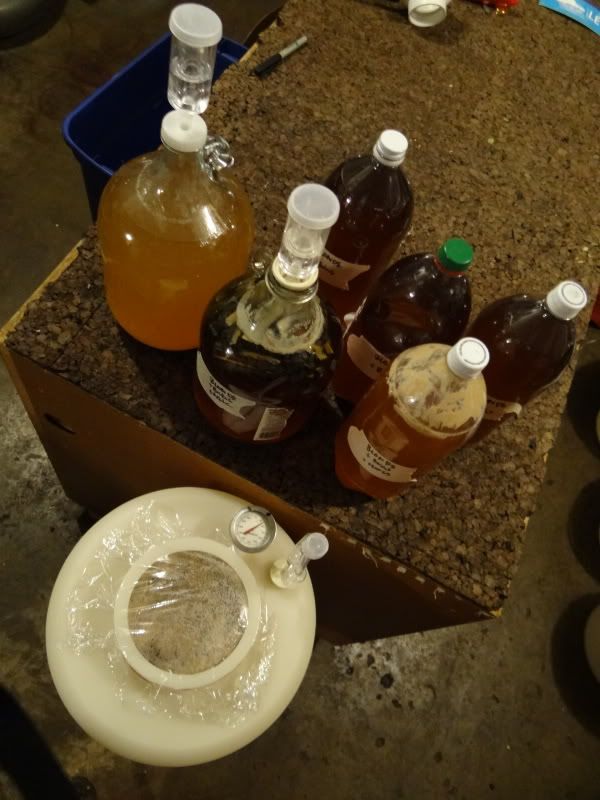
Brewday went well; my attempt at a step mash failed though, my 144 mash temp hit perfect, but I lost 5*F over 45 minutes, and when I added the boiling water to bring it up to 158*F, I got 148*F, so this should be quite fermentable, but hopefully not thin.  Had my second stuck sparge which helped to boost the efficiency up to 86% giving me a final gravity of 1.049.  I diverted half a gallon off into 3 750ml bottles for Brett and Sour starters, and filled the carboy to 5.0 gallons.  I then topped off with 0.7 gallons of preboiled water and took it to 1.043 OG.  After aerating for 15 minutes I added the yeast slurry from the starter.  The wort and yeast were churning up a storm after 2.5 hours.  That night I took 3/4 gallons off with the auto-siphon during ferment to avoid a blow off and added sour dregs to the gallon jug I transferred to for a little fun funk.  Krausen was good by next morning.  By Monday morning fermentation appears to be complete and the Krausen seems to be falling back in.


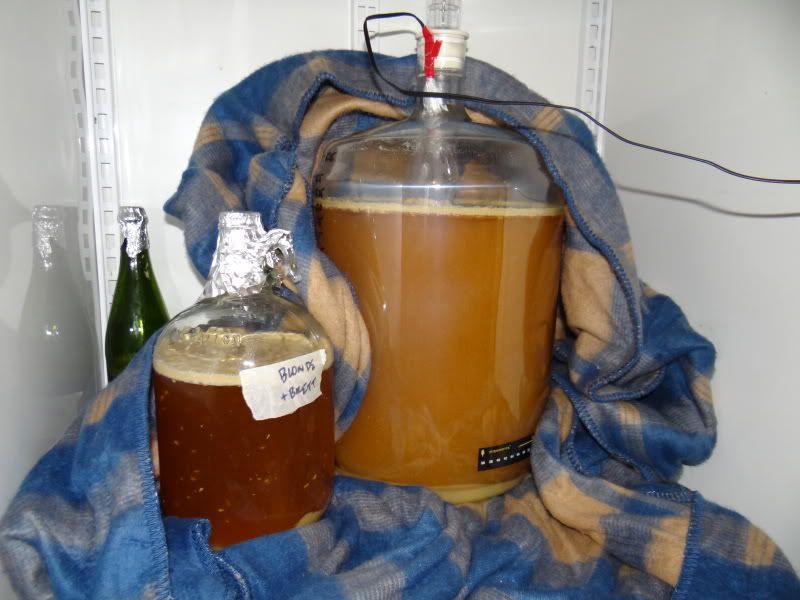
3 weeks:  A pellicle has formed atop the beer in primary confirming my sneaking suspicions that the yeast had gotten infected with the same wild strain that infected my previous batches.


4 weeks:  Bottled the beer up by lowering the carbonation to 2.1 vols, and adding back in the 3/4 gallon of beer I had drawn off on day 1 and added the bug/Brett blend to.  Bug/Brett blend shows nice acidity and slight funk, both finished at 1.003 so I am not too worried about bottle bombs.  Set ferm chamber to 74*F for priming (1 week), then will move out to garage to sit ambient to finish carbing and to sour and funk up more.

Wednesday, April 25, 2012

UPDATE: Brett Blonde

Thought I would post a quick update on the Blonde Ale that I turned some Brett lose on, mainly I just want to post some pix of the pellicle from inside the conical cuz it looks cool...


Tuesday, April 24, 2012

The New Hop Yard

Last year I grew a single lowly hop plant, Chinook, and collected a whole 21 cones.  First year, potted, lacking knowledge concerning nutrient deficiencies, all of these culminated in a weak first year.  But now we enter a new season, new plants, new knowledge, new trellis system.  Last weekend I cleared out the entirety of our backyard from all forms of plant life.  We dug down the whole thing a good 3 - 5 inches.  We brought in Playground Chips and laid it on thick over landscaping fabric... except for one strip of land about 2 foot wide by 24 foot long.  It was here, along the back wall, in full exposure to the sun that I erected the hop trellis.  On each end, I dug a hole 20" deep by about a foot wide into which I dropped a 14' 4X4 treated post cemented into a 2 gallon bucket.  The cement helps to make it slightly more permanent as well as add weight for an anchor, and putting it in the bucket allows me to dig it up and move it if/when we buy a house.  At the top I threaded an eye-bolt screw to attach my wiring.  I ran a length of 3mm Aircraft Cable from one eye-bolt, through a hole in the top of a 2X4 sunk into the ground between the posts for mid-way support, and through the other eye-bolt, down the post to a third eye-bolt where I attached it via a turnbuckle.  From the same eye-bolts at the top, I ran more cable to the fence posts where it went through an eye-bolt at the top of the post down to a ring attached to the bottom where it connected via another turnbuckle.  These guy wires pull the posts outward to anchor them so they don't collapse in towards each other under the weight of the hop plants.  They also pull them back some since the posts are 5 feet from the back fence and the fence posts are 8 feet.  This pulls the posts against the overhang of the house, thus anchoring the post in all four directions.  They can't fall back because the house is there, they can't fall out because they are anchored to one another, and they can't fall forward or in because of the anchors to the fence.  The space provided allows me to plant 7 hops in between the posts, and an extra 2, 1 at each fence anchor to grow up the anchor wires and along the fence, giving me room for 9 varieties.  I then back filled the holes to ensure stability.  

Next I dug out the top 3 inches of soil across the top of the entire area and added about an inch and a half of fresh planting soil from Lane Forest Products.  I also took a pic-axe (wish I would have used this to dig the post holes) and used it to dig holes about every 3 feet that were about 3" wide, 8" long, and 6-8" deep which I filled with the same new soil and piled up on top to make mounds about 3 inches high ( giving a final depth of about a foot).  On top of this I added an inch and a half layer of bark mulch for ground cover, to keep weeds out, and to keep nutrients like Nitrogen in (something I didn't do last year).  I transplanted my Chinook from the Rubbermaid I used last year and put it to the outside edge of the trellis.  I underestimated the depth and size of the roots that these things put out.  I thought it would have some roots around it being a year old, but they went all the way through the 25 gallon Rubbermaid and even out the hole in the bottom.  I also bought a healthy rhizome from Falling Sky of Brewers Gold (mother variety to many of the high alpha American hops, with decent bittering [~10%], and aroma/flavor of spice, fruit, resin, and Black Currants).  The rhizome was shaped like a boomerang with shoots on the top of one end and coming from the bottom on the other with flip-flopped roots as well, so I cut it in half and planted them each roots down, shoots up, facing opposite ways in the same hill, and covered with soil and mulch.

I will be adding quite a few more varieties (see here for more info on these hops) along with these two, such as, commercial American varieties Cascade, Centennial, and Santiam, old-school New Zealand variety AplhAroma, French Tardif d' Bourgnone (Strisselspalt and Saaz like), as well as 2 experimental varietals: American high alpha, high aroma Blisk and the Continental / Saazer type variety Cerara.  There is also a Japanese variety called Shinsuwase with a very perfumey nose that I might try to plant as well (at the loss of another variety).  I will of course continue to update the progress of the hop yard with lots of pictures and hopefully some helpful hints on how to maintain, feed mid season, trouble shoot, harvesting and drying the hops, as well as experimenting with each variety in SmAsH beers to evaluate there contributions.

Monday, April 9, 2012

DIY: Stir Plate Build


Yeast... it is the key factor to fermentation.  Without yeast, there is no beer.  Yeast is what turns the sugars in the wort into CO2, alcohol, fruity esters and spicy phenols (where appropriate), and all the wonderful flavors we look for in beer.  Yeast also can add flavors that we don't want, off flavors, higher alcohols, and other things that can cause a beer to no longer be wonderful.  The key to making a great beer is healthy yeast.  Yeast, like us, can only do so much work before fatigue sets in and they have to stop.  In order to keep the yeast from quitting before their work is done they need sufficient nutrients, oxygen, and numbers.  Many hands make for light work.  The more yeast you pitch, the faster they can work, and the less stress exerted on them to finish their job.  

There are multiple ways to get an adequate amount of healthy yeast to pitch.  One way is to buy lots of yeast packs and pitch them all in.  Another way is to get a pitch of yeast from a brewery.  The standard way that a homebrewer has sufficient yeast of the strain they want for the best fermentation is to make a yeast starter.  Basically, you make a small amount of wort 1-2L of 1.040 wort with yeast nutrient, cool it, and pitch the yeast into it.  This will grow the amount of yeast and get them awake and active, ready for fermentation.  You can grow more yeast by adding oxygen as you pitch the yeast.  You can grow even more by shaking the starter whenever you pass it which sends oxygen into the wort while expelling the CO2 lowering the pressure in the vessel and allowing for more growth.  The best way to make a starter to optimize growth is to place it on a Stir Plate.  A Stir Plate uses magnets to create a constant vortex in the starter releasing CO2 and infusing with oxygen continually.  Commercial Stir Plates can easily cost $100, even on eBay.  But we're homebrewers, we don't pay absurd prices for beer we can make 5 gallons of for less than 3 6 packs (sometimes less than a bottle), so why would we pay that much for a piece of equipment that you can make for around $25?

Do you have access to a hard drive?  What about a computer fan?  What about a cigar box?  What about an extra 12V power supply (maybe to the old Sega)?  Grab a couple screws, nuts, washers, rubber washers, and some basic tools and you're good to go.  If you want more information on how to build a Stir Plate beyond how I did it, you can always read the article I used to build mine from Brew Your Own

What you’ll need:
Wooden cigar box
80mm 12-volt DC fan
12-volt AC/DC wall adapter
Rare earth magnet (from hard drive)
4 - #6-32 x 2” machine screws
4 - #6-32 machine screw nuts
#6 metal washers
4 - 1⁄4” flat neoprene wash
Plastic wire connectors


Tools:
Wire cutters
Drill
13/64 Drillbit
Countersink
Electrical Tape

Extra Needed Materials to Use:
2000ml Erlenmeyer flask
Magnetic Stir Bar


Start by opening up the hard drive and removing the rare earth magnet.  Once you have it, place it on the main hub of the fan and give it a spin to make sure the weight is distributed.  Mark it off with a pen, the superglue it in place.  Next measure the top of the cigar box to find the center and figure out where to drill your holes to attach the fan on the inside lid.  Once you have the holes marked out (use an inked q-tip), drill the holes so that they can sufficiently take the screw.  I did a countersink on mine that will allow not only for the head of the screw to fall below the level of the lid, but to have room for covering the head of the screws with wood putty (just sand it down and paint over for a clean look).  Open the lid and slide the screws through the top to the inside.  Slide the neoprene washer onto the screw, rubber side towards the box, then a couple washers; next slide the fan onto the screws, magnet towards the lid.  Add a washer to the screw next, then place the machine nut onto the screw and tighten it until the fan no longer moves (do this on all four screws).  If there is not enough clearance between the lid and fan for it to spin freely, add some more washers between the neoprene washer and the fan.  Once it is set you can wire it up.  Drill a hole through the back to slide the wire from the 12V power supply through.  Cut the wire of the 12V as close as possible to the part that attached to the device it was used for (typically the little circular plug).  Splice the ends of the fan wires to the 12V wires using plastic wire connectors and tape on tight.  (I just put the ground wire into a plastic wire connector and taped it off).  Check to see if you wired it up correctly and to see if it is stable; it might shake some, place a partially filled flask on top to see if it stops the rattling.  I filled in the hole around the wiring, and sanded it down as well to make a complete housing.  After a paint job it was ready for use.

Once it is ready, make your starter: go here to figure out what size starter to make for your specific batch of beer.  Once you know how big your starter needs to be, you take your flask, measure your water, and dump some of it out into a bowl where you will mix in the DME (1000ml of water to 100g DME makes 1.040 starter wort).  Add it back to the flask with some nutrient, and boil in the flask.  Add a couple drops of foam control to keep it from boiling over and to keep any krausen from blowing off during growth.  Drop in the magnetic stir bar during the boil to sanitize it.  After boiling, cover with foil and chill to pitching temps (below 80*F) in an ice bath (placing a cooling rack under the flask helps cool quicker).  Sanitize your yeast pack, open, pitch, and recover with the foil.  Tilt the flask so that the stir bar is at the outer edge, and place it on over the center of the plate.  You will see the bar magnetize to the magnet on the fan.  Slide it until the flask is centered.  Plug it in, and you will see the vortex form.  Place out of direct sunlight, and let her roar for a couple days.  You will see it get foggy and creamy.  After it is done, place it in the fridge.  On brew day, remove the flask from the fridge, let it warm up, and when you are ready to pitch - remove the foil, decant most of the wort, swirl up the yeast, and pitch it in – be careful not to toss the stir bar in with it.

UPDATE: This is an awesome tool to use as you step up your starters, but some times you have a small amount of yeast, like from a bottle or slant/plate, and need to do a 10ml starter, what then.  Build a Shaker Tray for the initial steps, then use your Stir Plate for the 100ml and 1000ml steps.

Thursday, April 5, 2012

Infecting My Infection Experiment

A few weeks ago I brewed up a basic American Blonde recipe to test my fermenters to see if I had effectively killed off the infection that may have been housed in them from previous batches.  The conical version of the beer seemed to be infected from the start so I decided to sour up the whole lot of it.  After checking the final gravity on the Better Bottle version and tasting it, I decided that I didn't have to have 5 gallons of this one bottled and could go for a half batch or so.  It seems a little thin with a FG of 1.005.  The flavors are nice, but the body is a little off.  I shouldn't have expected much different since I pulled 10.5 gals (post boil) from 12.5# of grain, and with such a low OG (1.037) even taking up the mash temp to 153*F wasn't going to stop it from finishing low.  Thus the decision to purposely infect the infection experiment batch.

On the conical, I diverted 1 gallon to a jug that housed a Brett starter to funk up, and I hit the remainder with 1/4 cup starter from Russian River Consecration and 1/4 cup of my Lambic along with 8 pieces of French Oak.  After a few days it was tasting quite oxidized, so I moved it out of the conical into smaller containers.  I put all the oak into one jug so it will be over oaked and used to blend into the final mix.  The rest was put into 2L bottles with a small addition of sugar.

I bottled 18 bottles worth from the Better Bottle using carb tabs just so I can know exactly how the final batch actually turned out.  The rest I transferred into the conical where I added the entire 2.5 gallons of this wort fermented on all Brett, the gallon of Bretted conical beer, and added 1.25# Clover Honey for added sugars.  I put a piece of saran wrap over the top so that I can easily look inside at what is going on with out allowing oxygen in every time I take a peek.  The saran wrap is kind of fogging up from the honey fermenting, which started out as a ring of foam as is began to dissolve from the bottom of the conical and start to ferment and slowly developed into a full krausen by 2 days later.

The plan is to let the Better Bottle version now in the conical funk up with Brett for a few months while the original conical version sours in the 2L bottles.  After 3 months or so, I will drain off a couple gallons of the Bretted conical into 2L bottles and add a 1 gallon starter of Lacto and honey, as well as a couple of the 2L soured bottles to get the souring bugs going in the Brett only version.  After some time passes I will pull some more form the conical and add the remaining 2L bottles of soured Blonde as well as the oaked sour Blonde to the mix.  Come the end of summer, I will have 2 gallons of Blonde Ale on Brett, and about 8 gallons of soured, oaked, wild Blonde which I will split 3 gallons onto cherries, 3 gallons onto apricots, and keep 2 gallons straight giving me a total of about 10+ gallons.  We will see how time plays this one out. 

Monday, April 2, 2012

The Becca: Imperial Chocolate Stout w/ Cherries & Chipotle

The Becca: Smokin' Hot Mother of A Stout.  I got the idea to brew a beer to name after my wife, a complex, deep, rich beer to ponder, as the back of the label reads:

Gaze upon her beauty ever so longingly, be captivated by her sparkle, stand in awe of her mystery.  You would not think that she had the fortitude to withstand the years, yet with a strength that causes many to wonder at her power.  So dark that you would think her bracing, and with a gracious smoothness that drives one to ponder her infinite depths, the complexity and richness of who she is --- truly a sweet heart.

Great Western Pale Malt, Crisp Pale Chocolate, Black Patent, C75, Carafa III, C136/165, Cherry Wood Smoke Malt, Zeus hops, Chipotle pepper, 3.75# Sweet Cherries, 61 IBUs, 10.6% ABV.


Appearance:  Pours like oil, jet black, 1 finger dense brownish tan head that fades slow to a thick cap, leaving behind spotty lacing and nice legs.  The head has a slight rose-ish tint to it on the edges from the cherries.

Aroma:  Smells of dark chocolate, espresso, cherry, big sweet caramel, plums, burnt raisins, toast, deep dark fruits, baking cocoa, hints of smoke and spices, touch of alcohol as it warms.

Taste:  Flavors pop with chocolate cake, cherries, plums, burnt toast, slightly spicy, hint of smoke, bready, touch of coffee beans, big caramel presence.  Drinks like a black barley wine with hints of cocoa and smoke, roast is light and could stand to show more presence.

Mouthfeel:  A warming finish but not boozy, big, chewy, sweet yet semi dry finish, slick, light carbonation, coats the tongue and throat and leaves them covered.  Bitterness is in the background and balances the beer to keep it from being cloying, but doesn’t assault you.

Overall:  Very impressive Imperial Stout, and way too drinkable for 10.6% at only 4 months.  Deep, black, thick, sweet yet not cloying, mild roastiness, big fruits, chocolate.  The spiciness and smokiness of the Chipotle are hinting at their presence, as is the Carafa III bringing in a touch of coffee.  The cherry lets you know that it is there, but you wonder if it is malt & yeast or fruit.  It could stand to be a little more bitter to help balance it out, and a touch of roast barley or more black malt for a little more roast character and to help dry the finish out and leave you wanting more.  Looking forward to how this beer ages (especially since it had the last pitch of the dreaded infected batches).


And as an added bonus, it makes a killer addition to chocolate cake!