Showing posts with label yeast starter. Show all posts

Friday, September 14, 2012

Where the Wild Things Are: The Carol


About a year ago, actually, 52 weeks ago, I brewed up a Lambic that I fermented with the yeast I cultured off of blackberries from my backyard and a small starter of yeast from organic peaches grown locally.  After making the wort and adding the entire starter from each yeast to the carboy, I had a "funny" fermentation which consisted of small bubbles flowing up to the top quickly to feed a very small fluffy white head that looked like a single centimeter of soda foam.  Eventually the fermentation looked a little more like normal, but the krausen never really roared up like a normal yeast would.  There were chunks of peach flesh and blackberry, as well as oak chunks on top.  I also added some wild grapes after a month for a little extra yeast.  After only three weeks it was down from 1.053 to 1.006.  Nice and fruity, with a light tartness, mostly tropical and berries.

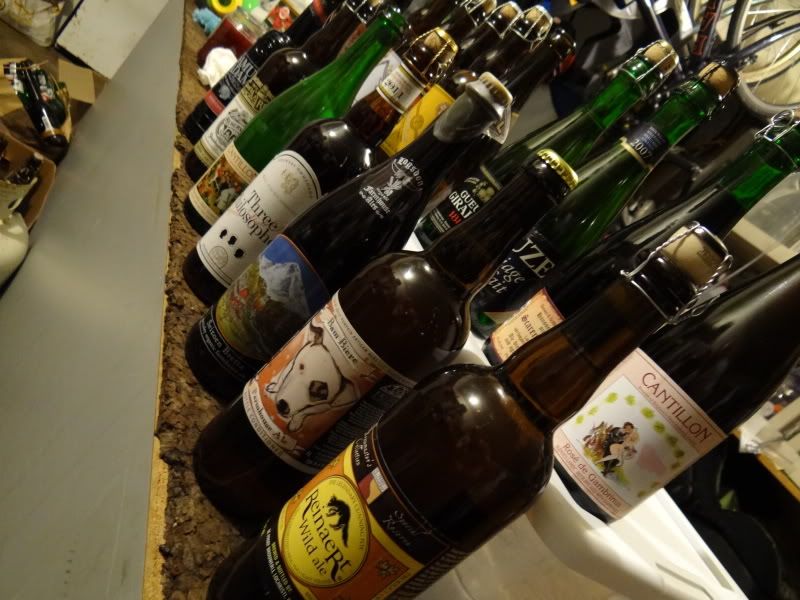
Over the course of fermentation, I have added dregs from commercial and homebrewed sours to try to get more complexity built up from other sources of Brett and bacteria.  I added some Russian River dregs, Cantillon Grand Cru, Jolly Pumpkin, Oude Beersel, Girardin Black, some infected Logen Berry mead a buddy made, and some dregs from a sour I did with Russian River dregs.  This will ensure a more complex beer, but it also kills much of the work I did culturing the yeast since the final product isn't a showcase of what that yeast can actually do (part of the reason I am going to brew a new one this year with fruit cultured yeast again and leave it alone).

After a few months I noticed a lot of oak character showing, and seeing that I used 5 oz of French Oak that had come from a wine barrel in Lodi, it wasn't any wonder why.  I needed to do something to stop the oaking, but I didn't want to lose all of the goodness in the trub and yeast that is needed for a Lambic to ferment properly.  I racked the beer out of the carboy into my sour bottling bucket and then dumped the trub, yeast, fruit, oak, etc., into a vessel while I cleaned the carboy and removed all the oak.  After this I added a few pieces of oak to the carboy, opened the valve on the bucket and refilled the carboy.  While this was going on I also racked the yeast, trub, and fruit back into the carboy as well.


I noticed an oxidative character beginning to creep in around January, so I brewed a little extra wort on my Saison and added a half gallon to the carboy to displace the head space.  The FG was still at 1.005.  Only took a few days for the fermentation to kick back up and take on the fresh wort.  After about a month or so, it was back down to 1.005.

Given another month, the FG had gotten down to 1.002, and there was a sheen atop the wort slightly resembling an oil slick, not like the pellicles I have seen before on my other sour beers.  By mid summer the taste was nice, funky, tart, clean, fruity, spicy, but lots of oak, so I racked it from the 6 gallon carboy into a 5 gallon, taking some of the yeast sediment at the bottom with it.  Given another month, the oakiness is starting to fade some.  I racked 1/2 gallon out of the carboy and added 1/2 gallon of my sour Blonde ale to try to cut down on the oak a little.  A few weeks later I am happy with the results, and am ready to bottle, and seeing that it is sitting at 1.001, not much more for it to do in the short term.

A beer that I have been watching, shaping, tasting, aging, and waiting on for a year is no simple brown bottle beer.  For this batch I needed to do something special, at least for a few bottles.  I started with 375ml Champagne bottles.  At this point I could go with cork and cage, or cork and cap (Cantillon style), but I opted for a cap and wax seeing as they look very nice, and it's super cheap as well as not requiring extra equipment.  Add to this full labels with art work and it is a very nice show piece, even if it is only 6 bottles worth.

I hope that the beer will carbonate quicker than my other sour which has been bottled for nearly 7 months and is still fairly flat.  Our club has a competition coming up and in late October that I would like to enter this batch into.  I will of course set the bulk of this beer aside to cellar for years to come and continue to develop.

This beer will be the first installment in my new series of beers, dubbed Where the Wild Things Are, named after characters from the children's book made movie.  The first is going to be called The Carol.  One of the main Wilds, he was impulsive, much like brewing a beer with blackberry yeast, adding dregs at random, and over oaking, only to move the beer twice.

NOTE: This beer took 1st place in Sour Beers and BEST OF SHOW in February 2014 at the KLCC BJCP comp.

Friday, May 18, 2012

Bring On The Bugs

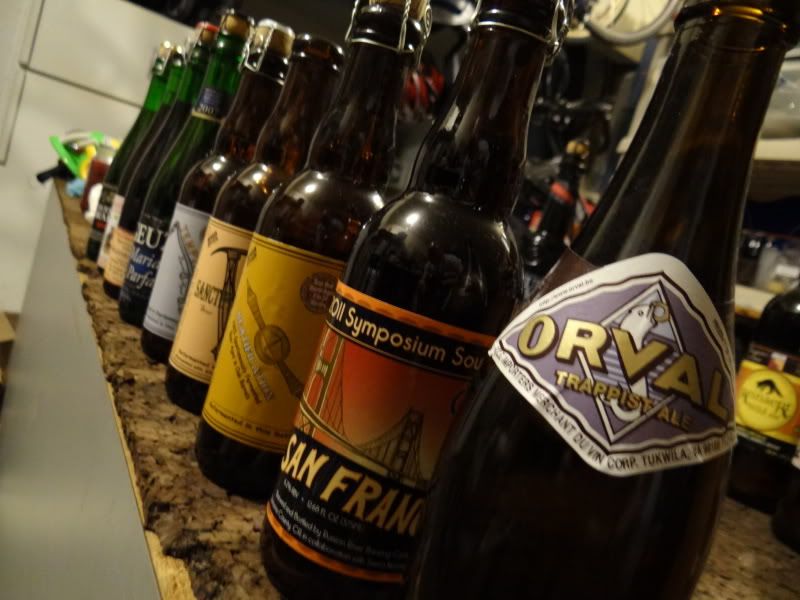
I've been thinking about building up my reserves for sour dregs to add a little more depth and complexity to my sour beers.  The two that have finished were good, but I only used one type of dregs to achieve them and my hope is to add a lot more to the following batches.  Previously I have used Russian River's Supplication and Consecration.  Recently I built up the dregs from there Sanctification which is brewed with only Brett, with Lacto and Pedio in secondary, and bottled with Brett alone (thus removing the champagne yeast that they use in all the other sours at bottling), as well as dregs from a bottle of Jolly Pumpkin Bam Biere which has a great pellicle.  I added the dregs from a bottle of Oude Beersel Oude Geuze Vielle to my Lambic as well as dregs from some of my homebrew, Cantillon, and a dose of Logenberry Mead from my buddy that had gotten infected.  

I've got quite a few bottles of different sours that I was considering culturing from, such as, RR Beatification (among other RR offerings), Cantillon Rose de Gambrinus, Oakshire Scookumchuck, Girardin 1882 Black Label, Boon Oude Geuze Mariage Parfait 2007, and Hannsens Scarenbecca Kriek.  What I was thinking was to make a 1.030 starter wort from DME and Apple Juice, transfer into water bottles and put it in the freezer until I drink one of these bottles, at which point I will pop the cork, pour the beer, flame the lip, and add dethawed starter wort to the dregs in the bottle then place foil on top and leave at ambient to grow.  After some time I will be able to swirl up the starter of which ever one/ones I want to use, pour some off into the beer I am brewing, and add some more starter wort to it to feed it and keep the culture going.  This will give me variety, and since I have lots of 1 gallon jugs, I can add JP to one, Cantillon to another, Hannsens to another and RR to another, and compare how they turn out, then blend to the desired effect I want.


One problem that I hit was with the bottle of Fantome Saiosn D'Erezee Prentemps that I did this with.  I ended up with Icebergs on top (Large clumps of mold) and a Sea Cucumber floating around in the liquid (large carpet of mold).  According to another homebrewer and sour  maker he has had this same issue when the starters are grown in too hot an environment.  Another issue that Mike Tonsmeire threw my way, and I was reminded of again while reading Wild Brews again, is that mixed cultures like this will be very difficult to keep in balance.  Inevitably the Sacc strain will die off and autolize, the Lacto (especially in un-hopped stater wort) and Pedio will multiply rapidly, and the Brett will not keep up with the acid bacteria.  If this were to happen, successive batches would become very sour and not have much other flavor components to keep the beer in balance with the proper flavors and aromas, just sour.  What he recommended, and the way I will probably go, is to just pitch the dregs into a batch, let it age, bottle, and then pitch the dregs from my bottled beers into new sours along with other dregs, age, bottle, repeat, and so on.  This will give me a large diversity of bugs and wild yeasts from different breweries, as well as a house character as my current bugs and yeasts are repitched and morph from batch to batch.  With all the different sours I have going right now, it sounds like a good option.


Add to this my culture of Lacto from yogurt, and my Brett starters - 1 Orval, 1 Reinhardt's Flemish Wild Ale, and I will be getting some Brett C from an all Brett beer that some buddies have going, I should be looking at quite a bit of funk to funk around with.

Monday, April 9, 2012

DIY: Stir Plate Build


Yeast... it is the key factor to fermentation.  Without yeast, there is no beer.  Yeast is what turns the sugars in the wort into CO2, alcohol, fruity esters and spicy phenols (where appropriate), and all the wonderful flavors we look for in beer.  Yeast also can add flavors that we don't want, off flavors, higher alcohols, and other things that can cause a beer to no longer be wonderful.  The key to making a great beer is healthy yeast.  Yeast, like us, can only do so much work before fatigue sets in and they have to stop.  In order to keep the yeast from quitting before their work is done they need sufficient nutrients, oxygen, and numbers.  Many hands make for light work.  The more yeast you pitch, the faster they can work, and the less stress exerted on them to finish their job.  

There are multiple ways to get an adequate amount of healthy yeast to pitch.  One way is to buy lots of yeast packs and pitch them all in.  Another way is to get a pitch of yeast from a brewery.  The standard way that a homebrewer has sufficient yeast of the strain they want for the best fermentation is to make a yeast starter.  Basically, you make a small amount of wort 1-2L of 1.040 wort with yeast nutrient, cool it, and pitch the yeast into it.  This will grow the amount of yeast and get them awake and active, ready for fermentation.  You can grow more yeast by adding oxygen as you pitch the yeast.  You can grow even more by shaking the starter whenever you pass it which sends oxygen into the wort while expelling the CO2 lowering the pressure in the vessel and allowing for more growth.  The best way to make a starter to optimize growth is to place it on a Stir Plate.  A Stir Plate uses magnets to create a constant vortex in the starter releasing CO2 and infusing with oxygen continually.  Commercial Stir Plates can easily cost $100, even on eBay.  But we're homebrewers, we don't pay absurd prices for beer we can make 5 gallons of for less than 3 6 packs (sometimes less than a bottle), so why would we pay that much for a piece of equipment that you can make for around $25?

Do you have access to a hard drive?  What about a computer fan?  What about a cigar box?  What about an extra 12V power supply (maybe to the old Sega)?  Grab a couple screws, nuts, washers, rubber washers, and some basic tools and you're good to go.  If you want more information on how to build a Stir Plate beyond how I did it, you can always read the article I used to build mine from Brew Your Own

What you’ll need:
Wooden cigar box
80mm 12-volt DC fan
12-volt AC/DC wall adapter
Rare earth magnet (from hard drive)
4 - #6-32 x 2” machine screws
4 - #6-32 machine screw nuts
#6 metal washers
4 - 1⁄4” flat neoprene wash
Plastic wire connectors


Tools:
Wire cutters
Drill
13/64 Drillbit
Countersink
Electrical Tape

Extra Needed Materials to Use:
2000ml Erlenmeyer flask
Magnetic Stir Bar


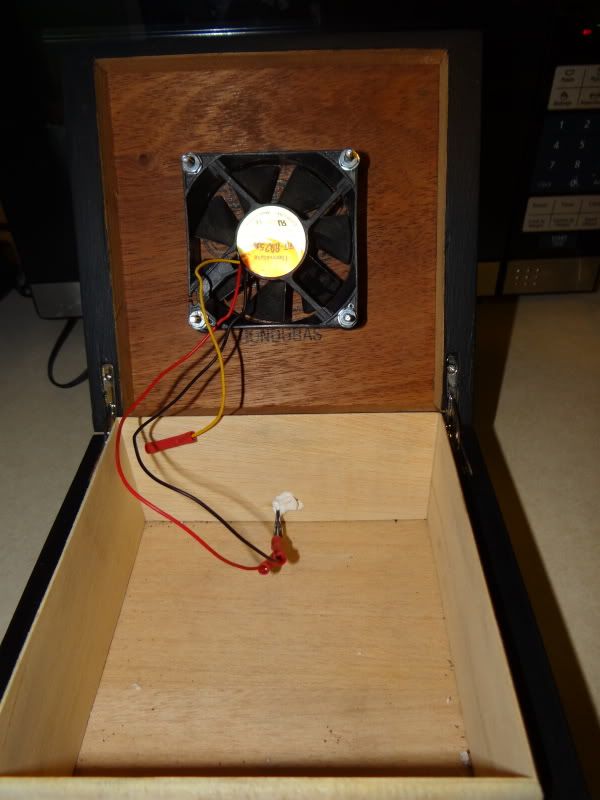
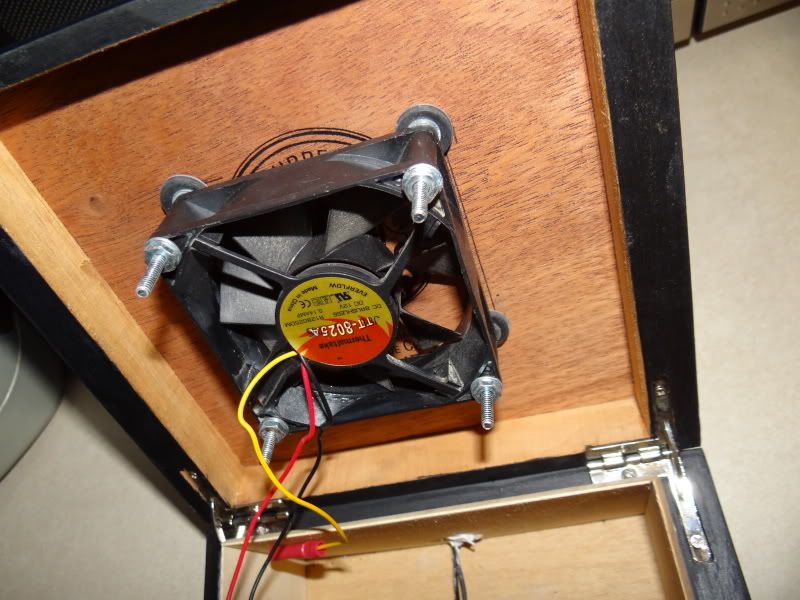
Start by opening up the hard drive and removing the rare earth magnet.  Once you have it, place it on the main hub of the fan and give it a spin to make sure the weight is distributed.  Mark it off with a pen, the superglue it in place.  Next measure the top of the cigar box to find the center and figure out where to drill your holes to attach the fan on the inside lid.  Once you have the holes marked out (use an inked q-tip), drill the holes so that they can sufficiently take the screw.  I did a countersink on mine that will allow not only for the head of the screw to fall below the level of the lid, but to have room for covering the head of the screws with wood putty (just sand it down and paint over for a clean look).  Open the lid and slide the screws through the top to the inside.  Slide the neoprene washer onto the screw, rubber side towards the box, then a couple washers; next slide the fan onto the screws, magnet towards the lid.  Add a washer to the screw next, then place the machine nut onto the screw and tighten it until the fan no longer moves (do this on all four screws).  If there is not enough clearance between the lid and fan for it to spin freely, add some more washers between the neoprene washer and the fan.  Once it is set you can wire it up.  Drill a hole through the back to slide the wire from the 12V power supply through.  Cut the wire of the 12V as close as possible to the part that attached to the device it was used for (typically the little circular plug).  Splice the ends of the fan wires to the 12V wires using plastic wire connectors and tape on tight.  (I just put the ground wire into a plastic wire connector and taped it off).  Check to see if you wired it up correctly and to see if it is stable; it might shake some, place a partially filled flask on top to see if it stops the rattling.  I filled in the hole around the wiring, and sanded it down as well to make a complete housing.  After a paint job it was ready for use.

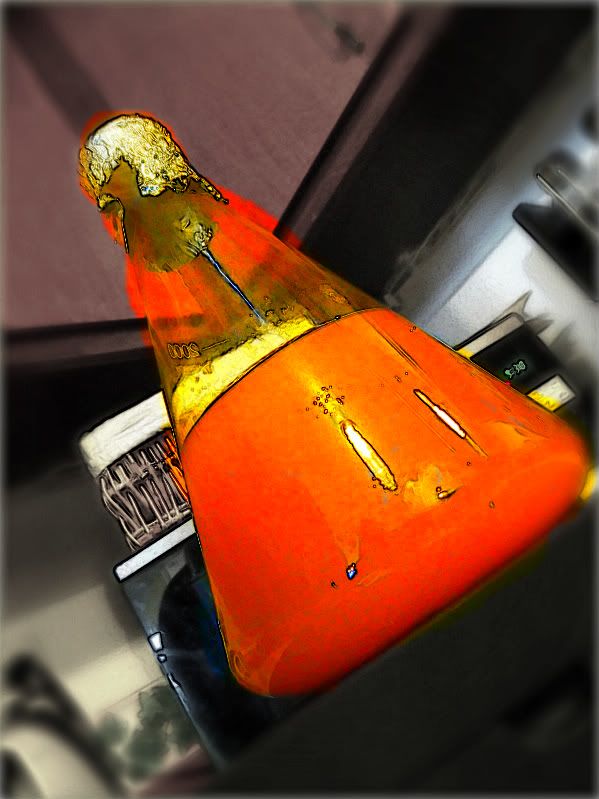
Once it is ready, make your starter: go here to figure out what size starter to make for your specific batch of beer.  Once you know how big your starter needs to be, you take your flask, measure your water, and dump some of it out into a bowl where you will mix in the DME (1000ml of water to 100g DME makes 1.040 starter wort).  Add it back to the flask with some nutrient, and boil in the flask.  Add a couple drops of foam control to keep it from boiling over and to keep any krausen from blowing off during growth.  Drop in the magnetic stir bar during the boil to sanitize it.  After boiling, cover with foil and chill to pitching temps (below 80*F) in an ice bath (placing a cooling rack under the flask helps cool quicker).  Sanitize your yeast pack, open, pitch, and recover with the foil.  Tilt the flask so that the stir bar is at the outer edge, and place it on over the center of the plate.  You will see the bar magnetize to the magnet on the fan.  Slide it until the flask is centered.  Plug it in, and you will see the vortex form.  Place out of direct sunlight, and let her roar for a couple days.  You will see it get foggy and creamy.  After it is done, place it in the fridge.  On brew day, remove the flask from the fridge, let it warm up, and when you are ready to pitch - remove the foil, decant most of the wort, swirl up the yeast, and pitch it in – be careful not to toss the stir bar in with it.

UPDATE: This is an awesome tool to use as you step up your starters, but some times you have a small amount of yeast, like from a bottle or slant/plate, and need to do a 10ml starter, what then.  Build a Shaker Tray for the initial steps, then use your Stir Plate for the 100ml and 1000ml steps.