Showing posts with label calibration. Show all posts

Friday, April 12, 2013

New Weldless Ball Valve, Pick Up, and Hop Filter

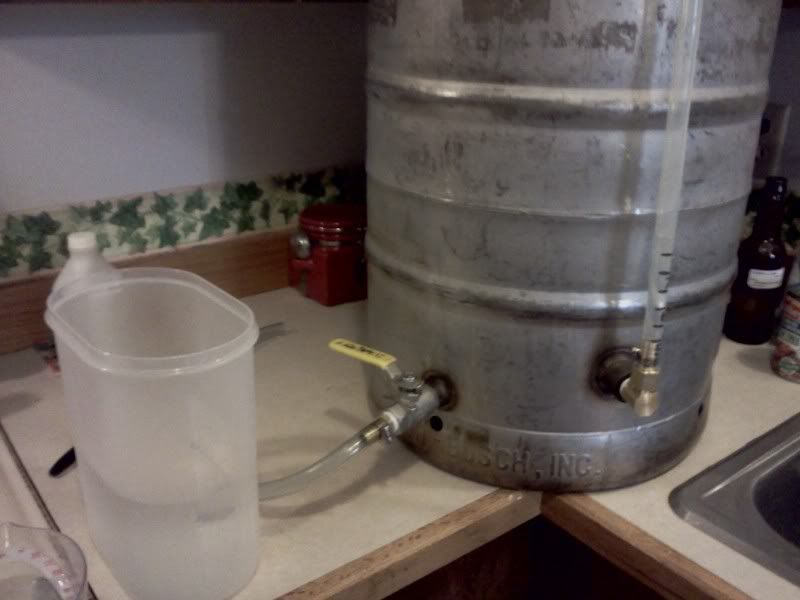
When I first got my keggle, it came pre fit with a 1/2" OD nipple welded to the outside that the ball valve was threaded onto.  The weld on the inside is very rough, and getting 3/8" fittings to thread into it has always proved to be a pain.  With the addition of the larger chiller I got for Christmas, I had to change the pick up configuration from straight out into the middle to an angle to the side (the chiller would sit directly on top of the old pick up and push it down as well as tilt the chiller back).  When I pulled the old straight fitting and tried to put the 45 degree fitting in its place, it wouldn't hold, which caused me to lose suction at that joint (leaving nearly 3 quarts in the bottom).  It also makes for a difficult clean up since I have nearly 5 brass and copper parts in place to make the angles as well as to have the option of removal.

Compound this with all the failed attempts to filter out the hops and trub from my beers (a small hop taco and a large hop taco both clogged on 10 gallon hoppy batches), and I have been set for a change.  I was thinking about having a 90 SS street elbow welded to the inside to flow into the nipple and ball valve, but then I thought there might be a better option, especially with some of the infection issues I have had. 

Monday, January 14, 2013

New Brewhouse Additions

This year for my birthday and Christmas I was given a chance to expand my brewery equipment and make for a much easier brewday as well.

For my birthday I was able to purchase some aluminum cam lock fittings for the new tubing I am going to be using.  I shopped around and looked at the brass and Stainless Steel quick disconnects which are way too expensive, and I also looked at the SnapLocks from Williams Brewing, which looked great and were affordable, but I faced the issue of having to order, pay shipping and handling charges, and await delivery if I needed to replace an existing piece or expand my usage at all.  I found that A1 Coupling, a local store, carries ½” aluminum cam locks for just about the same price as Williams and I can buy them in town without shipping costs and times.  The aluminum may not look as nice as the SS, but they will work just as well.

I did end up doing an order from Williams Brewing for some other items though.  I bought their silicone washers to replace the washers in the cam locks since the silicone is rated for boiling temps and is food grade.  I also bought 10’ of their ½” thick wall thermoplastic tubing.  I can get silicone tubing here in town at the local brewshop, but it is outrageously priced and using hose clamps on silicone will destroy it.  The thermoplastic is stronger than silicone, cheaper than silicone, and works great with boiling temps, the only draw backs are that I can’t get it locally when I need it, and it is opaque making it impossible to see the liquid flowing through it.  I know another brewer who uses the same tubing in his brewhouse without issues, so I am fairly confident that it will work great for my purposes.

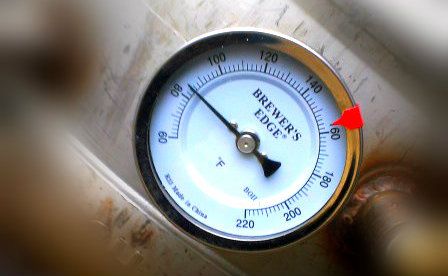
I also ordered a kettle thermometer from them as well (a Christmas present from my wife).  This is going to be a huge help on brewday.  Up until this point I have been dangling a probe thermometer inside my keggle from a piece of copper wire to monitor my temperature during chilling.  The huge problem with this is that I have to take the lid off of my kettle to check on my temperature which opens it up to airborne contaminants or to debris and bugs falling in.  With the new thermometer installed in the side of the keggle I can monitor the temperature of the wort from the outside, and with the new lid I have with a built in notch for my chiller I can keep the lid on from Knock Out to run off keeping the wort free from any outside contaminants.  Along with my new glass lab thermometer that will allow me to calibrate all my thermometers, I should be in good shape for great temperature measurements and more control in my temps.

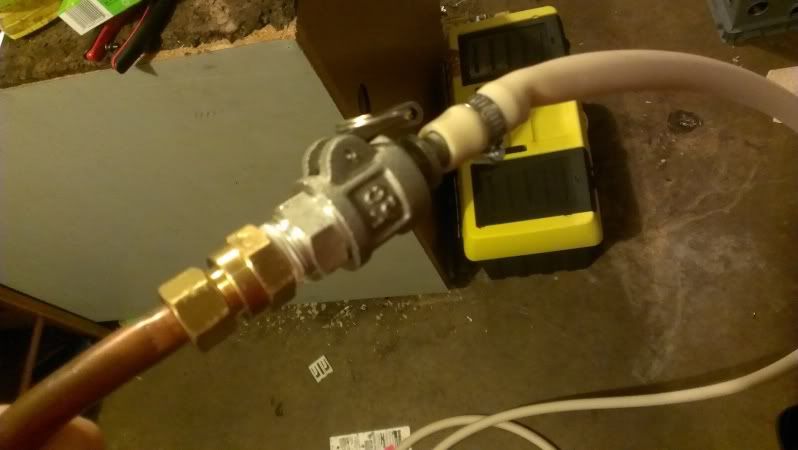
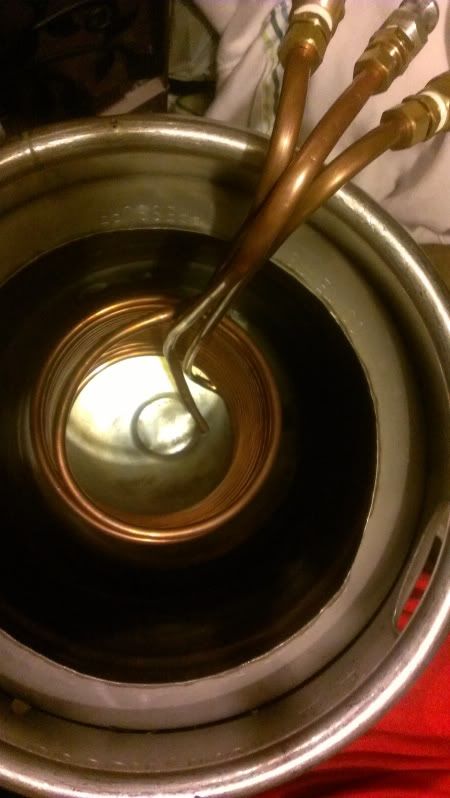
Speaking of efficient chilling and a notch in my lid for my chiller, I was able to take advantage of one of More Beer’s Deal of the Day items.  I had been planning on building a new wort chiller from 50’ of ½” copper tubing to replace my very ghetto 20’ – 3/8” one I built 2 years ago.  The cost of all the parts was going to be about $100, plus the labor to bend and twist all the pieces, as well as soldering, which I don’t know how to do, and hoping it looked attractive.  When More Beer had that exact chiller, professionally built, for a few dollars cheaper than the cost of the parts to build one, my wife was very gracious and gave me a “Great Daddy and Husband” present, and bought the last one.  I added to this a 2’ length of ½” copper tubing with a J like curve at the bottom as well as a bend at the top for a whirlpool arm like Jamil’s.  I attached a compression to ½” FPT fitting to it that allows me to connect my male cam lock fitting.


At this point, many of you may be thinking, why would I need cam lock fittings with silicone washers, thermoplastic tubing, and a whirlpool arm attachment?  This brings me to the priciest new addition to the brewhouse, the present from my dad: a March Pump.  But you’ll have to wait for more on that one.

Wednesday, March 7, 2012

Laminated Envelope

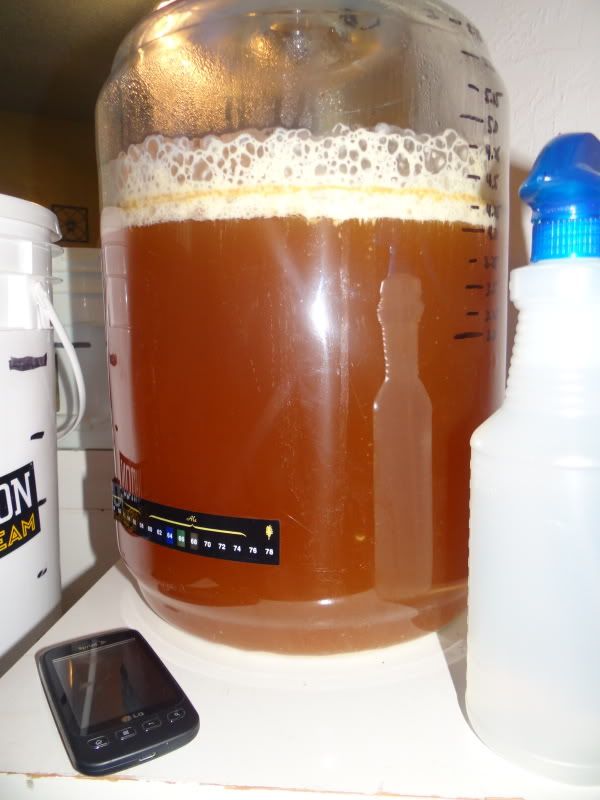
After all of the infections in my past 8 batches, then cleaning and sanitizing all the equipment, it was finally time to test it. I made some new adjustments to my brew house to help facilitate the brewday as well. I split my cold and hot water lines for my laundry and added Fresh Water hoses to it so I have water in the brew house now (no more running back and forth to the bathroom for strike and sparge water, or cleaning). I also got some plastic 4.5 cup measuring cups for hops. While my strike water was heating, I thought it best to calibrate my thermometer only to find it was 7*F off, meaning that on the past few batches when I thought I was mashing at 147*F, I was really at 140*F... thus 83% attenuation on my Bitters with yeast that stops at 72%. This also made my mash hit 159*F instead of 153*F, so I hit it with cold water until it evened out at 153*F.

After I ran off my first runnings, I hit it with my sparge water and gave it a good mix. Started to run off the second runnings and noticed that it was quite slow from 7.5-8 gallons, then no movement at all... my very first stuck sparge (23 batches). I gave it a good stir, recirculated, and ran off the remainder to 10 gallons @ 1.040. 1.040 was supposed to be my OG post boil. I hit 90% efficiency. Had to think on the fly for this one. I didn't want a 1.050 Blonde Ale, so I topped it off with cold water to hit 12 gallons preboil @ 1.033, and added another 0.10 oz of Zeus for the adjusted bittering. Boiled it down to 10.5 gallons in an hour for an OG of 1.037 (should have boiled another 15-20 minutes to get it closer to my desired OG of 1.040). My Immersion Chiller - designed for 5 gallon batches - took the 10.5 gallons from boiling to 90*F in about 22 minutes, not bad (another 15 minutes to get it to 65*F).

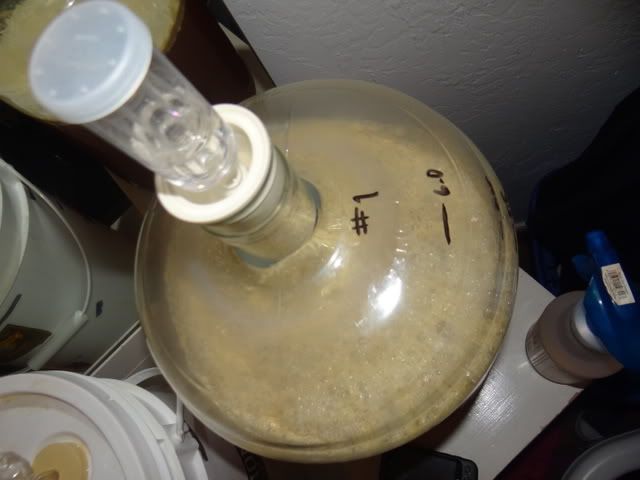
After letting it settle, and sanitizing my Better Bottle, conical, and a 6.5 gallon plastic bucket, I started running it off into the Better Bottle (measurements are fully calibrated on it). At about 1.75 gallons, I stopped the flow and dumped it from the BB to the bucket, then filled the BB to 4 gallons and dumped it into the conical (which was severely off on its measurements). Then I sent 4 gallons to the BB and the last of it to the bucket (2.5 gallons total). I aerated the BB and conical and pitched the 1.5L West Yorkshire starter into the two batches. I pitched a starter of Brett I made from Orval previously into the bucket for a Brett Blonde with the extra wort (didn't want to pitch the yeast for 8 gallons into 10.5).

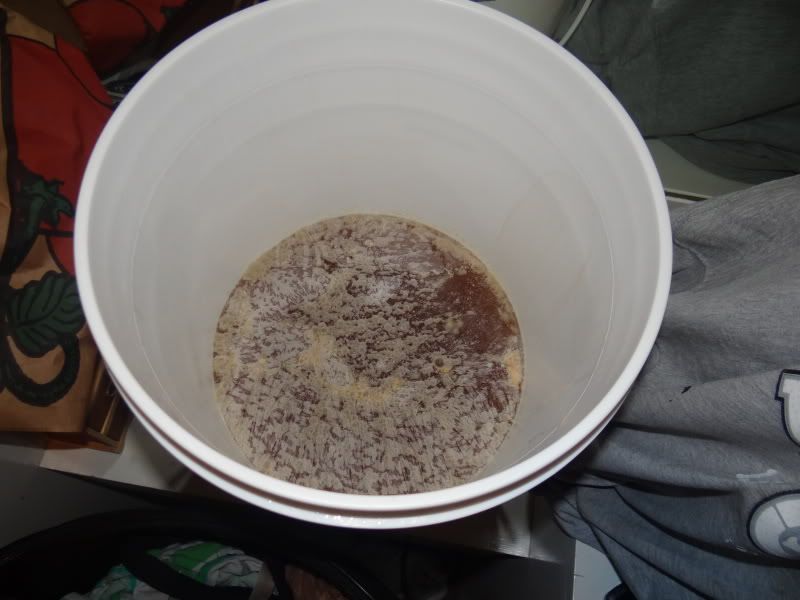
The Blondes were rocking within 16 hours, and full bore by 30 hours, but the Brett Blonde was still a no-go at 42 hours, so I dumped the rest of the Orval starter into it before work and came home to a nice pelicle. After another 36 hours the pelicle is full bore and bubbled up nicely. Another 24 hours later and the Brett Blonde has a krausen. Wort stability test was still showing no activity at one week, which is awesome, I opened it and it is pure fresh wort.

After one week, I took samples and readings on all of them. The Better Bottle smells of peaches, melons, and a touch of sweet malt at 1.010. The conical is at 1.007, the aroma is lightly phenolic and has a light dirty fruit smell... I am thinking the conical is infected and will now house sours only which sucks since it would be perfect for lagers, yet I want to do more sours so that works too. The Brett Blonde is acidic, light, funky, a little fruity, and slightly oxidized (I dumped the whole 2L 8 month old starter into 2.5 gallons, to be expected), and it is @ 1.007 as well.

_______________________

American Blonde Ale
10.5 gallons
20 IBUS
4 SRM
3.5 ABV
_______________________

11# Pale Malt
1# Carafoam
0.5# Honey Malt
45 minute mash @ 153*F
90% Efficiency
_______________________

60 minute boil
60 mins 0.20 oz Zeus 15.4% AA
25 mins 1.00 oz Amarillo 10.4% AA
0 mins 1.00 oz Amarillo 10.4% AA
_______________________


1/4 tsp Gypsum - Mash
3/8 tsp Calcium Chloride - Mash
1/4 tsp Gypsum - Boil
1/2 tsp Calcium Chloride - Boil
1/4 tsp Yeast Nutrient 12 mins
1 tab     Whirfloc 12 mins
_______________________

Chill to 62*F
Pitch 1.5L Starter WY 1469 West Yorkshire
Split to 3 fermenters
Ferment 68*F for 7 days
Ambient for 21 days
Bottled 18 - 12 oz bottles w/ 4 carb tabs each from Better Bottle only
Soured all remaining beer
_______________________

OG 1.037
FG 1.010


Just for fun... the name of the beer came from an infamous day for a co-worker that she will never live down. Back when our new branch was just opening and didn't have their own laminating machine, they would send any items for laminating to our main branch. The branch sent a couple new membership cards over to have laminated and placed into an envelope that was ready to mail to the members. The sticky note said "Please laminate and mail to the members" meaning, laminate the cards, place in envelope, and mail. The blonde of all blondes placed the cards into the envelope, then laminated the envelope and sent it back to the branch with a big question mark. Thus, an apt name for a Blond Ale... Laminated Envelope.

Monday, October 24, 2011

Efficiency Experiment: The Results Show

As planned, I did my efficiency experiment this past weekend and I think I found my culprits. I double milled my malts to ensure a good crush. I mashed with 1.5 qts/lb. I ran off my first runnings and measured them so I could hit my sparge water volume perfectly. I got my pre-boil volume perfect. I boiled for an hour, and added hops on schedule and lost exactly 1 gallon to boil off which is what I wanted. I hit 80% efficiency (measured pre and post boil).

When I went to fill the conical... not even enough volume to register on my measurements (which start at 4.5 gallons.) I topped it up with a measured 1 gallon of water to see where I was at, and hit 5 gallons on the nose. I lost 1.5 gallons of wort to my hops and kettle! I had been chatting with Denny Conn about my issues as well and he said that he figures about 12oz of beer lost to 1oz of hops. I had 7.5 oz of hops (5.5 whole, 2 pellet) and that would give me roughly 3/4 of a gallon lost to hops, and 3/4 gal lost to keggle pick up tube. That brought my efficiency down to 60%.

Monday, October 17, 2011

Keggle Fittings: Hop Taco, Pick Up Tube, and Sight Glass


This weekend I fit my keggle (15.5 gal keg converted to use as a kettle) with a few things to make it easier to use. I added a sight glass, and fixed my hop taco and pick-up tube that had failed in a previous brew session. These items were not too difficult to add since the keggle I got from an ex-homebrewer was already fit with a ball valve for draining which was threaded on the inside for easy addition of the pick-up tube, and it was already fitted with a threaded female port that had a hole in it making for a simple sight glass addition.


The most difficult aspects of adding the sight glass were finding the pieces to fit it with and drilling the hole at the top of the keg for the eye-bolt. I was trying to fit this keggle with a sight glass for as cheap as possible. The cheapest way was a nylon 1/2" male thread to 3/8" barb elbow, but that won't work with the boiling wort, so I had to go with brass, which doesn't have such a piece. This lead me to make a piece from two separate pieces, which is still difficult, and more costly. I ended up getting a brass elbow 1/2" male thread to 1/2" male flare, and a 1/2" female flare to 1/2" barb. This made for an easy addition with a little plumbers thread wrap to make the seals water tight (I didn't initially add this and then had to pull it all apart and add it after it leaked). I then added a length of 1/2" high temp vinyl tubing, and attached it through an eye-bolt to a 1/2" barb to 1/2" solder fitting so that it is opened at the top to avoid a vacuum in the sight glass.


Installing the eye-bolt was a difficult feat. I had numerous sizes of drill bits and planned to step it up as I went. The first, and smallest bit snapped off after making a small dent. The next size up snapped off as well. The next size up was too large to work properly. The second one to snap had broke off at the perfect spot to still fit into the drill and have 1/4" still showing, so it had no ability to snap again. After about 35 minutes of drilling with this broken bit, and stopping to dump the yeast on the conical for my Brown Ale and add the dry hops while my arms and drill took a rest, I switched out the battery and drilled for another 5 minutes and finally broke through the wall of the keg. Next I stepped it up 3 times. At this point I had one more bit left, my largest one, which was the size I needed to get the eye-bolt through. As I drilled through the keg it ate away at the bit and wore it down as opposed to opening up. I finally got the bit through, and between its work and the kegs work on it, I was able to twist the eye-bolt in and throw away the bit. I pushed the tubing up through the eye-bolt which had a nut on both sides of the keg to keep it in position, and then I pushed the 1/2" barb to solder fitting down into the tubing and through the eye-bolt which made for a very snug fit. Just for good measure I slid a hose clamp up the tubing and attached it under the eye-bolt to ensure proper fitting. I pulled the hose taught, cut it to the proper length to fit on the elbow to hose barb fitting, and then attached it with a hose clamp.


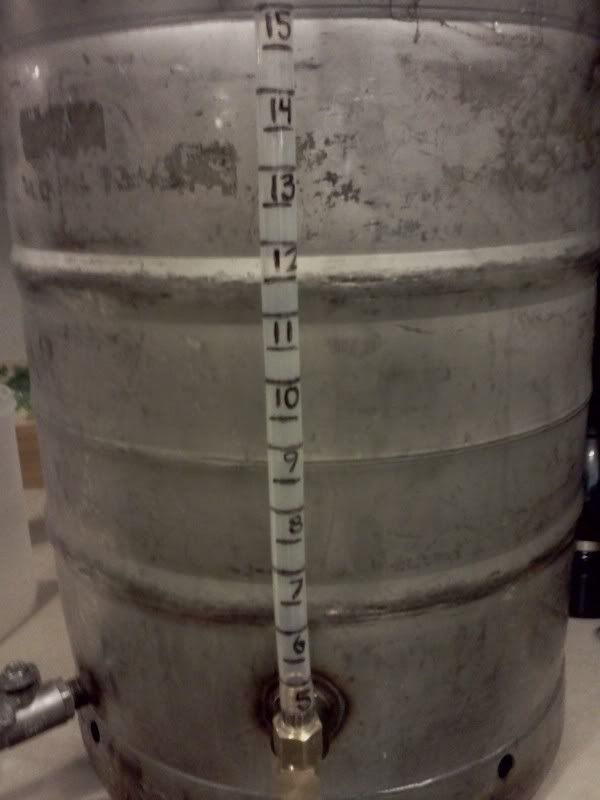
After an over night check for leaks, I calibrated it the next morning. I added a gallon of cold (hot would 1) be a waste of energy, and 2) have a higher volume since hot water is expanded and thus makes for a slightly higher volume) water at a time until it showed inside the tubing. It didn't show until 5 gallons, which will be fine for final volumes, but will not help figure out my first runnings and ensure that I have the correct sparge water, so I will be measuring quart-by-quart up to 5 gallons on a wooden dowel that I have so that I can measure my lower volumes accurately as well. After I reached the first mark, I measured out 1/2 gallon of water at a time and added this to the keggle, marking every full and half gallon on the vinyl tubing, all the way up to 15 gallons.


This sight glass will now let me accurately know how much wort I have collected from the mash, and how much I have post boil and chilling so I know how much I lost to evaporation, and once I move it into the fermenter I will know how much I lost to trub, hops, and keggle dead space (keggle volume minus fermenter volume).


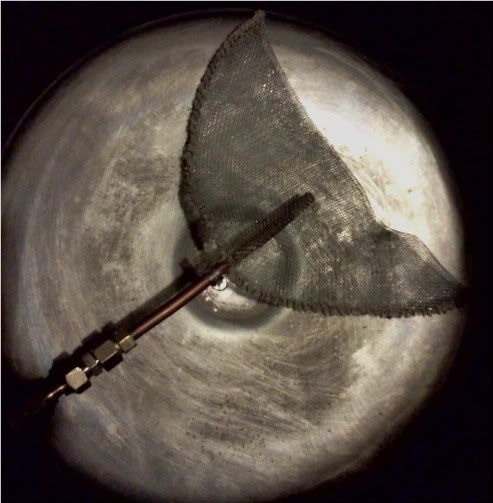
For getting the wort out of the keggle into the fermenter I fit the keggle with a pick-up tube and hop taco. The pick-up tube is a length of 3/8" copper tubing that curves down towards the bottom and through vaccum force will draw all the wort from the keggle through the ball valve into the fermenter. The pick-up tube is attached to a 3/8" female flare to 3/8" compression fitting. This initially screwed onto a 3/8" male thread (into the keggle ball valve) to 3/8" male flare, but on my Brown Ale it lost its vacuum. The way that it originally was set up didn't work well since it was attached to a hop taco (more to follow on how to make one) which makes it difficult to turn and remove, and if it is not connected perfectly the pick-up tube could be pointing up or side ways instead of down. To fix this issue I added a 3/8" female flare to 3/8" female flare piece that allows the flares to free spin on their own until tight. Now it is fit to the pick-up tube and free spins onto the keggle fitting allowing the pick-up tube and hop taco to stay in the position they should be while I spin the other flare onto the threads and tighten which gives me perfect position and seal, and ease of removal for cleaning.


The hop taco is a mesh screen that slides over the end of the pick-up tube to keep hops and even some trub from clogging the tube or going into the fermenter. To make it I bought a stainless steel strainer and removed the mesh from the frame. I then folded this in half and "sewed" it closed using copper wire, stainless steel wire would have worked easier and what was supposed to be used per the instructions from the creators, but I couldn't find any and was in a rush so I used copper. I "threaded" the wire through the mesh and pulled tight using needle nose pliers. I left an opening in the top middle for the pick-up tube to slide inside. I also put a few short pieces of copper wire through this section and left them dangling so I could use a hose clamp to keep the hop taco from sliding off the pick-up tube.

UPDATE 12/3/2012: NEW HOP TACO DESIGN