Showing posts with label Drying Hops. Show all posts

Thursday, September 19, 2013

Technique: Packaging Hops

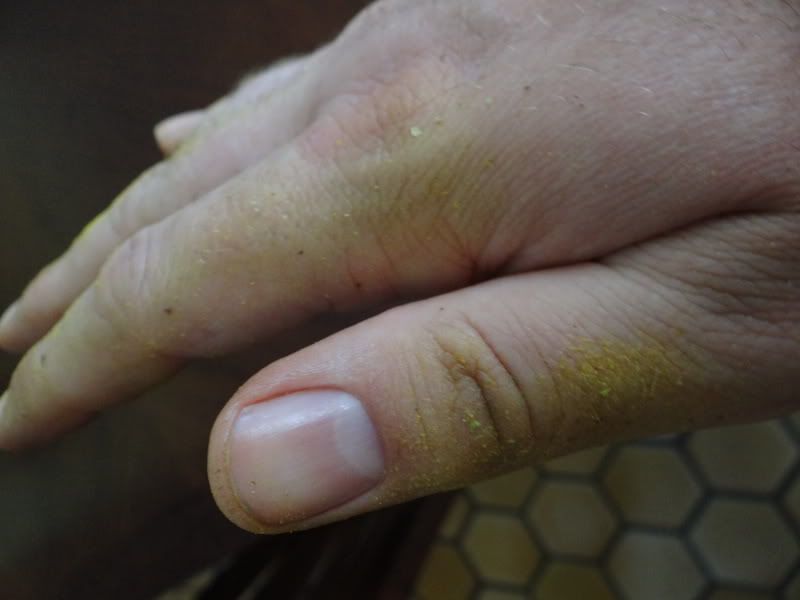
Lupulin On Hands From Pushing Through Funnel
Previously I posted about how to build an oast for drying hops.  Once you have your hops dried, it is necessary to package them for future use.  In the days before refrigeration, hops would be stored in the open, and would degrade quickly.  Many places, including home brew shops and breweries, keep there hops in large tight packed bails which they get them from hop growers in.  As needed they will break off chunks to brew with, or in the case of home brew shops, to package.  While not in use, these hops are stored in freezers, but still open to atmospheric oxygen, which causes hops to degrade.  In a brewery situation this is not as bad as hops are used up quicker.  In a home brew shop they move much slower and therefore begin to oxidize.  Pellet hops are easier as they come in 11# vacuum sealed mylar packaging and you can go through 11# in a brew house much quicker.

The best way to keep hops at there freshest is to flush them with inert gas like nitrogen, and vacuum package them in mylar bags that are then stored cold.  Of course, for homebrewers, this is a bit excessive.  For us, the best option is to vacuum seal them and store them cold, the colder the better.  Some people try to cram as much into a vacuum seal bag as possible, packaging them in 1# blocks.  This at first seems like a great idea, but as I thought about it more, I changed the way I packaged hops.  I was influenced by Matt Brynildson from Fierstone Walker Brewing, and a local brew-farm.  Matt talked about how Chinook taken out of the package and left exposed to oxygen in a refridgerator awaiting the late boil additions goes from pine bomb and wonderfully fruity to cat pee in a very short time.  Our brew club also had the hop guy come talk last month from a local brew-farm.  They grow their own hops, chiles, spices, and even some grains for use in their beers.  He was talking about how they have started packaging their hops in recipe quantities.  So if they know their recipe uses a total of 3# of Cascade in the boil, they package as many 3# Cascades as they need for the year.

Monday, September 16, 2013

DIY: Hop Oast

One of the more substantial cost for brewers from batch to batch is hops, especially if you want to brew lots of American styles, IPA and Double IPA in particular (as well as India Session Ales, Black IPAs, Red IPAs, etc.).  The other large cost is yeast, but with some effort, you can always purchase this once and repitch the yeast to keep costs down.  Finding a way to keep costs down on hops isn't as simple.  Though some brewers have supposedly dry hopped a beer and then put those hops into the kettle for bittering another brew, I wouldn't ever do this as you don't know what kind of bittering you will get out of it, and what do you do with the hops between brews to ensure they don't spoil?  

There are other, more effective ways to save money on hops.  One way that I have enjoyed is to get some hops in bulk when they are around at a great price.  I was able to get in on a group buy last year for Simcoe and Mosaic, 1# each, $10/#.  I also got a pound of CTZ for around $12.  These prices are great for the varietals, but there is still a much cheaper way to get great hops.  Grow them.  I am not going to tell you how to grow them here; there are many good resources both online and in print on how to grow them in your yard.  This post is what to do with them once you have grown them and established they are ready to pick (another topic I am not going to discuss here).  This is how to build a Hop Oast for drying them, then a secondary post on how to package them for storage and future use.

HOP OAST
Parts Needed: (around $30)
  • 7 @ 2X4X8' Kiln Dried Fir
  • 48" X 7' Aluminum Screen Material roll
  • 3" Wood Screws (56)
  • Staple Gun
  • Box Knife
  • Cordless Drill