
It wasn't long before I made the move to All Grain brewing once I started making my own beer. 4 batches to be exact. All Grain brewing allows you to control certain variables in the process such as fermentability of your wort (bone dry finish, dry finish, sweet finish) as well as the body of the beer (light, medium, full, chewy). When using malt extract, these variables are set by the company making the extract, as well as the composition of the base wort (some use caramel malts or carapils in the grist along with base malt). All Grain brewing also allows you to use malts that cannot be used with out mashing like Munich and Vienna base malts, raw grains (raw wheat, raw oats, flaked adjuncts, etc.), and others. It is also more affordable (initial investment is more, but cost of grains is drastically cheaper). Many brewers might fear that All Grain brewing is too difficult, but in reality it is fairly simple: RAISE a volume of water to a given temperature, RAIN it into your mash tun, ROUSE the grains into the water, REST the mash, RECIRCULATE the liquid then RUNOFF the liquid, RINSE the grains, REPEAT the process (see below for the specifics).
After deciding on a recipe, use an online calculator to figure out how much strike water you will need at what temperature, I used this one at TastyBrew before I created my own spreadsheet. Most brewing software programs can do this for you as well. It is best to always have a gallon of boiling water and a gallon of cold water ready to adjust temps when needed (see REST below).
RAISE:
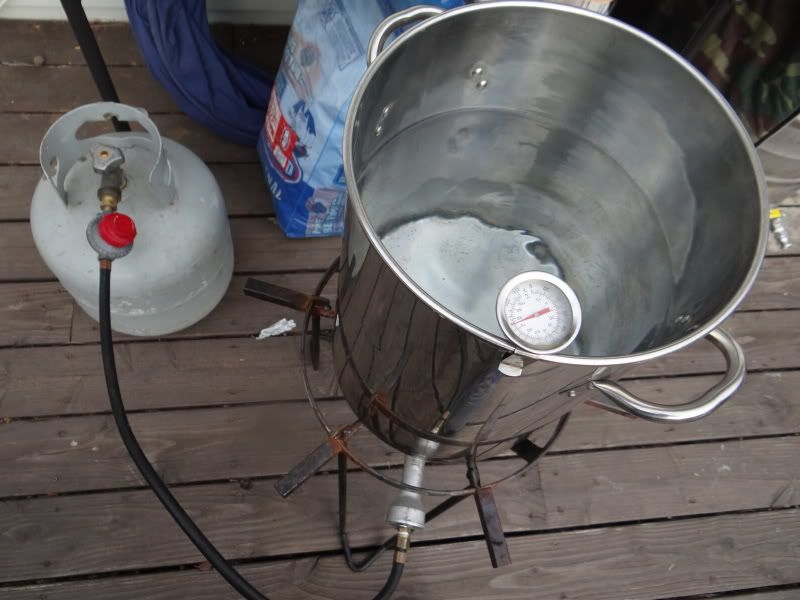
Once you have the amount of strike water and temperature, measure out the volume, place it on your burner, and raise the temperature to the temperature given in the calculator. You will also want to take your Mash Tun (MLT) and fill it with the hottest water you can to raise the temperature of the vessel (if it is at December garage temps you will probably lose quite a bit of your temperature to the walls of the cooler making your mash temperature lower than you want). Another alternative is to do a test run before you brew by heating the same volume of water to the same temp, adding it to the MLT, and checking the difference in temperature, then add this number to your strike temp each time (if you lose 9*F to the MLT add 9*F to the strike temp given you by the calculator).

RAIN:
Once the volume of strike water is up to the temperature, pour the entire volume into your Cooler Mash/Lauter Tun.
ROUSE:
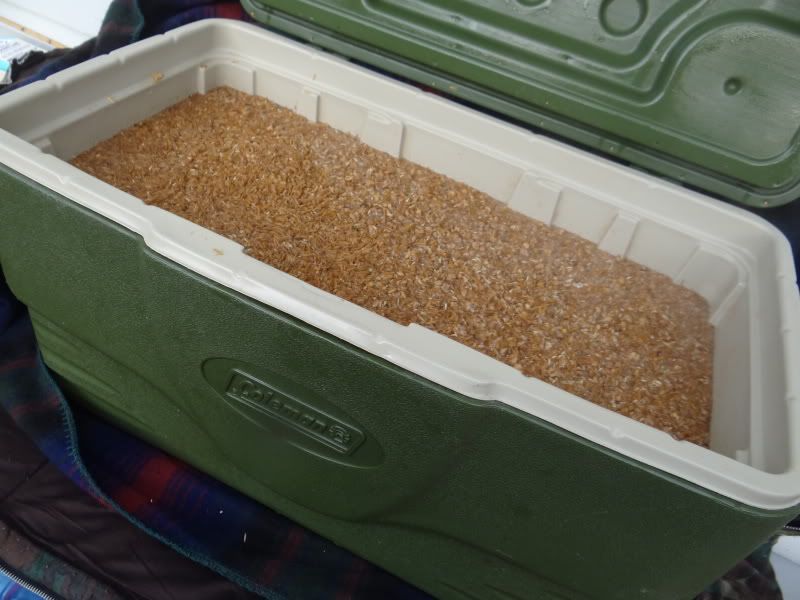
Slowly add your milled grains (you can purchase your grains already milled or mill them yourself at the homebrew shop or with your own mill) to your MLT stirring continually to ensure that none of the grain clumps up creating "dough balls"; dough balls do not allow the water to get to the grains on the inside which means you will get none of the sugars from those grains. Using a slotted SS spoon works okay, but a Mash Paddle works best (buy a large wooden paddle from a restaurant supply store and drill holes or a design in the paddle). Continue to add the grains and stir until all the grains are wet and all the dough balls are broken up. Stir well to distribute the grains.


REST:
Check the temperature of the grain bed in several locations around your MLT to make sure you hit the correct mash temperature (if one spot is 5 degrees high and 2 sections are 3 degrees low, they will balance out - take the average). If it is too hot, add some of your cold water 1 pint at a time and stir well (wait about 5 minutes after stirring) and check it again, repeat until the mash settles at the proper temp. If the temp is too low, do the same thing using boiling water. Once you have the correct temperature, close the lid to the cooler (I place a thick beach towel folded twice over the lid to help insulate along the lip where it closes and retain as much heat as possible). Let this set for at least 60 minutes (stirring well every 15 minutes helps the conversion process, but quickly close the lid and let it rest again - do not stir during the last 10 minutes of the rest).

RECIRCULATE:
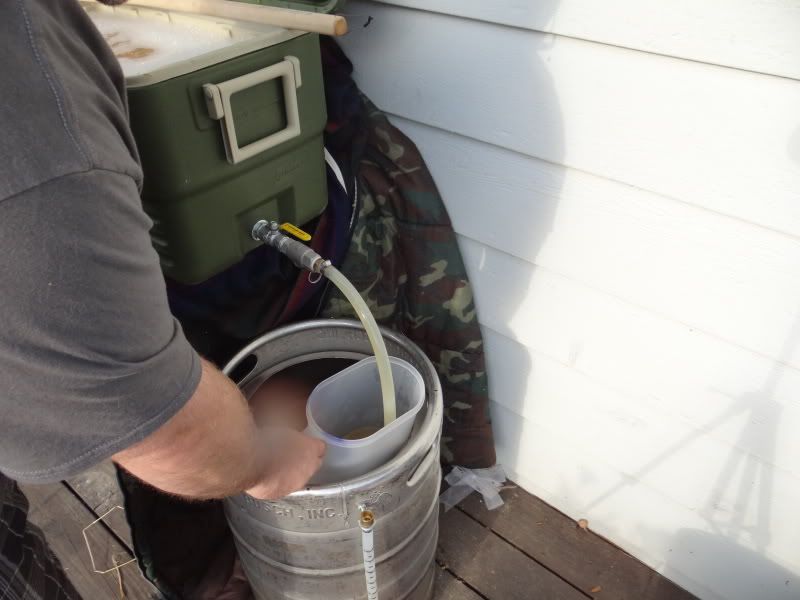
After the mash is complete, usually 60 minutes (maybe longer for super low mash temps between 143-149*F), begin what is called the "Vorlauf". Vorlauf is when you begin to run the mash liquid off into a seperate vessel (I use a 1 gallon plastic pitcher with handle - see pic below) until it is clear of debris like grain husks and chunks. Once this is complete move the flow from the mash tun to the RUNOFF step (next step) and gently pour the Vorlauf runnings back on top of the mash liquid making sure not to disturb the grain bed (I pour it over my mash paddle or slotted spoon).


Open the valve on your MLT wide open and let it flow; once the wort runs clear of debris into your extra vessel, begin sending it into your kettle. While the MLT continues to drain into kettle.

RUNOFF:
Open the valve on your MLT wide open and let it flow; once the wort runs clear of debris into your extra vessel, begin sending it into your kettle. While the MLT continues to drain into kettle.

RINSE:
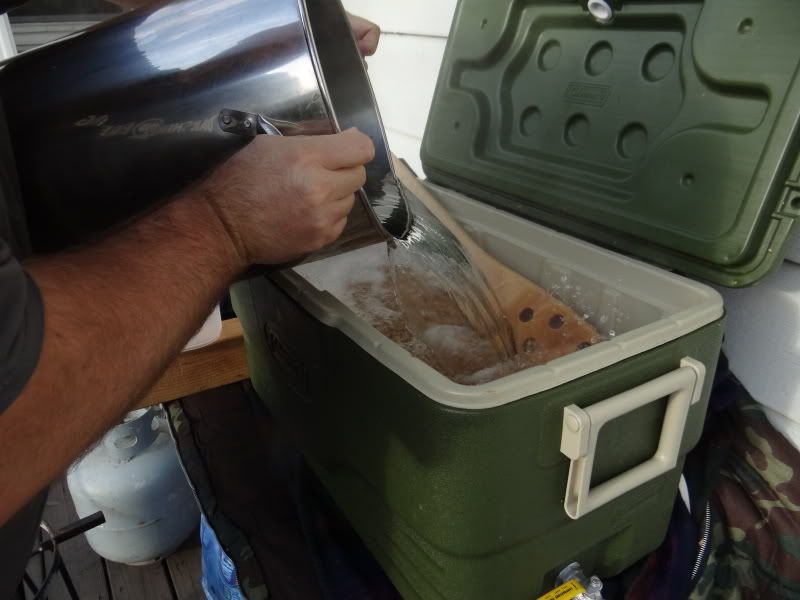
After you have collected all of the "first runnings" (the liquid from the above step into the kettle) take a measure of the volume. Subtract this volume from the pre-boil volume that you need (usually around 6.5 gallons for a standard 5 gallon batch, more for an IPA). Measure this volume into your empty kettle, this is your "sparge water" (if you have 2 kettles, one can received the first runnings and the second will get your sparge water, if you only have one kettle, you can RUNOFF into the kettle, measure, then move it to a 5 gallon bucket until your kettle is empty again). Sparge water is the water you will use to RINSE the remaining sugars from the grains into your kettle and to give you the proper pre-boil volume. Once you have this water measured, place it on the burner and RAISE the temp until it is between 185-190*F. RAIN (pour) all of this hot liquid into the MLT and ROUSE the grains until the sparge water is mixed in thoroughly.


REPEAT:
Once all of your sparge water is incorporated back into the mash, let it REST for about 10 minutes so the grain bed can settle again. RECIRCULATE the runnings, then head into the RUNOFF of all the liquid just as before until the MLT is empty (towards the end of the RUNOFF don't be afraid to place a piece of 4X4 under the opposite end to move the last of the liquid towards the drain). Once these steps are done, you should have your full volume (if you are less than a quart shy, just add some water to the kettle, if more, consider doing another small sparge with the needed volume) For larger volumes of pre-boil wort (like 10 gallon batches), you may want to do multiple RINSES (sparges).
This puts you in the same place as you would be with an extract batch, ready to boil. It would be good at this point to stir the entire kettle to mix it thoroughly, take a sample, chill in the freezer, and take a gravity reading with a hydrometer (or simply use a refractometer if you have one). Take the GU (all the numbers after the 1. in the OG) and multiply it by the total volume of your wort. Divide this number by the total volume after the boil (6.5 gallons boiled one hour should get you close to 5.5 gallons); this should give you your OG (6.5 gals of 1.047 should give 5.5 gals of 1.056 OG wort - [6.5*47]/5.5). If you are drastically over or under your expected OG, you can adjust with DME to raise the OG, or water it down to decrease it. From here, bring the wort to a boil, adding hops and such as normal. Once done, cool the entire contents as quickly as possible (if you don't have a wort chiller, invest in one before going All Grain, or build one yourself).
From here you can begin to experiment after you are comfortable with your system. Try doing multiple beers from a single mash, or even making brewday easier and possibly shorter by mashing overnight (article to come soon).
From here you can begin to experiment after you are comfortable with your system. Try doing multiple beers from a single mash, or even making brewday easier and possibly shorter by mashing overnight (article to come soon).
No comments:
Post a Comment