
 One of the more substantial cost for brewers from batch to batch is hops, especially if you want to brew lots of American styles, IPA and Double IPA in particular (as well as India Session Ales, Black IPAs, Red IPAs, etc.). The other large cost is yeast, but with some effort, you can always purchase this once and repitch the yeast to keep costs down. Finding a way to keep costs down on hops isn't as simple. Though some brewers have supposedly dry hopped a beer and then put those hops into the kettle for bittering another brew, I wouldn't ever do this as you don't know what kind of bittering you will get out of it, and what do you do with the hops between brews to ensure they don't spoil?
There are other, more effective ways to save money on hops. One way that I have enjoyed is to get some hops in bulk when they are around at a great price. I was able to get in on a group buy last year for Simcoe and Mosaic, 1# each, $10/#. I also got a pound of CTZ for around $12. These prices are great for the varietals, but there is still a much cheaper way to get great hops. Grow them. I am not going to tell you how to grow them here; there are many good resources both online and in print on how to grow them in your yard. This post is what to do with them once you have grown them and established they are ready to pick (another topic I am not going to discuss here). This is how to build a Hop Oast for drying them, then a secondary post on how to package them for storage and future use.
HOP OAST
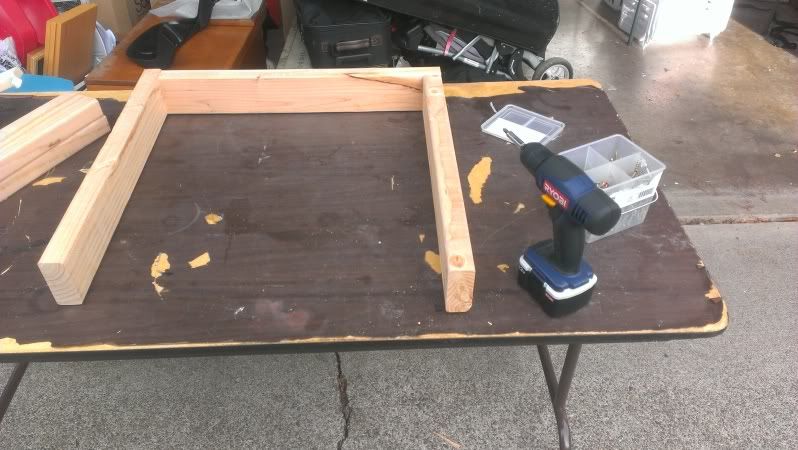
Parts Needed: (around $30)
- 7 @ 2X4X8' Kiln Dried Fir
- 48" X 7' Aluminum Screen Material roll
- 3" Wood Screws (56)
- Staple Gun
- Box Knife
- Cordless Drill
Begin by cutting each board into 4 - 23" pieces (keep the scraps). I just had the guy at Lowes do this for me. Take each of the pieces and begin screwing them together using 2 screws to each joint. Align each joint so that they are flush on top and bottom, and that the end of one board is flush with the side of the next at a 90* angle. Don't be too overboard at insuring a perfect 90 as it will self align when you make the last connection. Once you have all 4 corners drilled together, set the tray aside. Repeat this until all 7 trays are built.
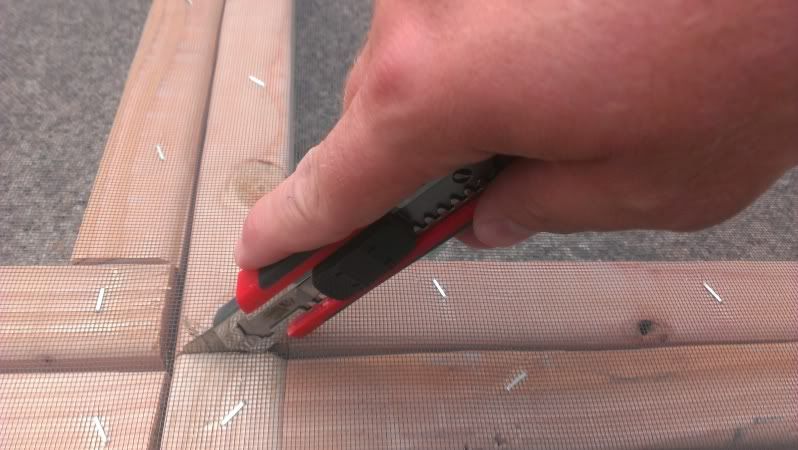
After you have all 7 trays built, set one aside. Place the others together 2 wide, and 3 tall on a flat surface. I did this on my driveway. Once they are flush and straight, roll the screen out over the top of them. The 48" width should be a perfect fit across 2 trays, and the 7' should easily cover the 3 trays up. Once you have the screen spread over, use the staple gun to attach it to the corners, then work your way around all of the trays along every side rail and every corner until each tray is fully attached to the screen.

Now take your box knife and insert the blade between 2 trays through the screen and cut along the separation until all the trays are cut apart. You will have a little hangover from the edges, feel free to clean them up with your box knife, I just left mine for now (more important to get the hops dry when you build this after the bines have been cut down). It would be good to glue along the inside edge and allow it to dry to seal the trays from allowing hops to get stuck between the screen and box frame, and it will make cleaning easier after you are done with them.
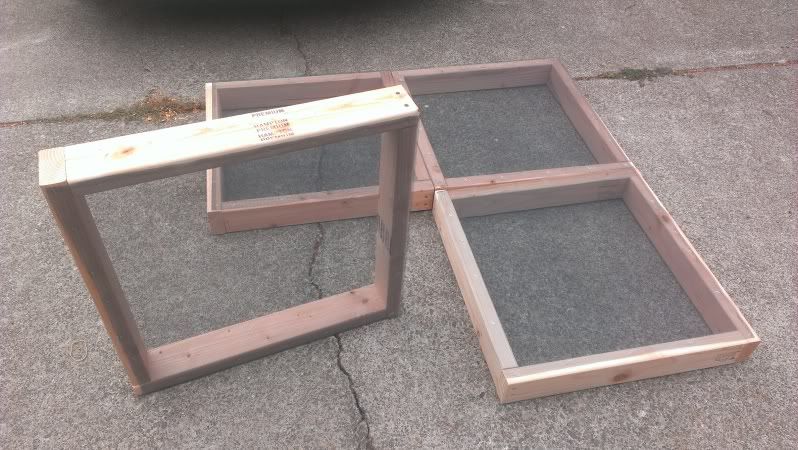

Place the screenless tray on top of the box fan as a diamond fro use as a base. If your box fan is large enough, you can stack it on top at the same angle as the box fan edges, but for mine, it worked perfect to turn it slightly so that it became a diamond to the square fan, creating an 8 pointed star if outlined. This empty tray with no screen allows a little extra flow for the fan so it isn't blowing directly against the screen and hop bed which may cause it to overheat.

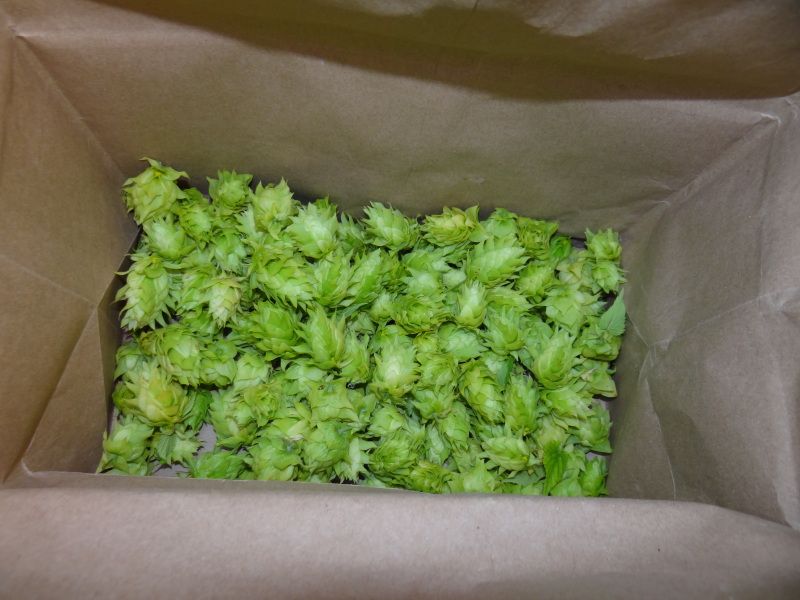
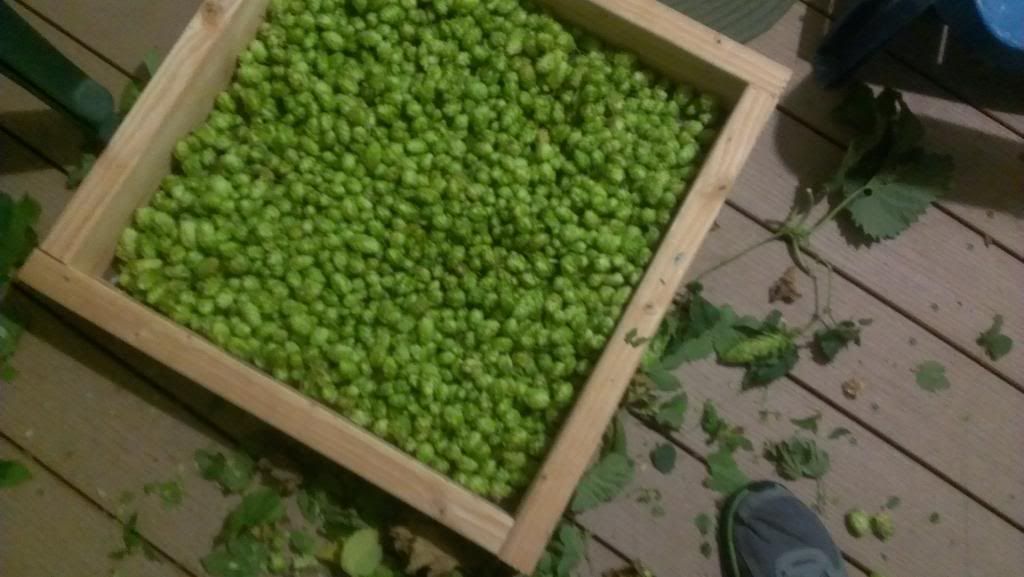
At this point you should pick your hops into sacks and weigh them, then place a single variety into a single (screened) tray. Once your tray is full (about 2/3 up the side is the most you would want in there), set it on top of the base tray over the fan so that the tray edges align perfectly over each other. Continue to pick your hops, fill your trays, and stack them up. Leave one of the trays empty to the side. I used a piece of masking tape to mark each tray to know which variety was in which tray. Next year I may just add a plastic sleeve to the side and make up cards with the names of the varieties I grow to sort them that way (it will look much nicer).
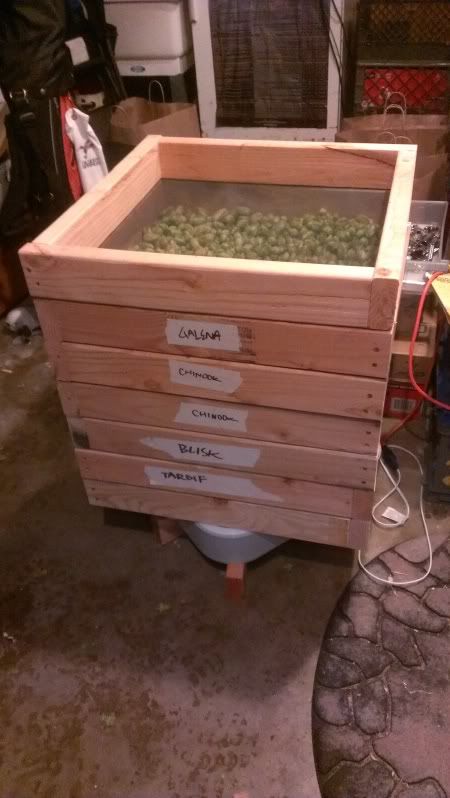
Once you have your trays are filled with hops, place the last empty tray on top. This tray's screen will keep things from falling into your hops, and keep the stray hop leaves in place to make clean up a little easier. At this point turn on your fan to medium. Low will take longer, and high would be faster, but you don't want to have it so high that you end up blowing any of the Lupulin out of the hops.

Leave the hops to dry for a few days, gently fluffing them up every 12 hours or so to ensure even drying. I also swapped trays out so that the bottom trays became middle trays, top became bottom, and middle became top. I continued this rotation whenever I fluffed them. They say that the hops should be about 20% the weight they were when you picked them. If you got one pound of hops, you should have around 3-3.5oz of dried hops. Another telling sign is that when you take a hop cone and bend it in half the strig in the middle should snap clean. If if bends and moves back then they are still too moist.
After you have dried the hops, you need to package them, find out how here.
Hey great build man.
ReplyDeleteDo you have an email address that I can ask more specific questions about the build?
Glad you liked it John, you can email at endofsilencebrewing[at]gmail[dot]com
Delete